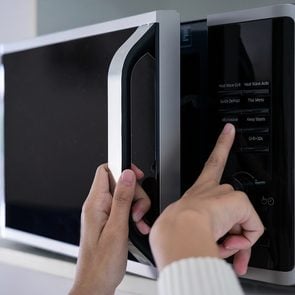
This Mouthwatering Fudge Recipe Takes Only Minutes—in the Microwave!


Calling all chocoholics! Here's how to make microwave fudge in just five easy steps.
When your sweet tooth is calling, there’s no better way to answer it than with some fudge. Rich, decadent and creamy, fudge is a guaranteed hit no matter the occasion. But you don’t have to head out to a specialty candy shop or spend half a day making homemade fudge to satisfy your craving. We’ll show you a microwave fudge recipe that’s so easy, you can throw it together on a weeknight.
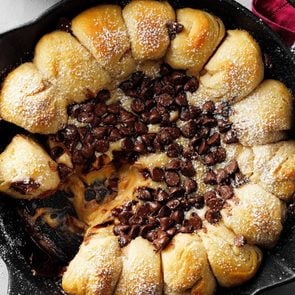
The Best Microwave Fudge Recipe
When it comes to ease, microwave fudge is the way to go. Not only does it take less time than an old-school fudge (seriously, this microwave fudge recipe takes less than five minutes to make!) but it’s also great for those who don’t have a ton of candy-making experience.
Traditionally, fudge needs to be boiled, brought to the soft-ball stage, cooled and beaten, and it requires special tools like a candy thermometer. This microwave fudge recipe, however, only needs a bowl, spatula and 9×9 pan. How simple is that?
Our incredibly easy microwave fudge recipe comes from Taste of Home reader Sue Tucker of South Carolina. Sue says, “You’re moments away from a pan of creamy fudge. Just microwave, stir and spread. This easy homemade fudge recipe is the best.” And we can’t help but agree!
Ingredients
- 1-½ teaspoons plus 1 tablespoon butter, divided
- 2 cups semisweet chocolate chips
- 1 package (11-½ ounces) milk chocolate chips
- 1 can (14 ounces) sweetened condensed milk
- 1 teaspoon vanilla extract
Yield: About 81 pieces
Tools
- 9-in. square pan
- Foil
- Bowl
- Spoon or silicone spatula
Directions
Step 1: Prepare the Pan
Before you begin, line a 9×9 square pan with foil. Then spread about 1-½ teaspoons of butter over the foil, paying special attention to the corners. This will make the fudge much easier to remove once it has set.
Step 2: Melt the Chocolate
To a large, microwave-safe bowl, add the remaining butter and chocolate chips, then microwave for one minute. Remove the bowl and give the butter and chocolate a good mix. Continue to microwave and stir the mixture in 30-second intervals until the chocolate chips have completely melted.
Step 3: Add Remaining Ingredients
While the melted chocolate is still hot, stir in the sweetened condensed milk and vanilla extract, and mix until they’re fully incorporated.
Step 4: Transfer and Cool
Spread the fudge in your prepared pan and place it in your refrigerator until the fudge is firm.
Test Kitchen Tip: If you’d like to add any toppings to your fudge, like chopped nuts, do so before putting it in the fridge.
Step 5: Slice and Serve
Once the fudge has set, use the foil lining to lift it out of the pan. Cut the fudge into bite-sized pieces and treat your sweet tooth!
How to Store Microwave Fudge
If you have leftover fudge, place it in an airtight container and store it in the fridge for up to three weeks.
How to Customize Your Microwave Fudge
Once you’ve mastered microwave fudge, make it your own. Here are some of our favourite fudge toppings:
- Chopped peanuts, almonds or walnuts
- Crushed cookies or chocolate bars
- Sprinkles
- Peanut butter or marshmallow fluff swirl
- Dried fruit
- Glazed bacon
- Almond or orange extract
- Espresso
Common Microwave Fudge Questions
How Do You Fix Microwave Fudge?
If your microwave fudge didn’t turn out how you’d expect, there are a couple of things that could be responsible.
The first would be that the chocolate was overcooked by the microwave. Since microwave power varies from unit to unit, a minute and a half of zapping could be too powerful and turn your chocolate grainy. To revive it, add a tablespoon more butter or additional chocolate chips and stir. This should return the mixture to a smooth, creamy texture.
If your chocolate was burnt in the microwave, however, it’s best to toss the chocolate and start over.
Another issue could be that sweetened condensed milk was swapped for regular milk or a milk alternative, resulting in a runny fudge. Sweetened condensed milk is milk that has had its excess water removed and sugar added, resulting in a thick, glue-like texture. This thickness is important to this microwave fudge recipe as it helps solidify and stable the fudge. The best way to avoid this mistake is to stick to sweetened condensed milk, or use evaporated milk and add your own sweetener.
What Can I Do With Fudge That Won’t Set?
If you used the correct ingredients and method but your fudge still didn’t set up, don’t toss it! Instead, use it to top a bowl of ice cream or spread it between cake layers for a fudgy filling. Or you can eat it with a spoon, we won’t judge.
Next, check out this tasty, time-saving microwave banana bread recipe.