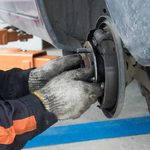
How to Replace a Thermostat in 8 Steps
 Updated: Sep. 28, 2018
Has your vehicle been overheating lately? You could call your mechanic and pay for an expert diagnosis, or you could replace your thermostat yourself with the help of these step-by-step instructions from NAPA Canada.

Why replace your thermostat?
Thermostats are important for two reasons: they accelerate engine warm-up and regulate the engine’s operating temperature. By blocking the circulation of coolant between the engine and radiator until the engine has reached its predetermined temperature, thermostats can ensure great fuel economy, reduce engine wear, and improve cold weather durability.
What you’ll need:
- A clean rag
- New thermostat
- Gasket and gasket sealant
- Screwdriver or pliers
- Small socket wrench
- Small adjustable wrench
- A small scraper or wire brush
- 9 L bucket or drip pan
1. Put your vehicle on level ground. Wait until the engine is cool before draining the cooling system.
2. With your screwdriver or plier, remove the radiator hose attached to the thermostat housing by pulling off the clamp.
3. Twist the radiator hose to loosen it from the housing. Some coolant will pour out of the hose when you take it off. Loosen the bolts on the housing with your socket or wrench. Lift the cover off and remove the thermostat. While the housing is removed, temporarily stuff a clean rag into the thermostat opening on the engine to keep debris out of the cooling system.
4. Install the new thermostat so the copper heat sensing element is toward the engine. If installed upside down, it won’t function properly.
5. Remove any corrosion from the accessible part of the water jacket. In addition, clean the rims of the thermostat housing. Use your scraper to remove the old gasket from the housing and cover base (the soft metal on aluminum housings can be easily scratched, so be careful).
6. Put on a new gasket and replace and tighten the housing. Torque the thermostat housing bolts evenly and to the manufacturer’s recommendations.
7. Re-attach the hoses and put the engine coolant back into the vehicle. When everything is back in place, run the engine to full operating temperature and check for leaks. Ensure that air has been removed from the cooling system too.
8. Take the car for a drive. Make sure that the temperature gauge needle stays at normal with the car at full operating temperature. If the needle did not do this before you changed the thermostat, it should do so now.
Plus: 4 Things You Probably Didn’t Know About Getting an Oil Change
For more great tips on how to maintain your car and to find the parts you need, visit NAPA Canada.