

Painting Tips the Pros Don’t Want You to Know

Get professional-looking results at a fraction of the cost of hiring painters.
Painting Tips For Do-It-Yourselfers
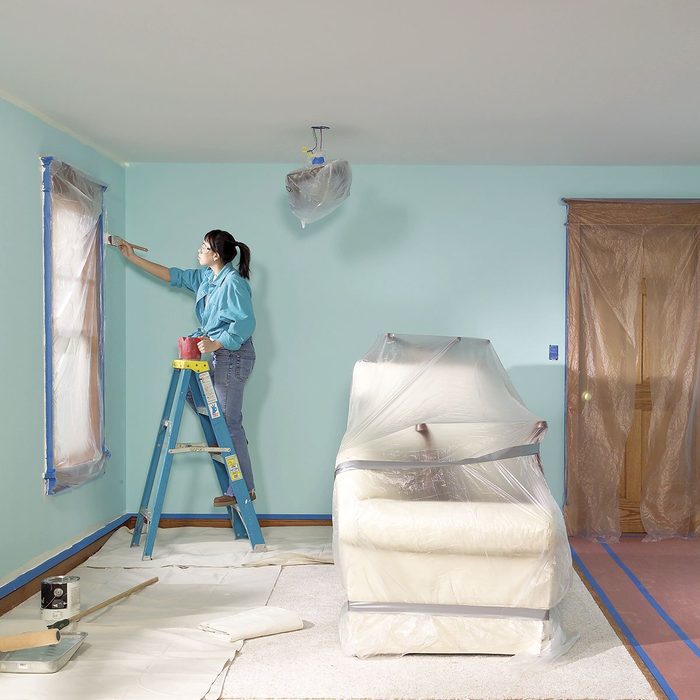
Clear the Entire Room Before Painting
If something is too big to take out, move it to the centre of the room and cover it with plastic. Use canvas drop cloths. Unlike plastic, they stay put without tape and aren’t slippery.

Painting Tips Are 2/3 Prep, 1/3 Painting
“A good prep job often takes more time than painting, but it pays off. The more time you spend prepping a room for new paint, the better your finished paint job will look. Washing, patching, sanding and vacuuming walls, ceilings, trim and doors before you pick up a brush or roller are time well spent. If you don’t take care of small imperfections now, they’ll stick out like a sore thumb once the paint goes on.” — Arthur Barfield
Discover 16 budget-friendly ways to boost your home’s curb appeal.
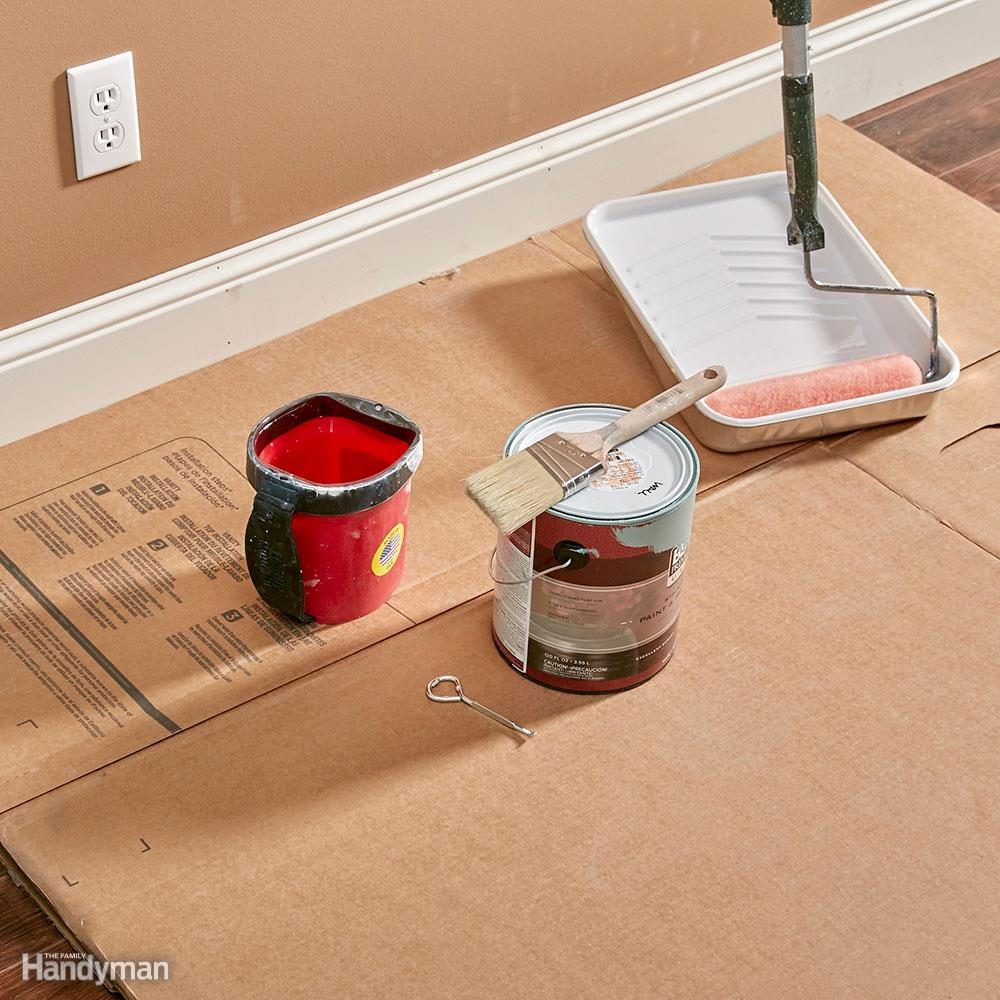
Cardboard Protects Floors Best
“I don’t like drop cloths. They’re usually too big, slippery, clumsy and just downright messy—especially when I need to move them around while they’re still covered in wet paint. That’s why I prefer cardboard. I set it tight to the wall and slide it with my foot as I work my way around the room.” — Beckie Boggs
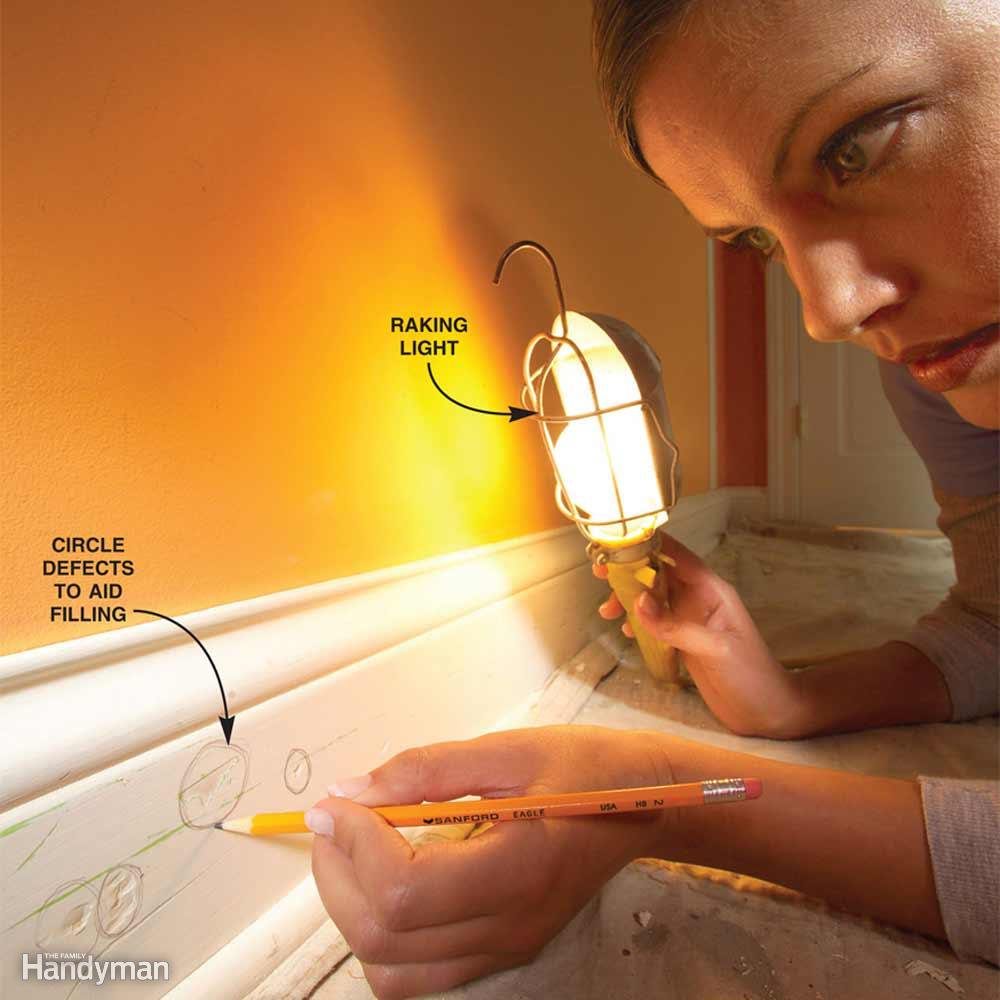
Shine a Light Across the Woodwork and Circle Flaws
Position a hand-held bulb (at least 60 watts) so it shines across (“rakes”) the wood surface to detect loose paint, rough edges and other blemishes in the surface to determine what needs to be filled. Take a pencil and lightly circle spots that need work.
Check out these quick home repairs anyone can tackle in 10 minutes (or less).
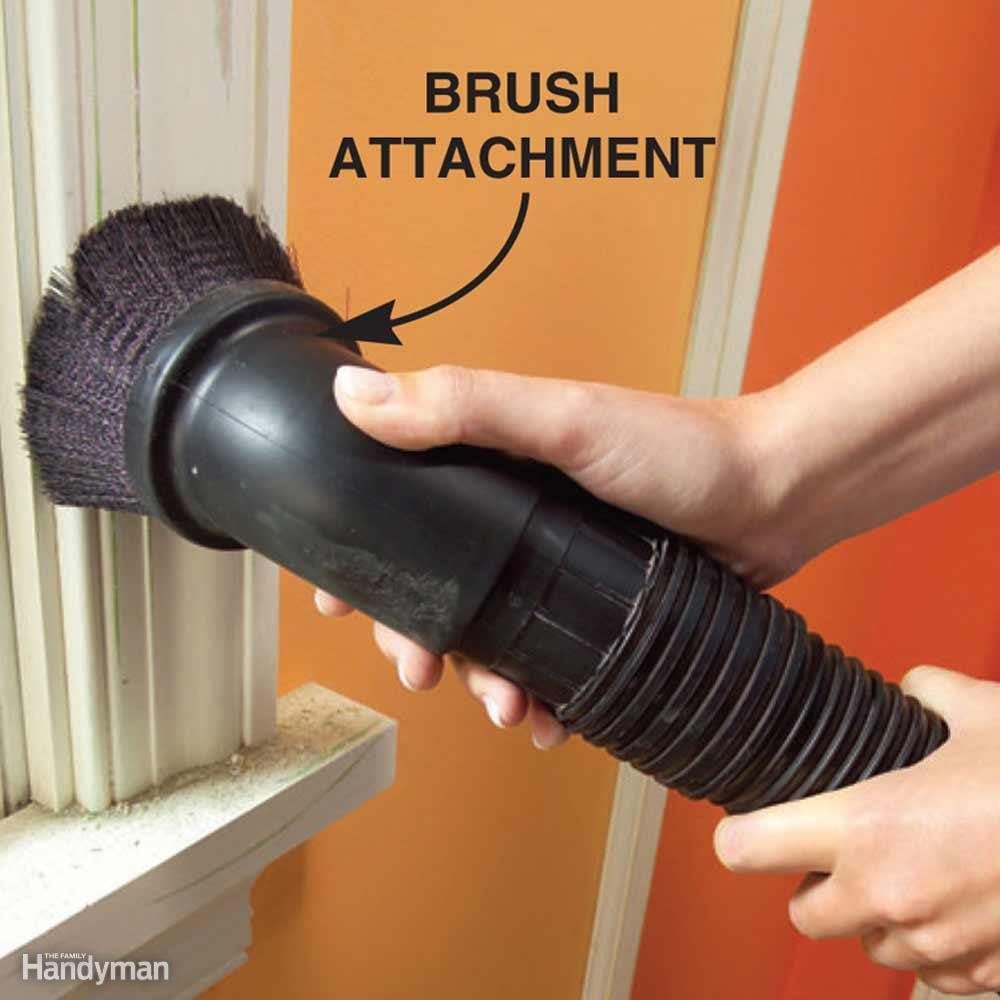
Dust and Vacuum Thoroughly
When the first sanding and scraping is complete, dust off all areas with an old paint brush and vacuum woodwork with a brush attachment.
Some pros go the extra step of wiping woodwork down with a liquid sandpaper/deglosser. This step will ensure a good bond. And if you have to deal with lead paint, this step can replace sanding.
Make sure you avoid these mistakes that shorten the life of your vacuum.

Fill All Holes (Even Small Ones!)
You might assume that new paint will hide tiny dents and scratches, but it won’t. In fact, the new coat of paint highlights minor flaws. Fill dents less than 1/8-inch deep with spackling compound. For deeper holes, use a two-part filler or an epoxy wood filler. It’s more of a hassle to use and you usually end up throwing away a lot of partially hardened filler (mix small batches), but the patch will be hard enough to take a lot of abuse without falling out.
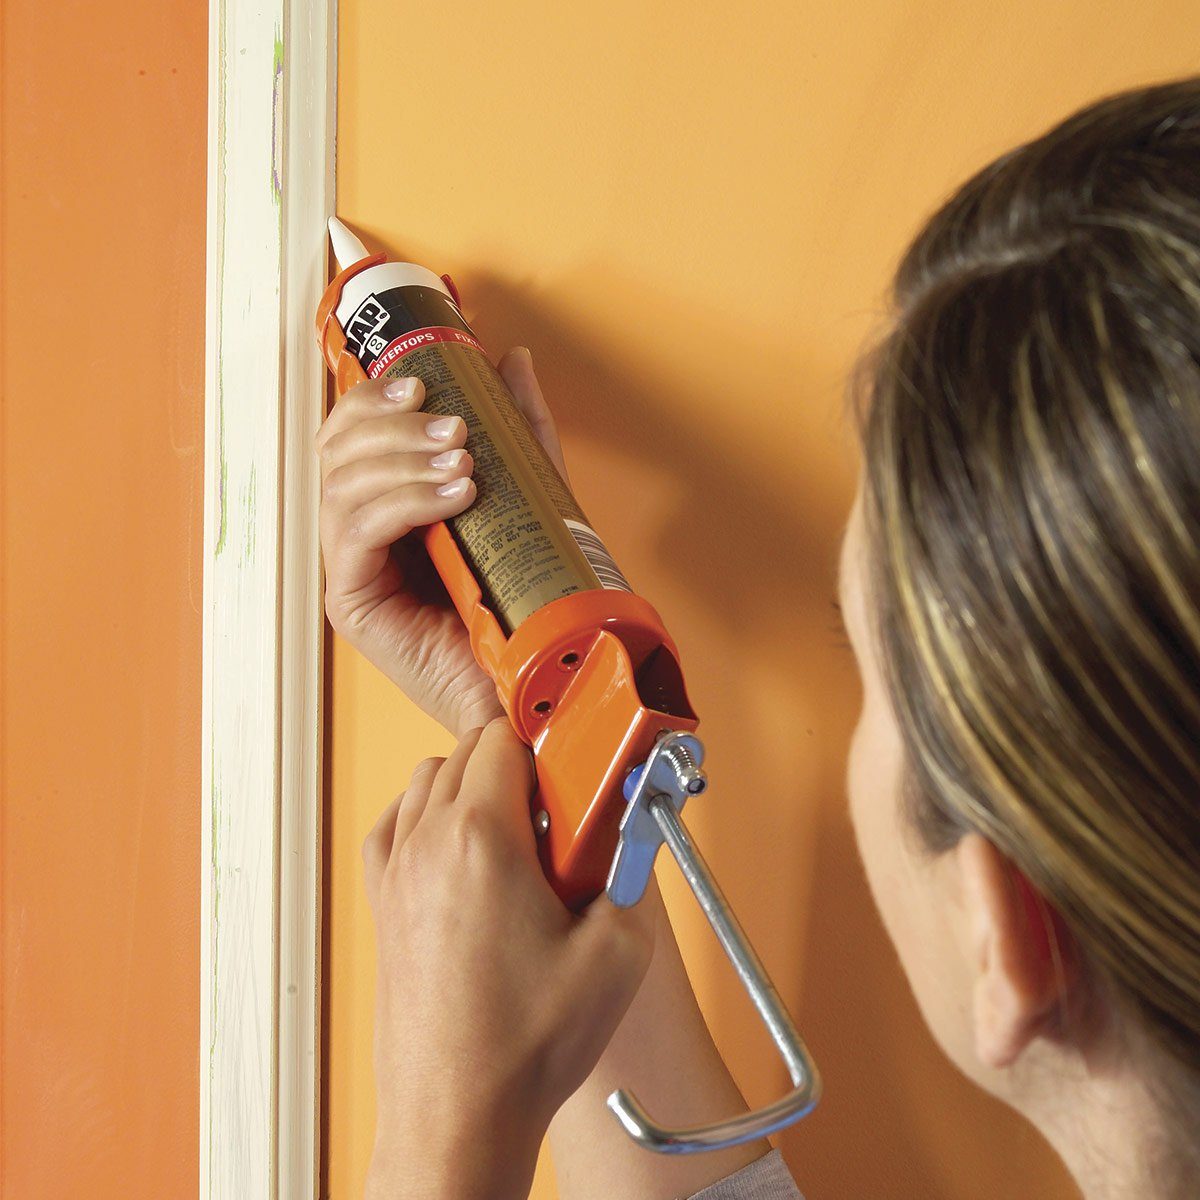
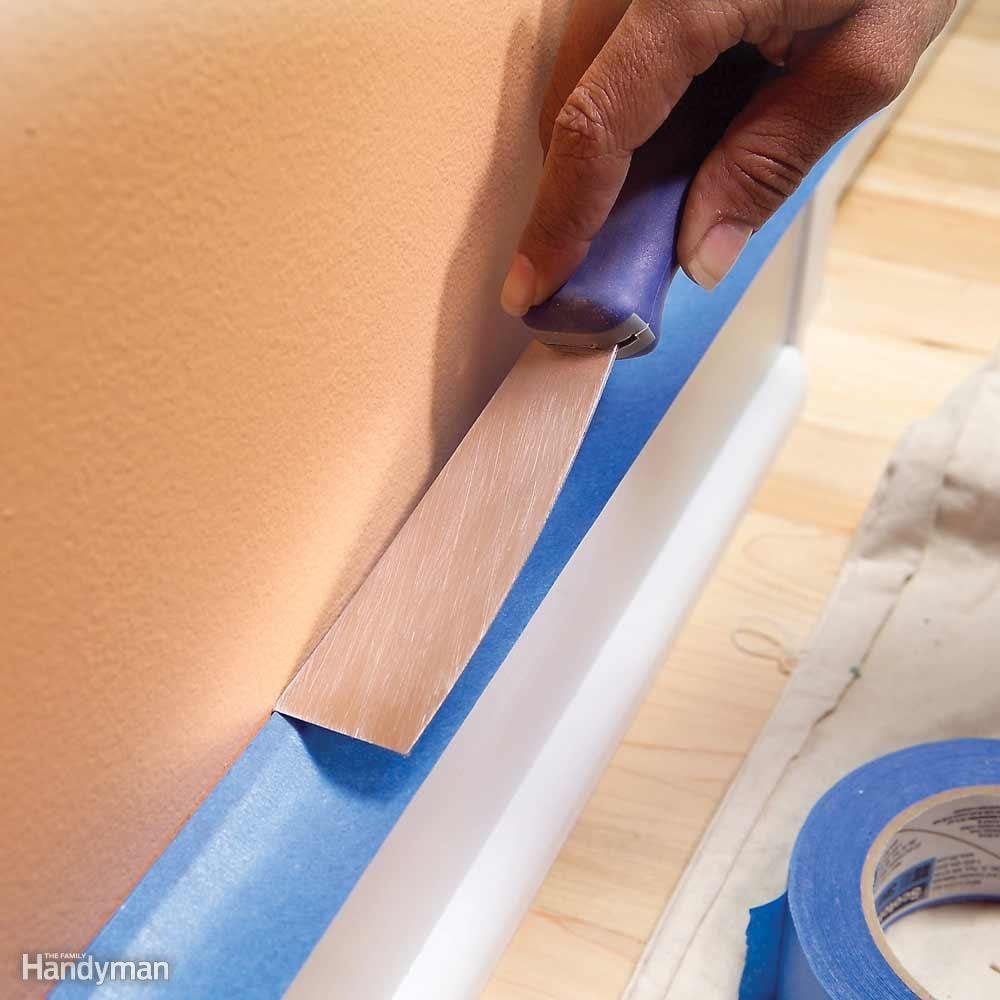
Run a Crisp Bead of Caulk Between Woodwork and Walls
Apply a thin bead of paintable acrylic latex caulk only inside the crack where wood meets a wall for a smooth, professional appearance. Remove extra caulk with a putty knife. And buy a dripless caulk gun to save time and frustration. Cut the tip smaller than you think you need.
Working renos into your budget? Here’s what you should know before hiring a contractor.
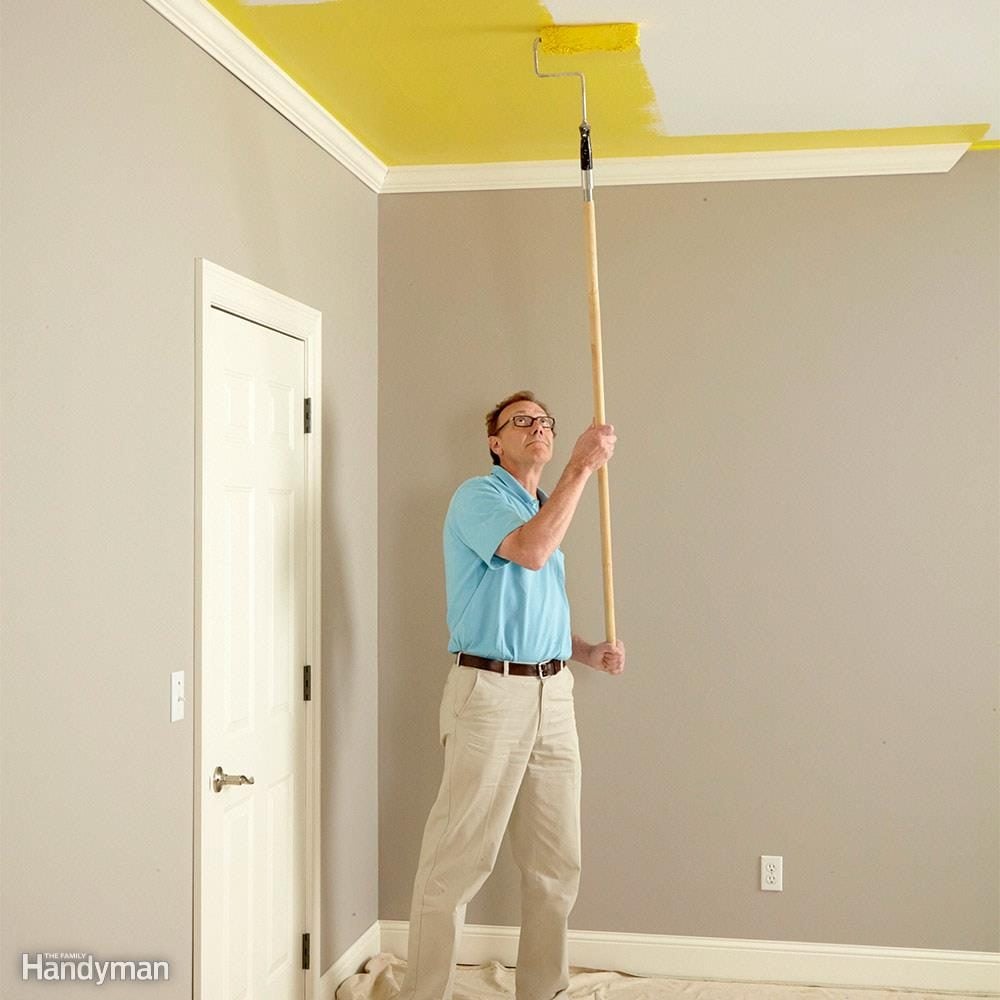
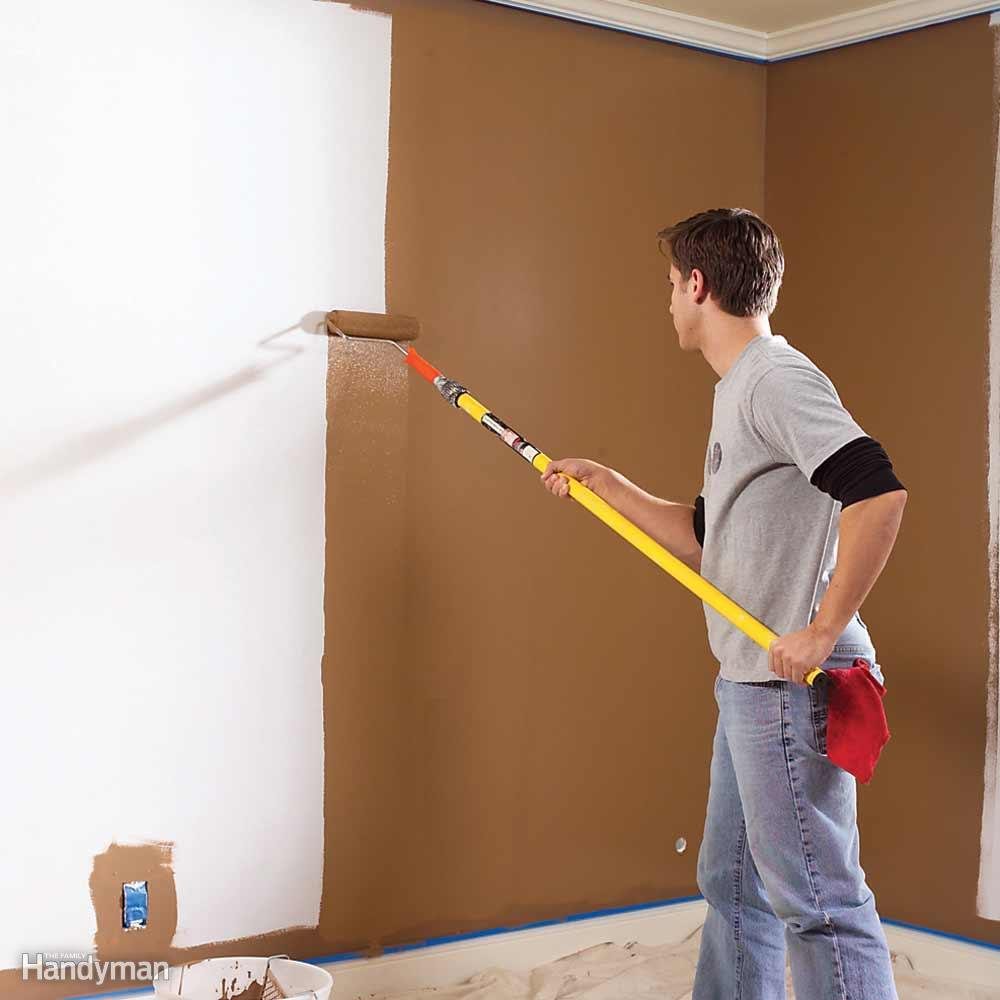
Paint the Trim First, Then the Ceilings and Walls
Pros know to paint the trim first, then the ceiling, then the walls. That’s because it’s easier (and faster) to tape off the trim than to tape off the walls. And you certainly don’t want to tape them both off!
When painting the trim, you don’t have to be neat. Just concentrate on getting a smooth finish on the wood. Don’t worry if the trim paint gets slopped onto the walls. You’ll cover it later when painting walls. Once the trim is completely painted and dry (at least 24 hours), tape it off (using an ‘easy release’ painter’s tape), then paint the ceiling, then continue on to wall painting.
Slap It On, Then Smooth It Out
“When painting trim or other woodwork with a brush, I’ve found it’s best to load my brush with paint and then lay it on heavily in small sections using short, quick strokes—just to get enough paint on the trim to work with. I then blend the paint into the section I painted before and smooth it all out using long finishing strokes in one direction.” — Greg Scholl
These home renovation mistakes could send your property’s resale value into a tailspin.
Do the Ceiling, Then the Walls
“Before painting any walls, take a good look at your ceiling. If you think it needs refreshing, paint it first. You don’t want to paint the walls and then—in a couple of weeks or years—do the ceiling. Rolling the ceiling drops a fine mist of paint onto everything below. Painting the ceiling first also allows you to be less fussy along walls. Any paint that gets slopped onto walls will get covered up later when you paint them.” — Patrick Morrissey
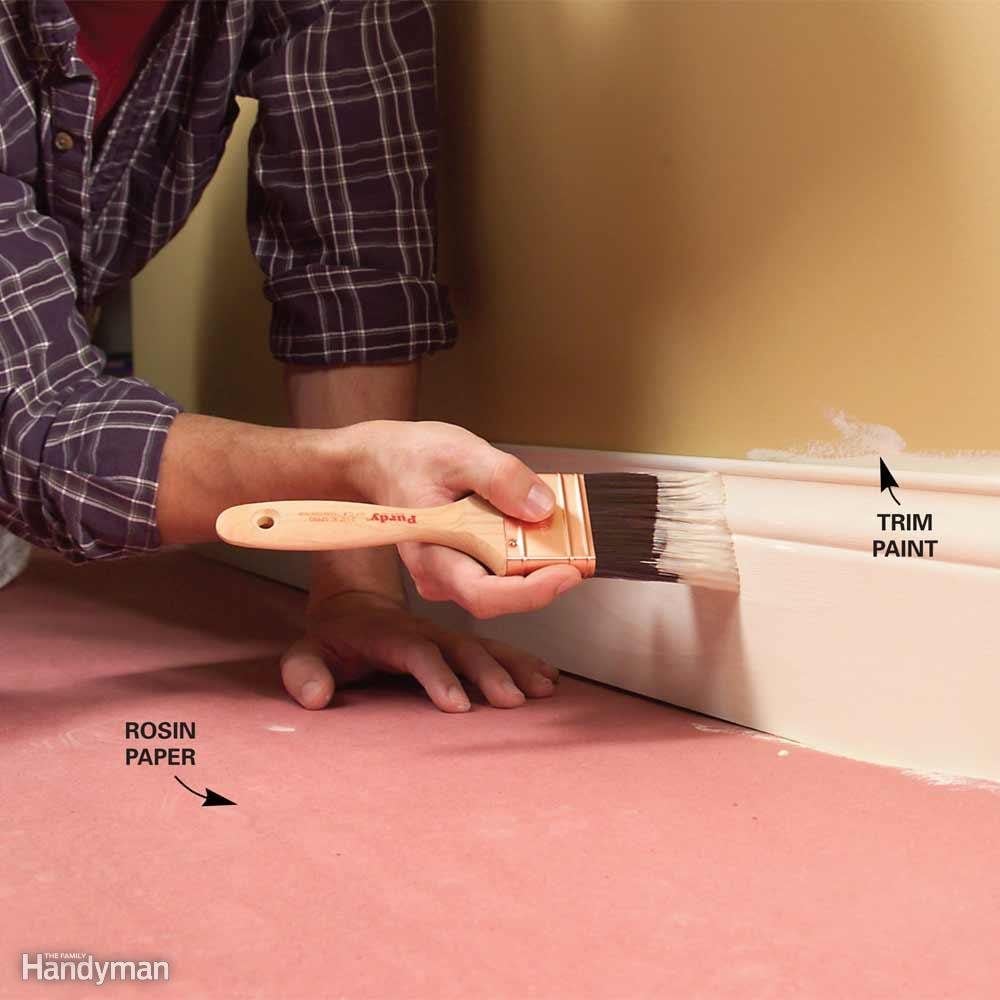
Avoid Drips as you Paint
Masking tape does a good job of protecting woodwork—if it’s applied well.
Clean off all the dirt and grime along the edge of the trim with a damp rag. Hold the tape tight against the wall and roll it out so the tape covers the edge. Press the tape against the wood with a putty knife along the entire length. Use painter’s tape that’s at least twice as wide as the trim and leave it flared out to protect the face of the trim from drips. When you’re done, either remove the tape immediately while the paint is still wet or wait until the next day when it’s totally dry. If you pull it free when the paint is partially dry, you may peel off bits of fresh paint along with the tape.
Don’t miss CityLine decorating expert Brian Gluckstein’s top 10 design tips.

Take a Wool-Blend Roller Cover for a Spin
The most important part of your paint rolling setup is the roller cover, also known as a sleeve. It’s tempting to buy the cheapest cover available and throw it away when you’re done. But you won’t mind the few extra minutes of cleanup time once you experience the difference a good roller cover makes. Cheap roller covers don’t hold enough paint to do a good job. It’ll take you four times as long to paint a room. And you’ll likely end up with an inconsistent layer of paint, lap marks and built-up ridges of paint. Instead, buy a 1/2-inch-nap wool blend roller cover and give it a try. With proper care, this may be the last roller cover you’ll ever buy.
Wool covers do have a few drawbacks, though. They tend to shed fibres when they’re first used. To minimize shedding, wrap the new roller cover with masking tape and peel it off to remove loose fibres. Repeat this a few times. Wool covers also tend to become matted down if you apply too much pressure while painting. Rolling demands a light touch. No matter what roller cover you’re using, always let the paint do the work. Keep the roller cover loaded with paint, and use only enough pressure to release and spread the paint. Pushing on the roller to squeeze out the last drop of paint will only cause problems.
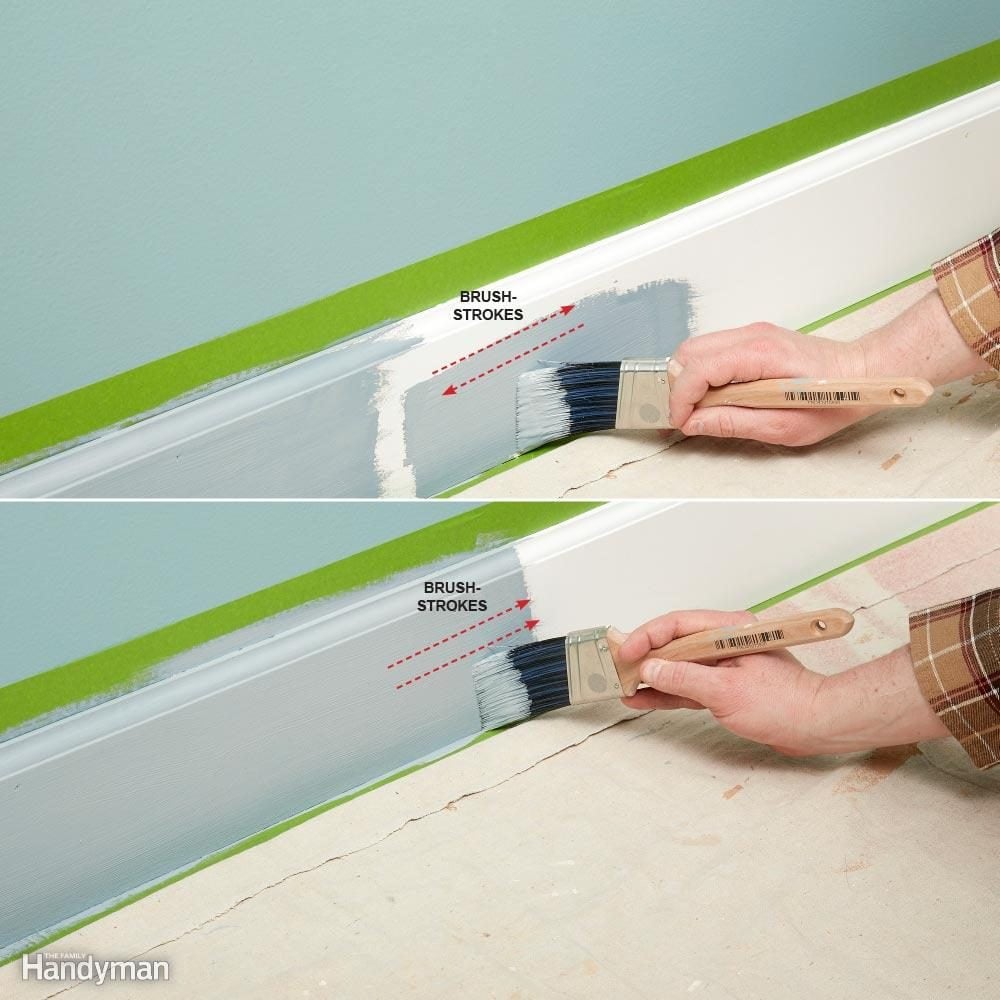
Painting Tips to Avoid Lap Marks
To avoid lap marks, roll the full height of the wall and keep a wet edge. Lap marks are those ugly stripes caused by uneven layers of paint buildup, a common problem when wall painting. They occur when you roll over paint that’s already partly dry. (In warm, dry conditions, latex paint can begin to stiffen in less than a minute!) The key to avoiding lap marks is to maintain a ‘wet edge,’ so each stroke of your roller overlaps the previous stroke before the paint can begin to dry.
To maintain a wet edge, paint an entire wall all at once. Start at one end, running the roller up and down the full height of the wall, moving over slightly with each stroke. Move backward where necessary to even out thick spots or runs. Don’t let the roller become nearly dry; reload it often so that it’s always at least half loaded. Keep the open side of the roller frame facing the area that’s already painted. That puts less pressure on the open side of the roller, so you’re less likely to leave paint ridges.
Investing in some updates before you put these painting tips into action? Don’t miss HGTV star Bryan Baeumler’s best kitchen reno advice.
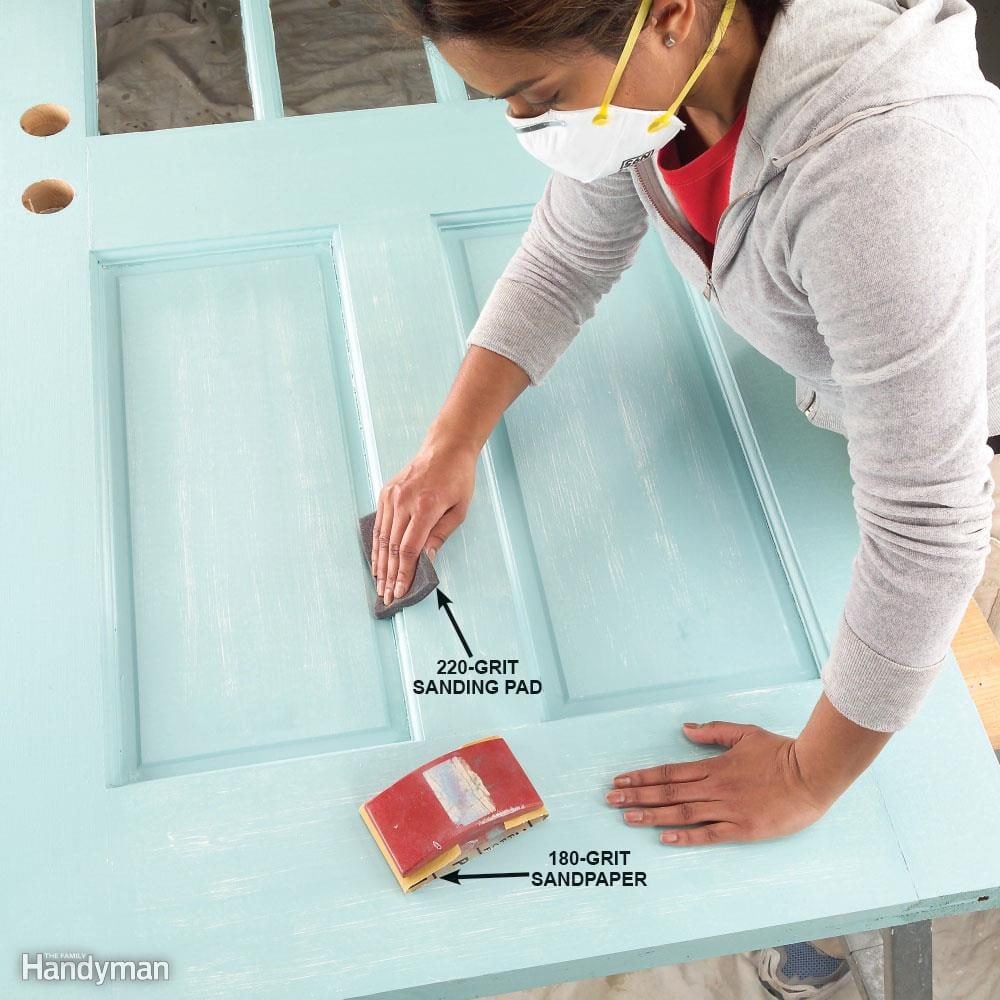
Sand Between Coats
No matter how closely you follow these painting tips, you can usually find ridges or bubbles or a few bits of dust and lint in a fresh coat of paint or primer. For the smoothest possible topcoat on surface like a door, hand-sand the entire door after the primer and between coats of paint. It may seem like a lot of work, but it shouldn’t take more than five minutes when the door is flat on the sawhorses. Sand with non-clogging 180- or 220-grit sandpaper or sanding sponges (look for ‘non-clogging’ or ‘stearated’ on the label). Sand just enough to make the surface feel smooth. After sanding, vacuum and wipe down the door with a damp cloth to remove all the dust.
Check out more smart uses for sandpaper all around the house.
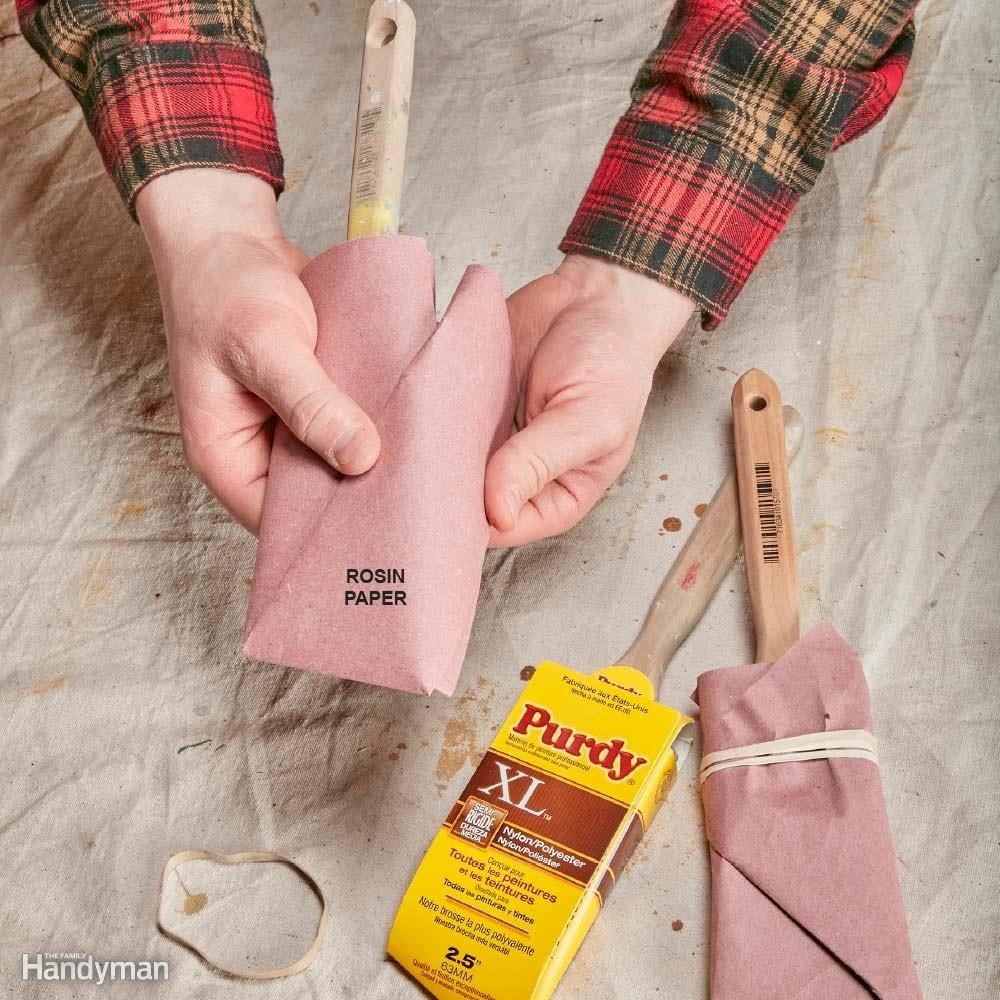
Brush Bristle Saver
“Without something to hold them in place, paintbrush bristles will curl or splay as they dry. The best way to store them is in the cardboard wrappers that they came in. They’re not just packaging; they maintain the shape of the bristles as the brush dries after cleaning. If you’ve already thrown your brush wrappers away, use paper and a rubber band instead.” — Andy Benke
No-Maintenance Paint Tray
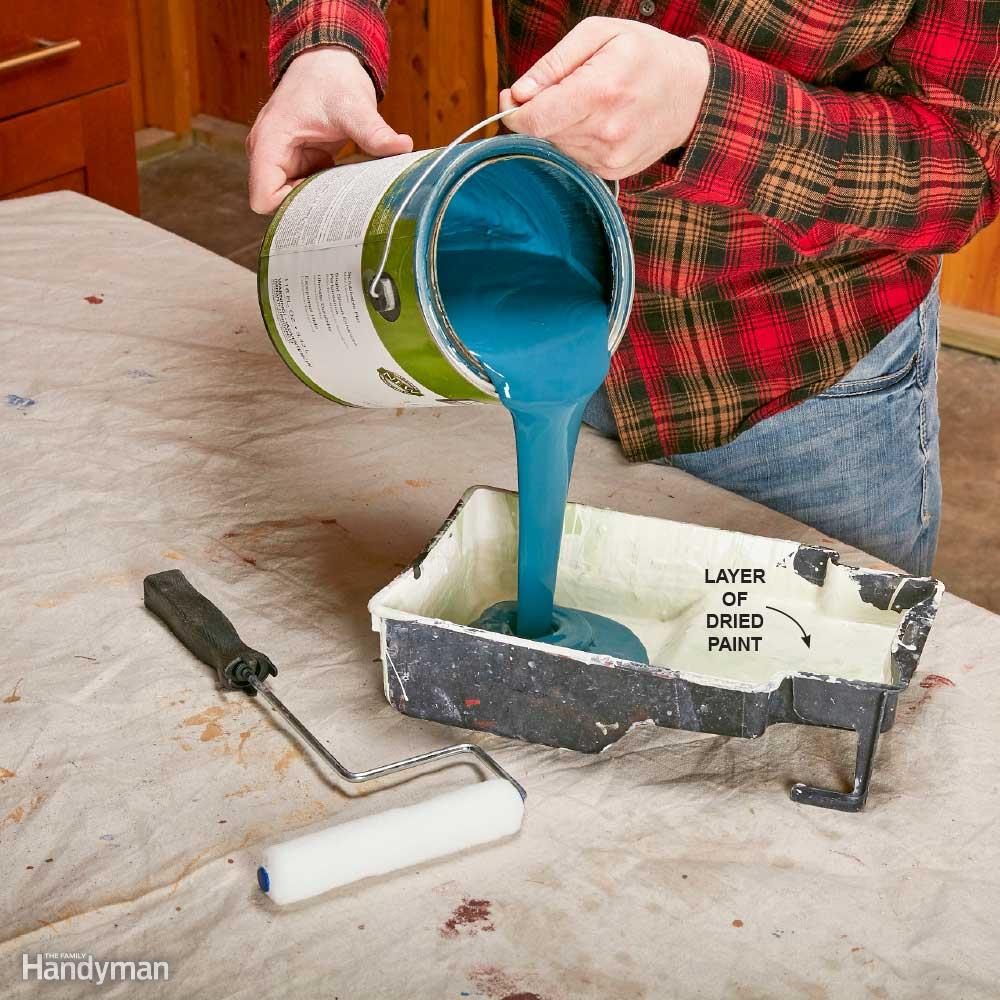
“Don’t bother cleaning or putting liners in your paint trays. Just pour any excess paint back into the can and let the paint in the tray dry completely before using it again. I have paint trays with a 1/8-inch-thick paint buildup in them. I like them better than clean trays because they’re a little heavier and don’t slide around when I’m loading the roller.” — Mac Wentz
Here are more thrifty ways to make everything you own last longer.
Skip Brush Cleaning Between Coats
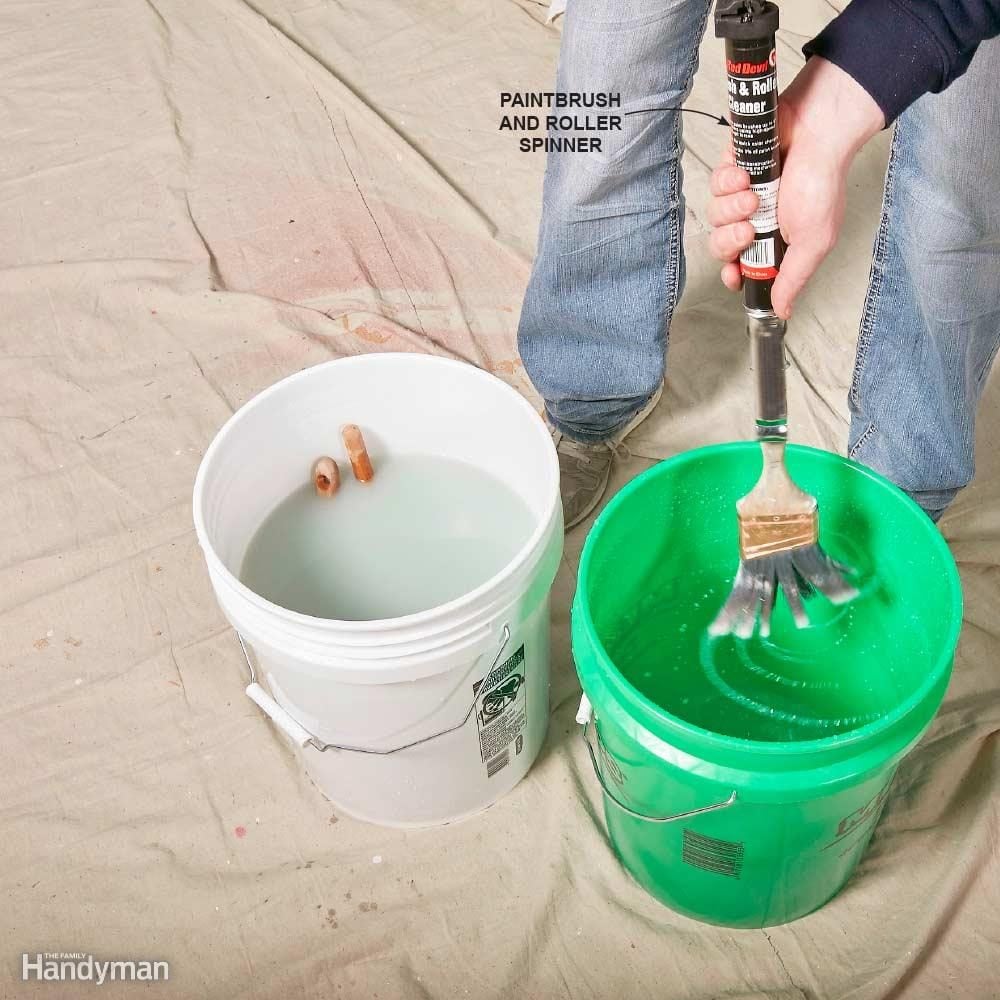
“Whenever I take a break from painting or if I’m done for the day, I toss my brushes into a 5-gallon bucket of clean water to keep them from drying out (make sure all the brushes have the same colour paint on them). Then, when I’m ready to start painting again, I swish the brushes around in the water and spin the excess out with a paintbrush-and-roller spinner. Do the spinning inside a second empty bucket to protect surrounding walls from flying water drops.” — Ann Wisnoski
Discover 13 secrets real estate agents want you to know.
Painting Tips for Smaller Projects
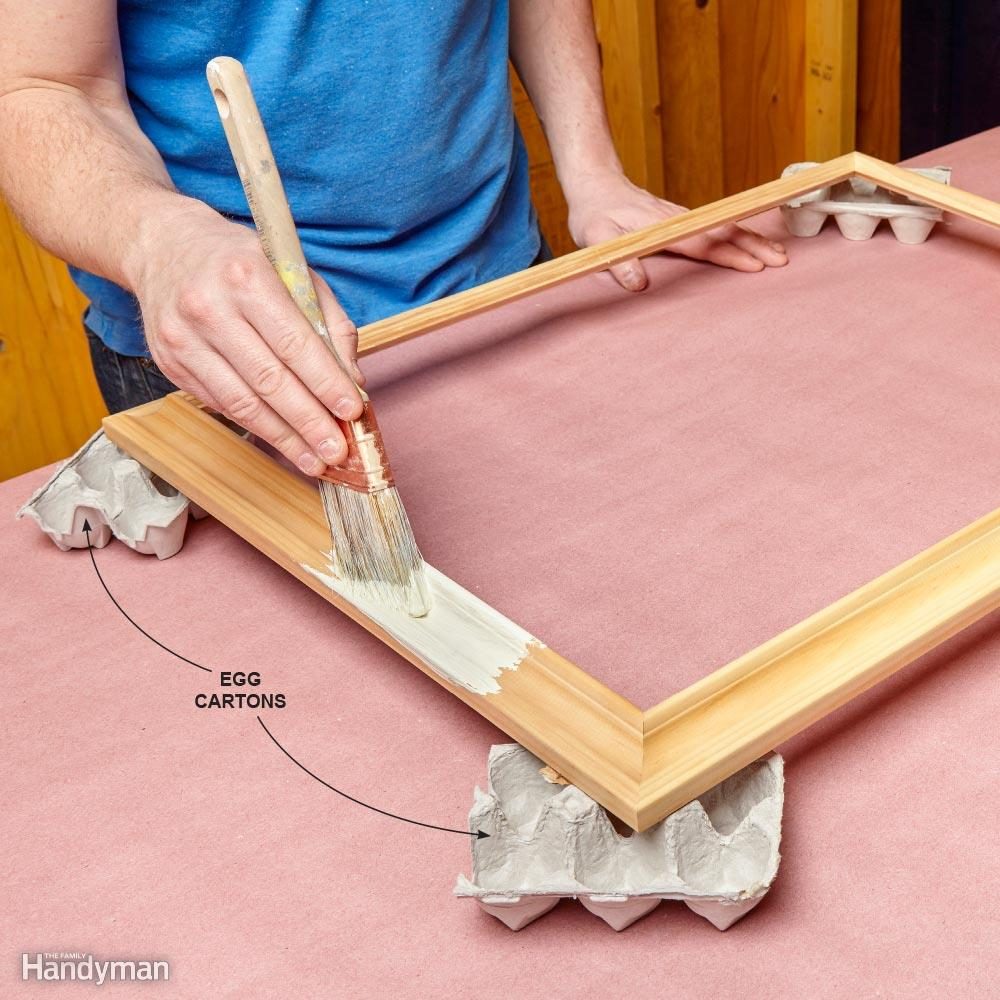
“Whenever I need to paint something small like a picture frame and want to raise it off the table a bit to paint the edges, I break out these handy egg cartons. I just cut a couple in half and use them to support the frame’s edges. I can reuse them several times or just throw them away when I’m done.” — Nancy Luptowski
Now that you’ve got these painting tips under your belt, check out these budget-friendly decorating ideas from HGTV’s Sarah Richardson.