

How to Replace a Broken Taillight
 Updated: Mar. 20, 2019
Replace a broken taillight assembly by ordering a new one online and installing it using two ordinary hand tools.
Order Your Replacement Taillight Online
Your teenage driver used the car and returned it washed and with a full tank of gas. Isn’t it great that he’s become a responsible adult? Oh, wait, you notice that the taillight is broken, and he has “no idea how that happened.” Time to head off to the body shop? Nope-this is a job you can do with ordinary hand tools and the Internet.
Finding a replacement taillight assembly is easy. Simply enter “taillight” into your favourite search engine. You’ll be amazed at the number of hits you get. Most of the companies sell low-priced offshore “knockoffs” of the original equipment (OEM) parts. If you’re okay with an “aftermarket” version, make sure the seller lists it as CAPA certified. A CAPA-certified part is guaranteed to fit and perform like the original. But don’t end your search there. Many car dealers have set up consumer-friendly websites that sell OEM parts at discounted prices.
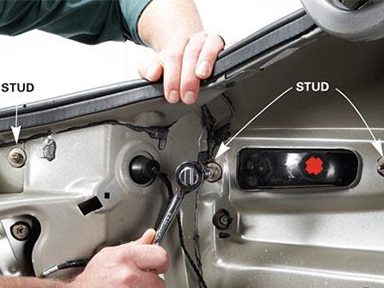
Remove the Broken Taillight’s Nuts
Car manufacturers use two different techniques to attach taillights to the body. One method uses threaded studs embedded in the taillight. The studs are inserted into holes in the sheet metal and fastened with nuts. For the second method see the “Captive stud/socket method” which follows the next slide.
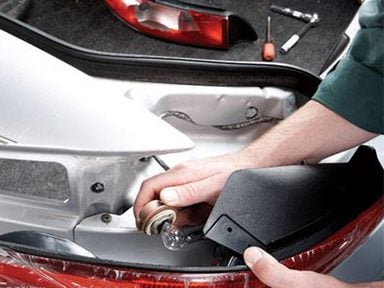
Replace the Broken Taillight Assembly
Once you have the taillight assembly disconnected, remove the lightbulb sockets by releasing the catch mechanism and twisting. If you haven’t replaced the bulbs in the past two years, now is a good time to do that, since you already have everything apart. Then install the sockets in the new taillight and reassemble.
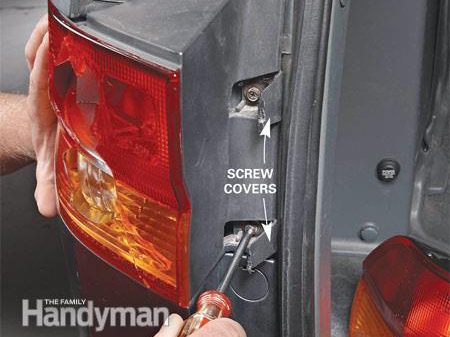
Remove Your Broken Taillight’s Assembly Screws (Captive Stud Method)
The second method uses screws to secure one end of the light, and captive stud/socket fasteners on the other end. If your vehicle has the captive stud/socket arrangement, use a wooden or plastic tool to pry the stud out of the socket. Metal screwdrivers will scratch the paint.
Pictured here: Remove the screws from the trunk or lift-gate side of the taillight. These were hidden under covers.
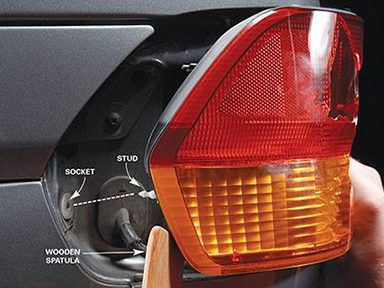
Pry Out Broken Taillight’s Assembly (Captive Stud Method)
Pry the plastic stud out of the socket while pulling back on the taillight assembly.
Check out more do-it-yourself car maintenance tips!
Explore Reader’s Digest Cars.