

How to Check Tire Pressure

Learning how to check tire pressure is easy and inexpensive. Make it a part of your monthly maintenance routine in a matter of minutes.
Our editors and experts handpick every product we feature. We may earn a commission from your purchases.
A guide to checking tire pressure
Driving on improperly-inflated tires can wear out the tread and cause steering problems. That’s why it’s important to check your tire pressure regularly.
Fortunately, checking tire pressure only requires two tools—a tire pressure gauge and an air compressor. Most gas stations have an air compressor so you only need to own one tool. The whole process is relatively quick, too. In a matter of minutes you’ve done a lot to ensure a safe and smooth ride.
Before you begin, make sure the car has been parked for three to four hours so you get an accurate reading from the gauge. If you drive to a gas station to use an air compressor, try to find one less than a kilometre away.
Tools You’ll Need to Check Your Tires
- Tire pressure gauge. A standard gauge, called a pencil gauge, can do the trick for less than $10. A digital gauge is also a good choice because it’s ergonomic and easy to read. There are also gauges (analog and digital) that attach to an air compressor hose so you can check the pressure and inflate the tire all at once.
- Air compressor. Many gas stations have air compressors that cost $1 to use. A portable air compressor that plugs into the 12 volt auxiliary power outlet will also work; just be sure the air hose will reach all four tires.
Here are more essential tools every home mechanic should have.
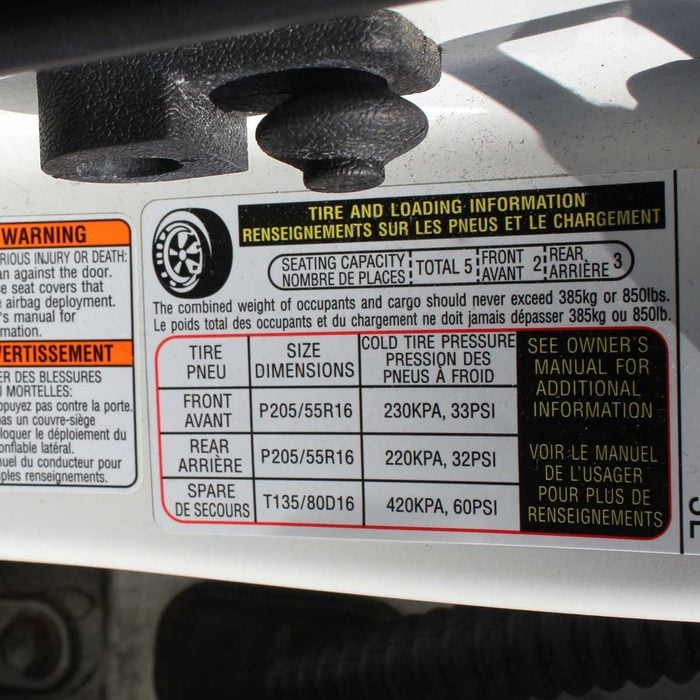
Step One: Determine Recommended PSI
The driver’s side door jamb typically has a sticker with the recommended PSI (pounds per square inch) for the tires. Most manufacturers recommend 30 to 32 PSI for all four tires, although some cars will have different PSI recommendations for the front tires and back tires. If you don’t see the recommended PSI on your door jamb, check your owner’s manual.
Find out the ideal tire pressure for cold weather.
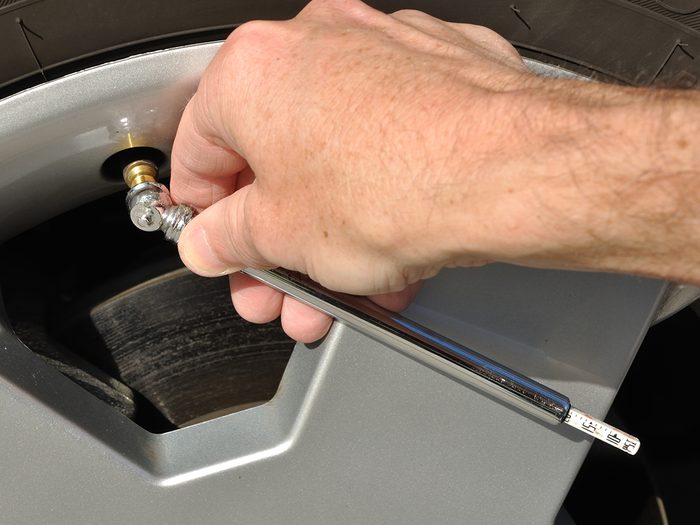
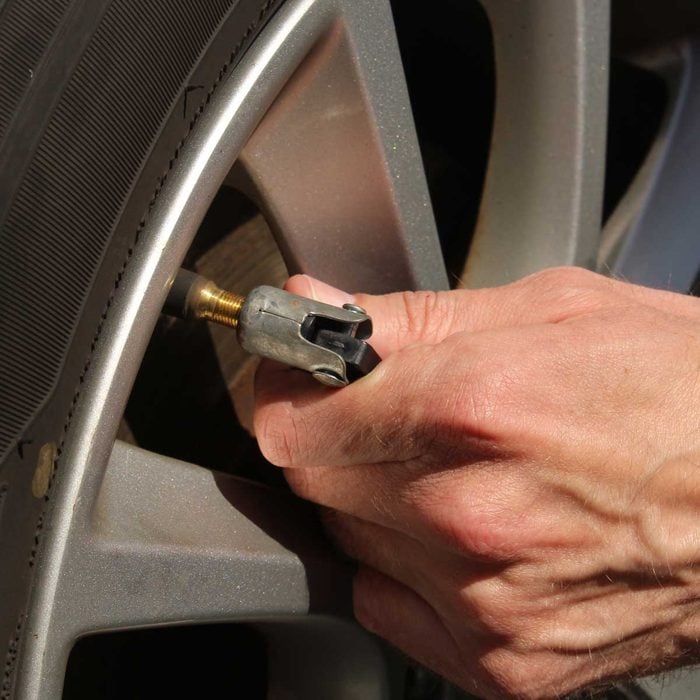
Step Two: Remove Valve Cap
Unscrew the cap on the tire air valve and place it somewhere safe.
Here’s the real reason tires are black.

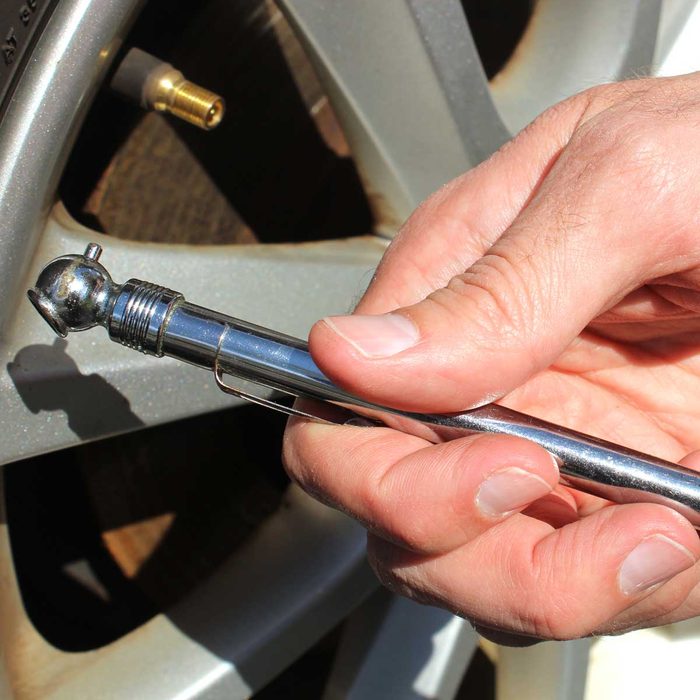
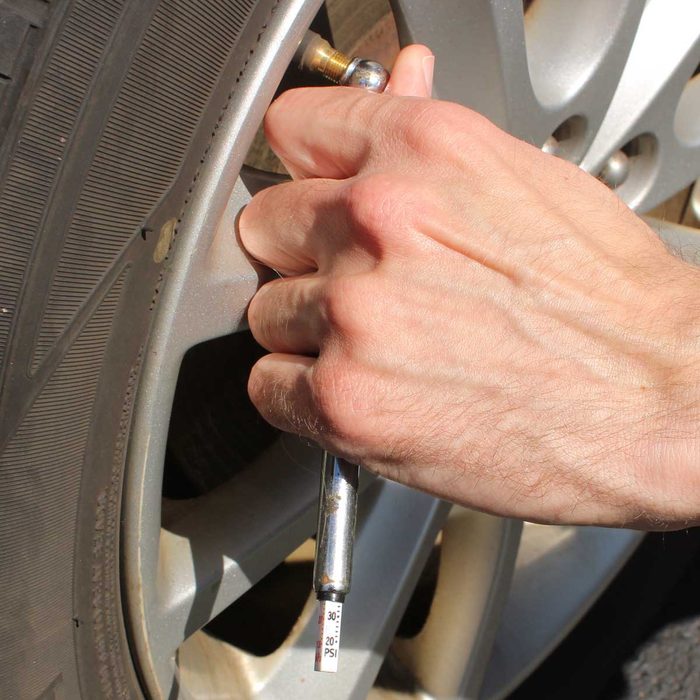
Step Three: Check the Pressure
Press the gauge onto the tire air valve straight on, and press it hard. This creates a tight seal around the tire air valve so you don’t accidentally release air from the tire. You’ll hear a hissing sound if air is coming out. A small bar with numbered notches will pop out of the pencil gauge with the tire pressure reading.
Don’t miss these pro tips on how to maintain car tires.
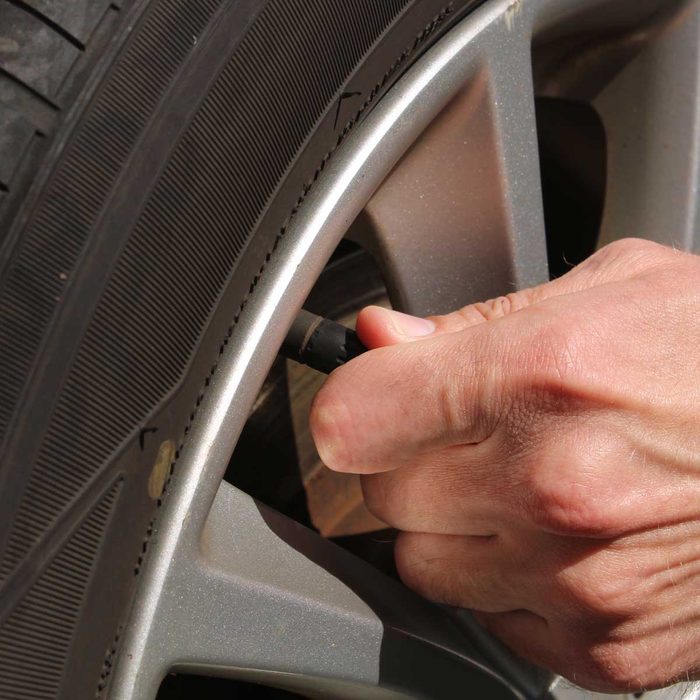
Step Four: Inflate Tire
Fill up the tire by pressing the air compressor nozzle onto the tire air valve in the same manner as the gauge—hard and straight-on to create a tight seal. Hold the nozzle onto the tire air valve for about 30 seconds to one minute, depending on how low the initial reading is. Repeat step three to get the new reading. Add or release air as needed to reach the recommended PSI.
Here’s what those numbers on your tires mean.
Step Five: Check Remaining Tires
Repeat steps three and four on the remaining tires.
Now that you know how to check tire pressure, find out what could happen if you don’t remove winter tires in the spring.