

How to Repack Trailer Wheel Bearings
 Updated: Mar. 20, 2019
We show you how to repack trailer wheel bearings to prevent the most common trailer breakdown. This DIY vehicle maintenance trick is an easy and cheap chore that will save you money in the long run.
Repacking Trailer Wheel Bearings: Step-by-Step Instructions
You know you’re supposed to repack the wheel bearings on your boat, horse or utility trailer. But do you? Well, not as often as you should, according to Field Editor George Andriotis, who owns D&G Auto and Trailers in Bridgeport, CT. George routinely gets calls from stranded trailer owners. The number one cause? Fried wheel bearings.
You can avoid being stranded by repacking your wheel bearings on a regular schedule. If you use your work or utility trailer daily or drive it long distances, repack them every six months. Repack annually if it gets occasional use and/or the trips are short. For boat trailers, repack the wheel bearings at the start and end of the boating season. Use marine wheel bearing grease.
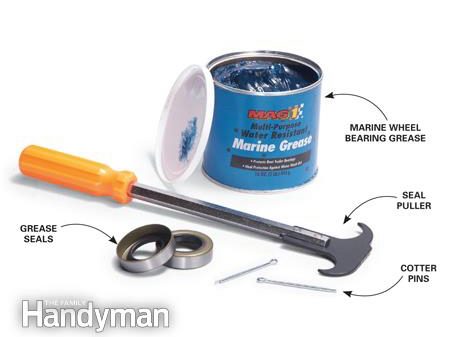
Repacking wheel bearings is cheap (less than $15) and you can do it yourself in a few hours. Pick up new grease seals, cotter pins and the wheel bearing grease at any trailer supply shop. Grease seals come in various sizes based on the inside dimension of your wheel bearings. So after you pull off the bearings, take them to the store to match them with new ones. You’ll also need a seal puller, degreaser solution, parts cleaning brush, washing tub, slip-joint pliers, side cutters, floor jack and jack stands. Then follow the simple steps in our maintenance photo series.
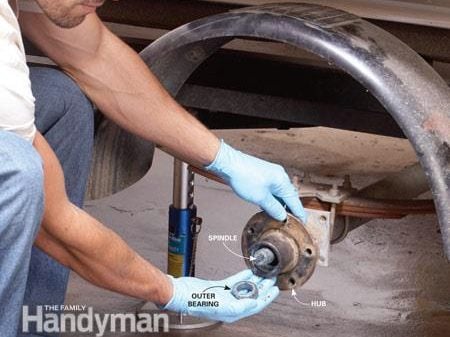
Step 1: Remove the Outer Bearing
Jack up the trailer and support the frame or axles with jack stands. Remove the wheel and then the hub dust cap with slip-joint pliers. Unbend the cotter pin, grab the head with side cutters and leverage it out of the castle nut. Spin the nut off with pliers. Then pull the hub forward until the washer and outer bearing fall into your hand.
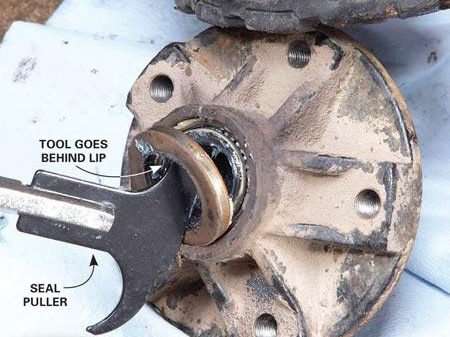
Step 2: Remove the Inner Bearing
Pull the entire hub off the axle and place it on the floor. Hold it with your foot and pry out the grease seal with the seal puller. Keep the inner and outer bearings separate – they have to go back in their original locations.
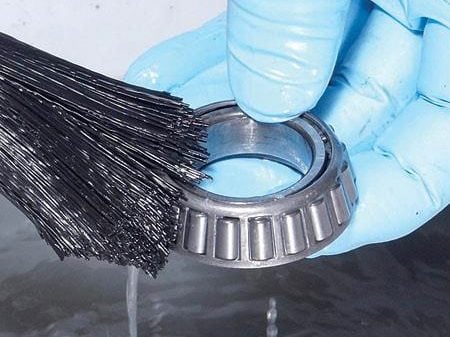
Step 3: Clean the Bearings
Soak the bearings in the degreaser and use the parts brush to clean out all the old grease and dirt. Set the bearings on a clean cloth to dry, or use compressed air. But don’t spin them with compressed air – they can fly apart and cause serious injuries.
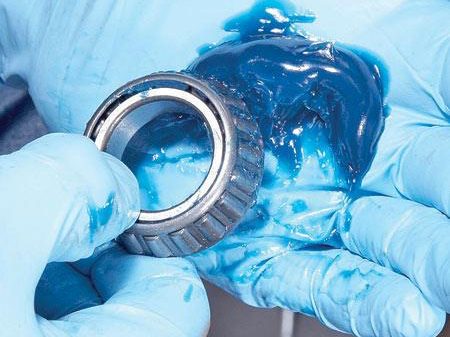
Step 4: Repack with New Grease
Spoon a glop of new grease into the palm of your hand. Then slap the edge of the bearing into the grease. Force the grease into the bearing cage like you’re scooping dip with a potato chip. Rotate the bearing and repeat until the bearing cage is filled with grease. Smear the rest of the grease over the face of the bearing rollers.
Step 5: Install the New Grease Seal
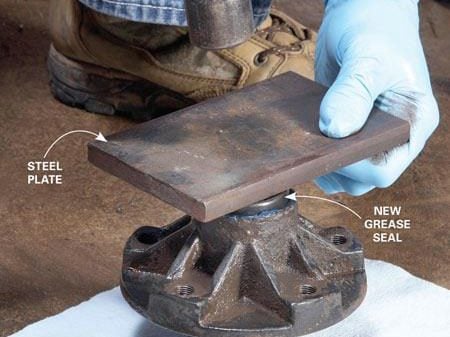
Clean all the old grease out of the hub. Then wipe fresh grease on the inner race and set the bearing in place. Position the new grease seal with the open edge of the lip facing in toward the bearing. Place a flat steel plate or wood block over the seal and smack it into position until the seal is fully seated. Then wipe a light coat of grease around the inside of the new seal.
Step 6: Reinstall the Hub
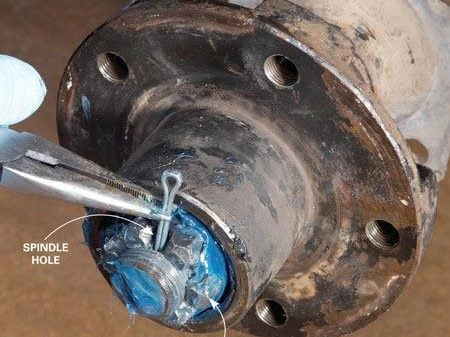
Remove the old grease from the axle. Slide on the hub, outer bearing, washer and castle nut. Tighten the castle nut until it’s snug. Spin the hub to spread the grease and seat the bearings. Resnug the castle nut, then back it off a quarter turn to line it up with the hole in the axle. Insert a new cotter key and bend the ears. Tap in the dust cap.
Repacking Wheel Bearings: What You’ll Need
Required Tools and Materials for This Project
Have the necessary tools for this DIY project lined up before you start – you’ll save time and frustration.
• Hammer
• Needle-nose pliers
• Parts cleaning brush
• Slip joint pliers
• Seal puller
• Washing tub
* Parts brush
• Floor jack
• Jack stands
• Side cutters
• Plastic gloves.
• Marine wheel bearing grease
• Grease seals
• Cotter pins
• Degreaser solution
Check out more do-it-yourself car maintenance tips!
Explore Reader’s Digest Cars.