

How to Safely Remove a Car Radio or Car Stereo
 Updated: Mar. 20, 2019
Learn how to remove your car radio or car stereo system-without wrecking any of the other wiring in your car.
Tips on Removing Your Car Radio
You own a high-end vehicle with a broken CD player. You could take it to one of the big box stores where they offer free installation on a new player. But the thought of a 16-year-old “customizing” your dash gives you nightmares. Besides, you love the look and sound of your factory system. You would remove the factory radio yourself and send it in for repair, if only you could figure out how to do it.
Removing the radio itself is actually pretty easy. But to get to that point, you’ll first have to remove some dash trim pieces. And there’s usually a trick or two to getting those off without wrecking anything. We recommend investing in two things: a set of special tools for trim removal and an online set of instructions geared specifically to your car. A set of the four most commonly used trim removal tools costs less than $16 online. It’s worth every penny.
Tools and materials needed:
– Trim removal tools (including nylon prying tool)
– Socket/ratchet set
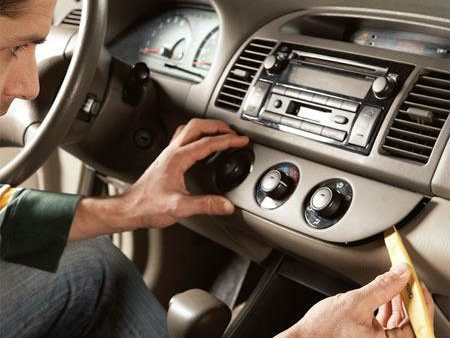
Start by removing the control panel
Slip a nylon prying tool between the heater control and the dash. Pop the control panel off.
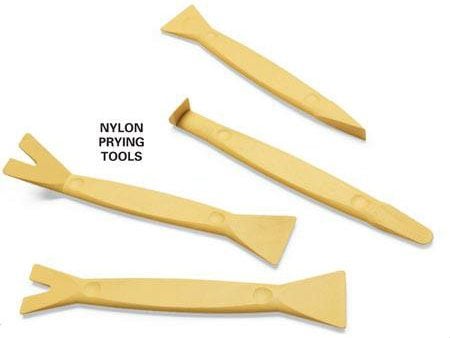
What Are Nylon Prying Tools?
These nylon prying tools can help prevent damage to the dash panel. Experiment to find which tool works best for each trim piece.

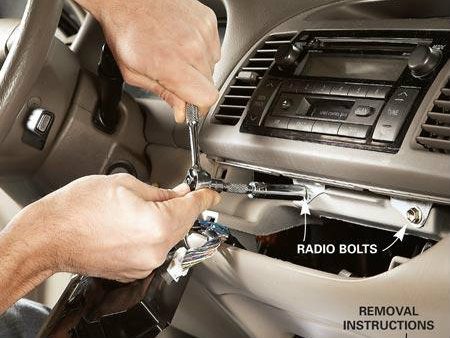
Remove the Trim Panels and Bolts
Pry out the radio trim panel to expose the radio fasteners. Then remove the retaining bolts.
Disconnect the Wires
Disconnect the electrical connectors and the antenna from the back of the radio. Then lift it out.
Is the radio beyond repair? Here’s advice on How to Upgrade Your Car Audio System.
Check out more do-it-yourself car maintenance tips!
Explore Reader’s Digest Canada.