

How to Install Custom Car Seat Covers
 Updated: Mar. 20, 2019
Are your car seats hopelessly stained or torn-or just plain ugly? Learn how to order and install custom car seat covers for both back and front seats.
Customize Your Car Seat Covers
Whether you fill your vehicle with construction materials, haul kids and grandkids around or just spill lots of coffee, you know how easy it is for factory seat covers to get grungy. If they’re beyond rescuing with an upholstery cleaner and you want to spruce up your vehicle’s interior, you have only three options: Pay a professional automotive upholsterer to reupholster your seats (well over $1,000), buy used seats from a junkyard, or buy and install seat covers yourself.
Aftermarket seat covers cost as little as $50 per seat for a universal-fit style or about $150 per seat for top-of-the- line custom-fit covers. We’ll show you how to order and install custom-fit seat covers. The installation is similar across makes and models. The job takes about two hours for front and rear seats. The only tools you’ll need are a wire coat hanger and some tape to fish the straps under plastic trim pieces (if equipped). Everything else is included with the seat covers.
Seat covers come in two styles: universal and custom-fit. You can buy universal seat covers right off the shelf at an auto parts store or order them online. Custom-fit seat covers must be ordered to fit your exact year, make, model and seat style. They’re far more expensive than universal-fit seat covers. But they fit like a glove, stay put when you slide in and out, and are more comfortable. Plus, custom-fit seat covers include breakaway stitching so the air bag can deploy properly if your vehicle has side bolster air bags.
To get around the air bag issue and keep costs down, universal seat covers simply eliminate the fabric that would normally cover the seat air bags. Then, to reduce slipping, the manufacturers coat the underside of the fabric with an anti-skid rubber. That makes them a bit more uncomfortable to sit on for long periods. And they will inevitably slip out of place and wrinkle because they’re not an exact fit for your seats.
For some strange reason we don’t understand, officially licensed designer camouflage and sports patterns are the most popular seat cover fabrics these days. Since the fabric designers get a royalty on every sale, you’ll pay more for those patterns. If you want to keep the cost down, skip the trendy camo and sports fabrics and choose a solid colour.
If you order custom-fit seat covers, you’ll have the option of also ordering matching armrest and headrest covers, console covers, seat back storage and map pockets.
Buy custom-fit and universal seat covers from retail and online auto parts stores, or directly from the manufacturer. We bought the custom-fit seat covers for this 2010 Subaru Outback at nwseatcovers.com. We bucked up and picked the trendy Bill Jordan Realtree AP Snow camo pattern and added headrest covers. The front seat covers cost $341 and the rears, $331. Here’s how they install.
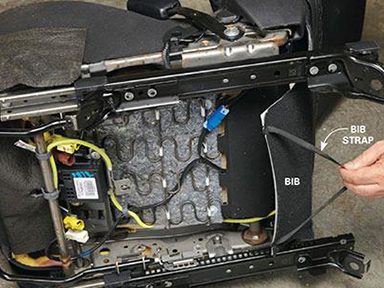
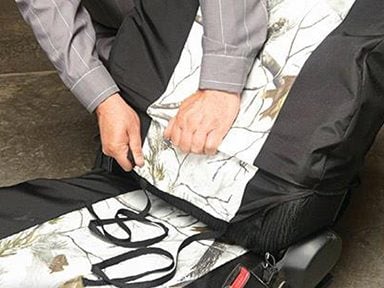
Customizing Car Seat Covers Step 1: Release the bib panel
Follow the bib panel straps and unclip them from the springs or pull the elastic straps out from under the springs. Then lift the bib panel up to access the gap between the back and the bottom cushion.
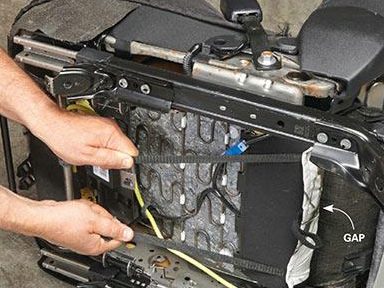
Customizing Car Seat Covers Step 2: Thread the straps through the gap
Push the bottom cushion straps through the gap between the seat back and the bottom cushion. Then pull the straps completely through until the seat cover is taut.
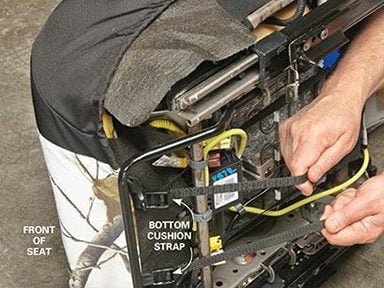
Customizing Car Seat Covers Step 3: Buckle the seat cushion straps
Route the bottom cushion straps toward the front of the seat, making sure the straps don’t interfere with the seat adjuster mechanism. Thread the strap into the buckle and cinch it tight to remove wrinkles in the car’s seat cover.

Customizing Car Seat Covers Step 4: Tighten and connect the bungee cords
Pull the bungee cords to cinch the skirt on the bottom seat cover. Then connect the ends using the supplied S-hook.
Customizing Car Seat Covers Step 5: Install the seatback cover
Pull the cover down until it reaches the side bolsters (cushions). Then compress the bolster while you pull the fabric down to the bottom.
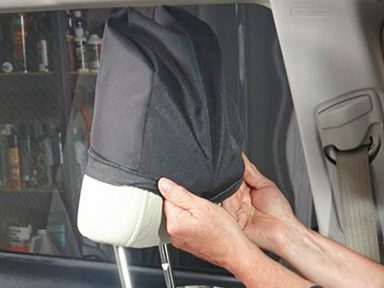
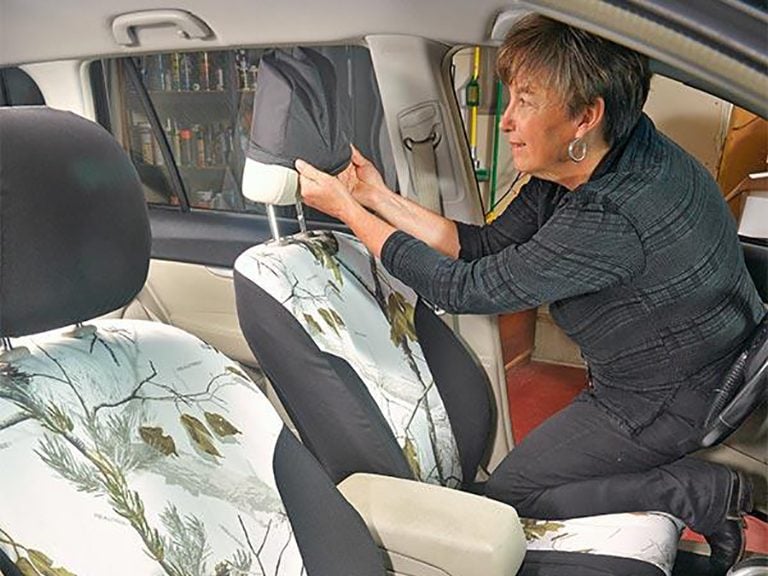
Customizing Car Seat Covers Step 6: Install the headrest covers
Stretch the elastic edges around the headrest and pull it down. Tug at the cover fabric until it fits smoothly on the contour of the headrest.

Customizing Car Seat Covers Step 7: Install rear bench seat cover
Fit the cover onto the bench seat and thread the straps into the buckles. Tighten until snug. Check the fit and adjust. Then tighten the buckles, secure the bungee cords and connect the remaining straps to the springs with S-hooks.
Check out more do-it-yourself car maintenance tips!
Explore Reader’s Digest Cars.