

How To Fix Car Dents
 Updated: Mar. 20, 2019
Learn how to fix car dents in a few simple steps and save hundreds of dollars over body shop prices.
Patching a dent in your car is easier than ever!
We’ve patched quite a few vehicle dents in our day. We used to do it the same way we tape drywall, by applying 5 lbs. of body filler and then sanding off 4.9 lbs. Then we went to “boot camp” at 3M and learned there’s an easier way (as in, the correct way) to do dent repairs. We asked a 3M expert to walk you through the same dent repair process. Once the dent is patched, you just spray on a primer coat and matching paint from the dealer or an auto parts store. The repair won’t look like a professional job, but at least it won’t stand out like a sore thumb.
Tools and materials needed for this project:
– Angle grinder
– Corded drill
– Extension cord
– Dust mask
– Hearing protection
– Safety glasses
– Sanding block
– Mixing board and plastic spreader.
– 24-, 80-, 180- and 320-grit sandpaper
– Body filler
– Finishing glaze– Latex gloves
– Tack cloth
– Wax remover
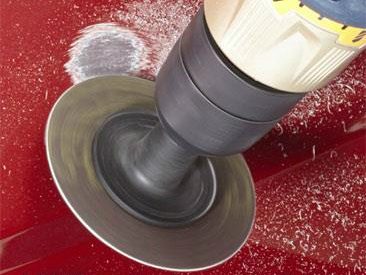
Step 1: Prep and clean before filling
Start by removing the paint inside and around the dent with 24-grit paper. Switch to 80-grit sandpaper and hand-sand the entire dent. Use the same sandpaper to rough up and feather the paint around the edges of the dent. (You can also chuck the 24-grit disc into your drill and spin it deep into the dent, getting all the way down to the metal. Then work your way out to the edges.) Clean the entire area with wax remover and a clean rag. Then wipe with a tack cloth.
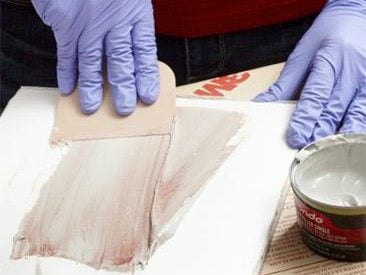
Step 2: Mix the filler
Don’t mix body filler on a scrap piece of cardboard. Instead, use a mixing board or an old, clean cookie sheet you’re willing to toss.
Scoop filler onto the mixing board and apply the hardener according to the directions. Then mix it using a spread-and-fold motion. The spreading and folding technique fully mixes the hardener into the filler and prevents air bubbles from forming. Never stir the mixture.
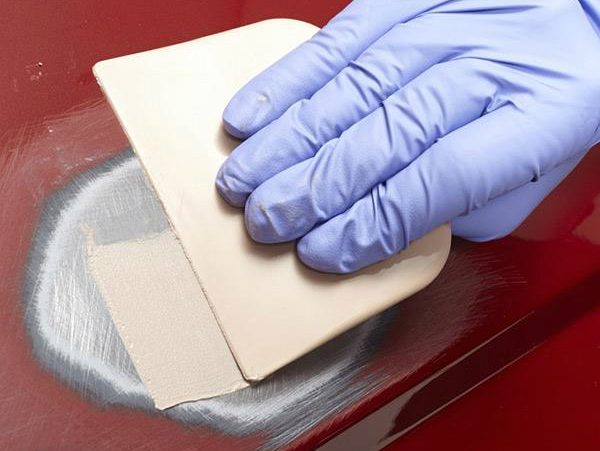
Step 3: Apply the filler
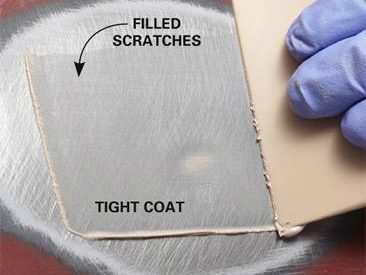
Scoop up some filler and press it hard into the rough metal. Spread the filler to form a “tight” coat. That will burp air out of the scratches and wet the bare metal. Then apply a fill coat.
Step 4: Sand to shape and glaze
Sand the filler to match the contours of the car body using 80- and 180-grit sandpaper. Then feather the edges of the filler right up to the painted edge.
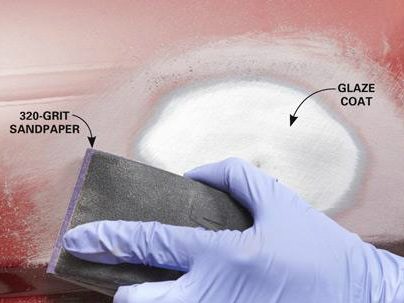
Next, apply finishing glaze to the entire patch and then sand with 180- grit and then 320-grit sandpaper. Spray the patch with primer, and follow up by painting it.
Check out more do-it-yourself car maintenance tips!
Explore Reader’s Digest Cars.