

How to Check Your Car’s Air Filter and PCV Valve
 Updated: Mar. 20, 2019
Save money on your next oil change by checking the air filter and PCV valve yourself. Here’s how to tell if you need new ones.

Check your air filter and PCV valve
You take your car in for an oil change. The work is almost done when the technician comes out to talk to you. He’s holding your air filter and PCV valve and recommending that you replace both because they “look dirty.” Without missing a beat, he explains how critical the air filter is to the efficient operation of your car. He tells you that a clogged air filter, or one that’s nearly clogged, can easily cost you 10 per cent in gas mileage.
With gas prices going through the roof, he adds, a replacement will probably save you more than the cost of the filter. Plus, a dirty PCV valve, well, that’s never a good thing. Then he waits for your decision. It’s tough to make up your mind about an expensive air filter and PC-whatchamacallit valve when you don’t know what to look for. This time around, you can actually check the air filter and test the PCV valve yourself and save money. Here’s how.
Tools and materials required:
Socket/ratchet set
4-in-1 screwdriver
Air filter
PCV valve
Shop light
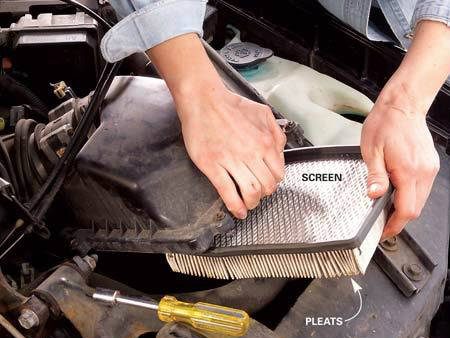
Step 1: Remove the filter
Follow the black plastic duct to the air filter box. Unscrew or unsnap the latches. Remove the filter. Note that the screen always faces the engine. The pleats face the incoming air.
Ignore the dirt on the leading edge of the air filter pleats. All air filters accumulate dirt on the leading edges in as little as a few thousand miles. Yet most last for about 20,000 kilometres. You want to know how much dirt has penetrated deep into the pleats.

Step 2: Inspect the filter
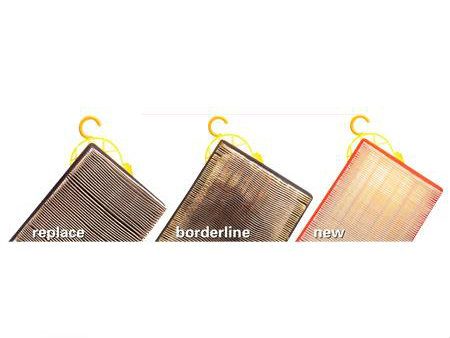
Hold the filter over a shop light and compare it with the three air filters in the next photo. Reinstall or replace.
Step 3: Check air filter wear
The filter labeled “replace” is totally clogged and cost the owner a fortune in wasted gas. The filter labeled “borderline” shows a clogged area, but the rest of the filter has decent light transmission. It’s borderline, and the owner could probably squeeze 3,000 to 5,000 more kilometres out of it. It should be replaced at the next oil change interval. The last filter shows how much light passes through a new filter.
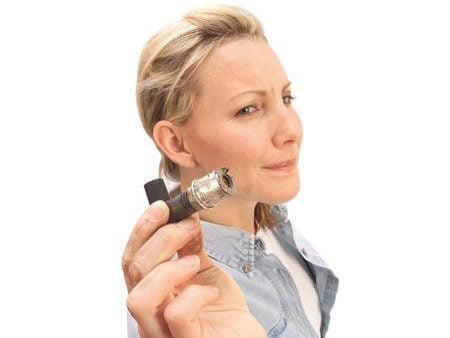
Step 4: Do the PCV test
The PCV (positive crankcase ventilation) valve is a one-way valve that recycles crankcase gases back into the engine to burn. A plugged PCV valve can result in a rough idle and poor mileage. Worse, it can cause costly oil leaks.
To test it, remove the PCV valve from its grommet. With the engine off, shake the valve. If it’s good, you’ll hear a solid clicking sound.
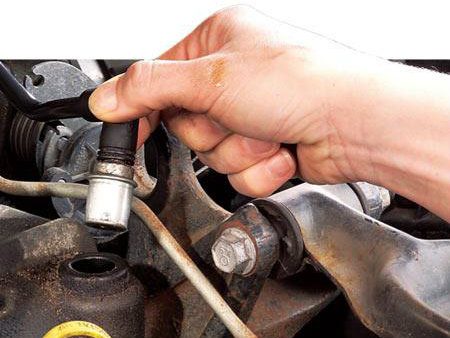
Step 5: Place your thumb over the opening
You can also check the PCV valve with the engine running. Just pull the valve from its housing and place your thumb over the PCV valve opening. You should feel it click. If the click sounds or feels mushy, replace the valve.
Always follow your manufacturer’s replacement recommendations. And never replace a PCV valve simply because it “looks dirty.” All used PCV valves look dirty.
Check out more do-it-yourself car maintenance tips!
Explore Reader’s Digest Cars.