

Check Out This Incredible Camper Trailer Makeover

After almost 50 years of exposure to the sun, snow and rain, every exterior surface of this camper trailer needed work.
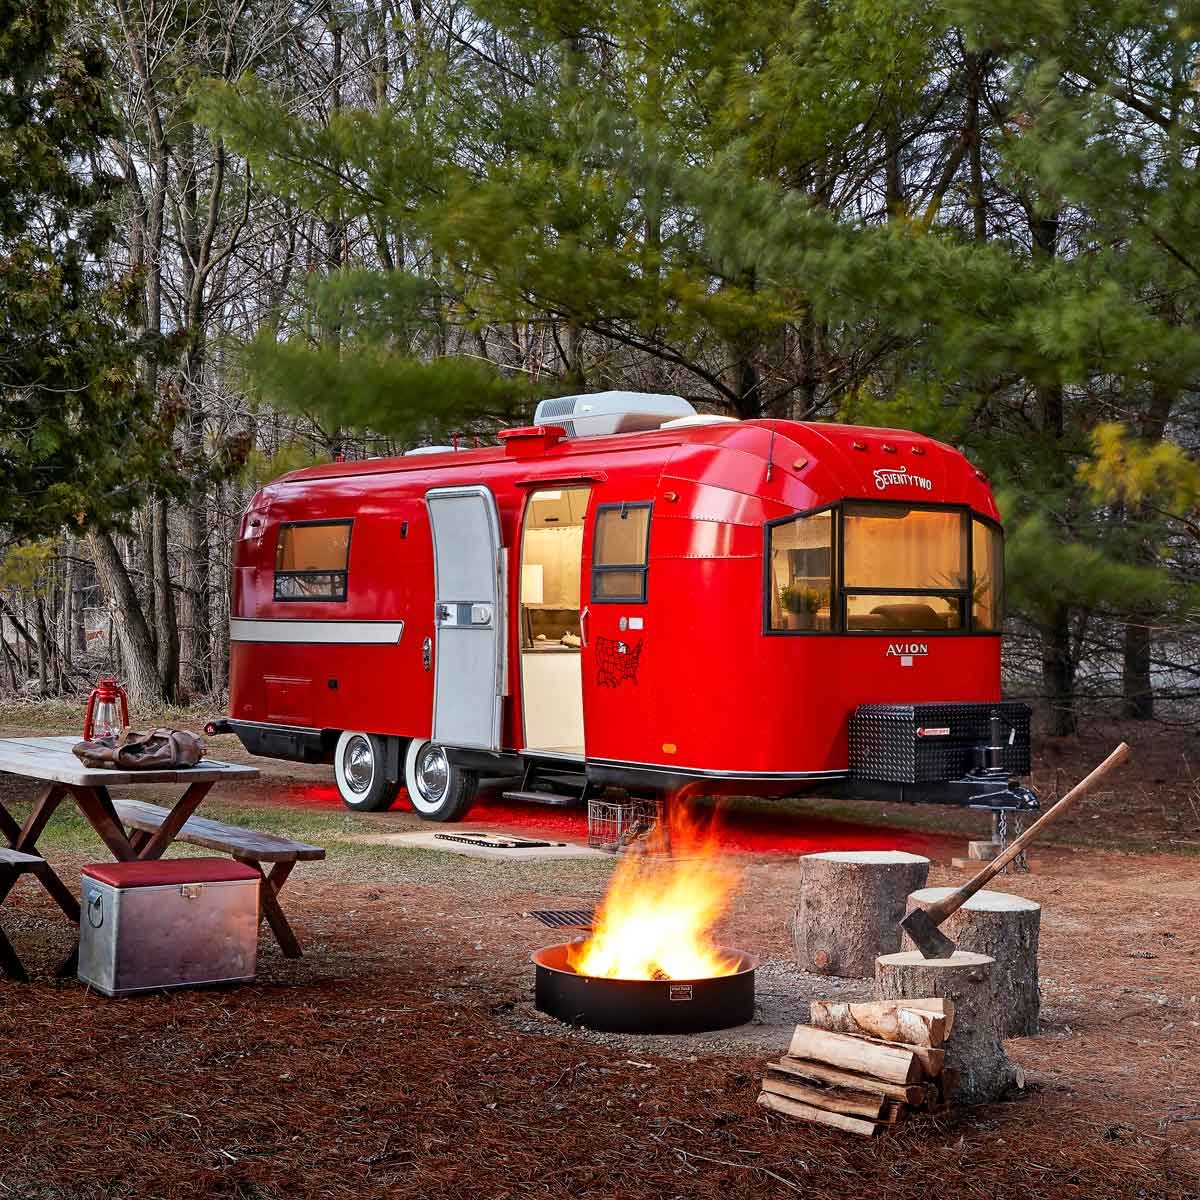
This trailer makeover could inspire *anyone* go to camping!
Have you ever gazed upon an old, neglected thing and envisioned what it could be? That’s how we felt when we first saw our camper. We swept aside the dents and the rust, the flat tires and the dull, oxidized aluminum.
Instead we envisioned a mint-condition camper trailer rolling down the road, a sparkling travelling showpiece that would really turn heads. What’s more, we imagined the freedom of a home on wheels. Go anywhere, anytime. Independent travel.
That freedom, however, can come with a serious price tag. A new camper of this size costs at least $20,000, and often twice that. We got this relic for less than $7,000 and spent about the same on our trailer makeover. Not bad.
But the real success goes way beyond economics. We got the best of old and new. A completely rehabbed camper, with a vintage style all its own. And with it, a little piece of history that grabs attention on the road and at campsites.
A change of plans
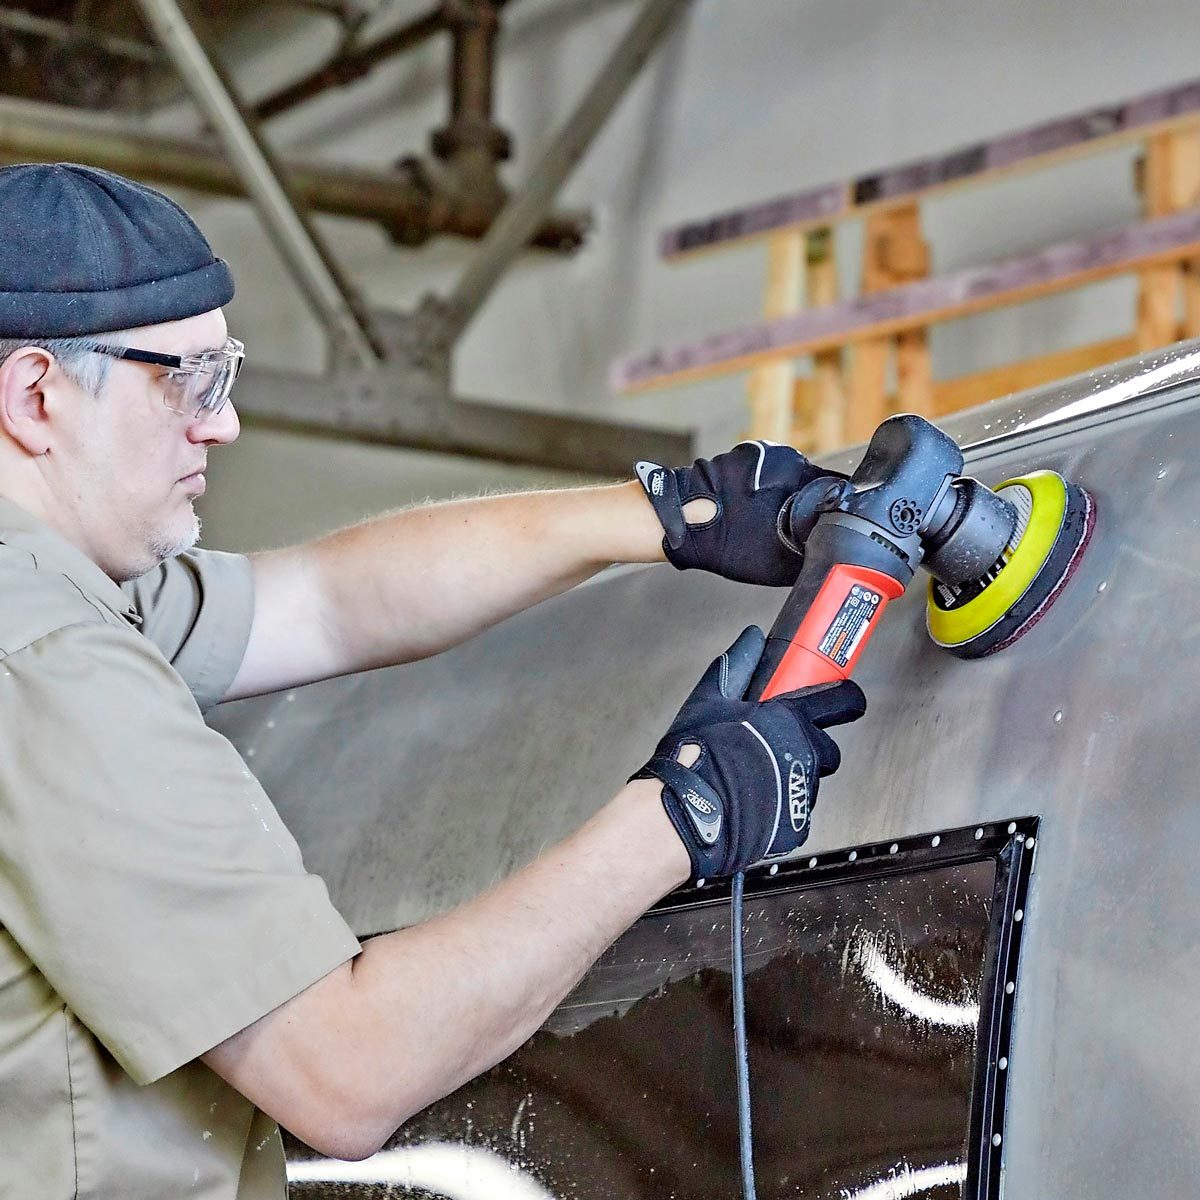
Our first plan was to restore the aluminum exterior to its original gleam. We talked to experts, amassed an arsenal of polishing gear and began experimenting. We achieved a mirror-like shine, though progress was incredibly slow—too slow for our schedule.
So we searched for paint that would form a tough, shiny surface. The answer turned out to be easy: alkyd paint. Water-based acrylic paints are best for most DIY jobs, but old-fashioned oil-based alkyds generally level out better and form a harder film.
Spraying paint in our workspace would be too messy, so we tried rolling. The results were great and better than spraying in one way: The slight texture left by the roller hid small dents and scratches.
Sandblasting—with water
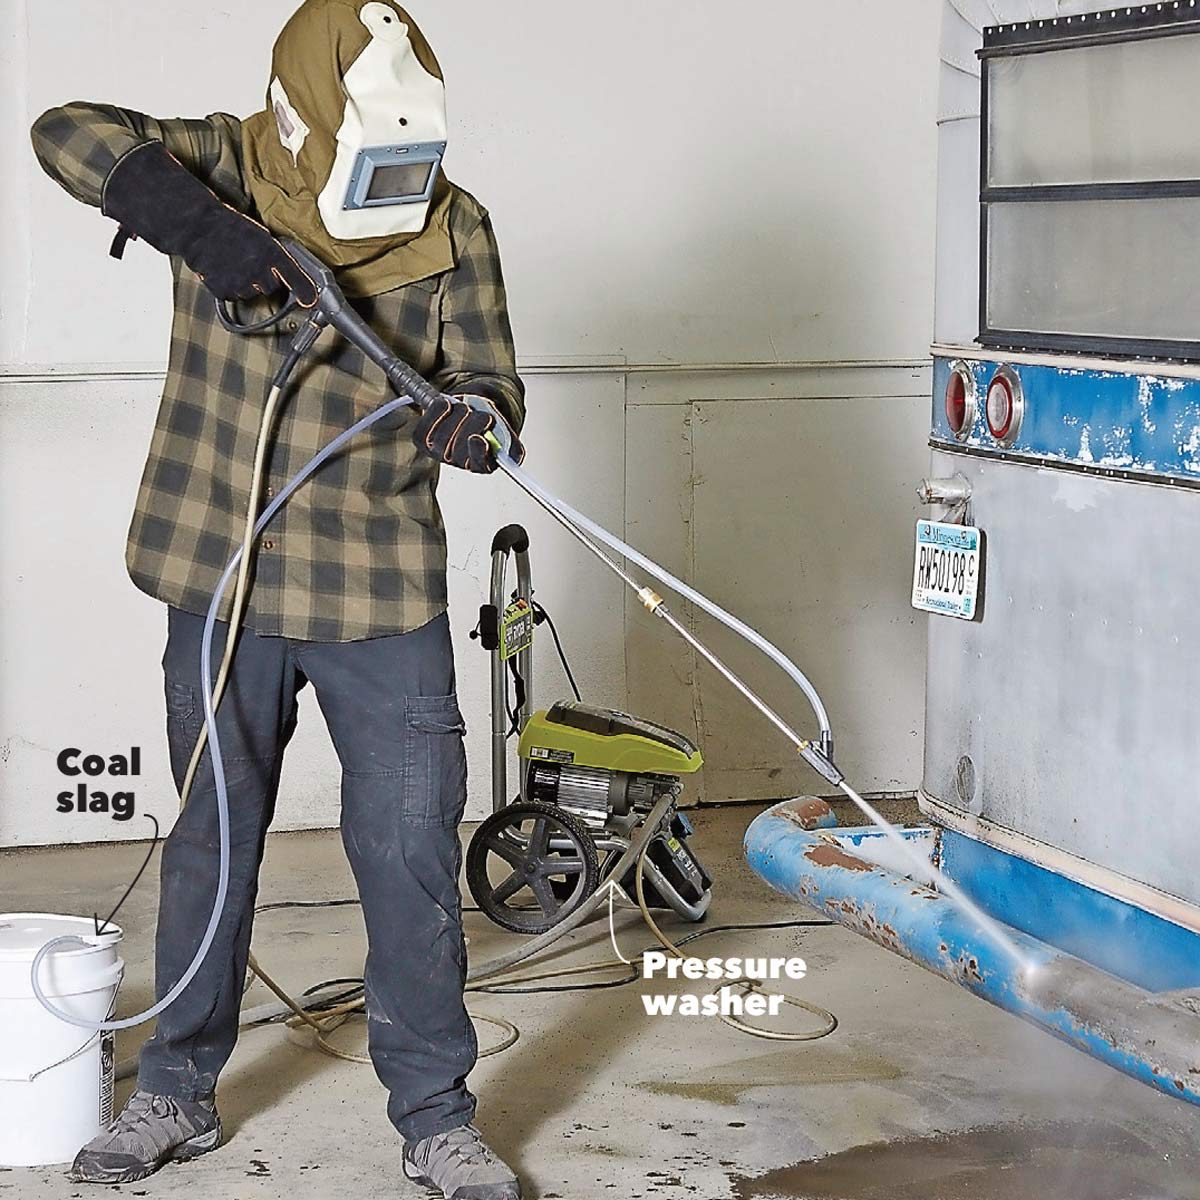
To remove old paint and rust, we first considered sandblasting. But that requires a big air compressor and creates a huge, dusty mess. So we gave “vapour blasting” a try.
Like sandblasting, vapour blasting pummels a surface with sand or other abrasive media. But vapour blasting relies on water from a pressure washer rather than air. That reduces the mess and takes advantage of a tool you may already own. We tried a generic pressure washer vapour blasting kit ($30 online), and we learned three key things:
- Match the gun to your pressure washer. There are different sizes available, with specific psi ratings. The pressure washer psi rating must match the range of the kit. The first one we bought, for $120, was too large and wouldn’t function with our 2,700 psi pressure washer.
- A bigger pressure washer is better. Our 2,700 psi machine worked, but it was slow. A system in the range of 5,000 to 7,000 psi would produce results much faster.
- Weight and size of the media make a difference. We tried three types of blast media before finding one that worked well. The coarse coal slag from Tractor Supply Co. did the trick.
Prevent “flash rust”
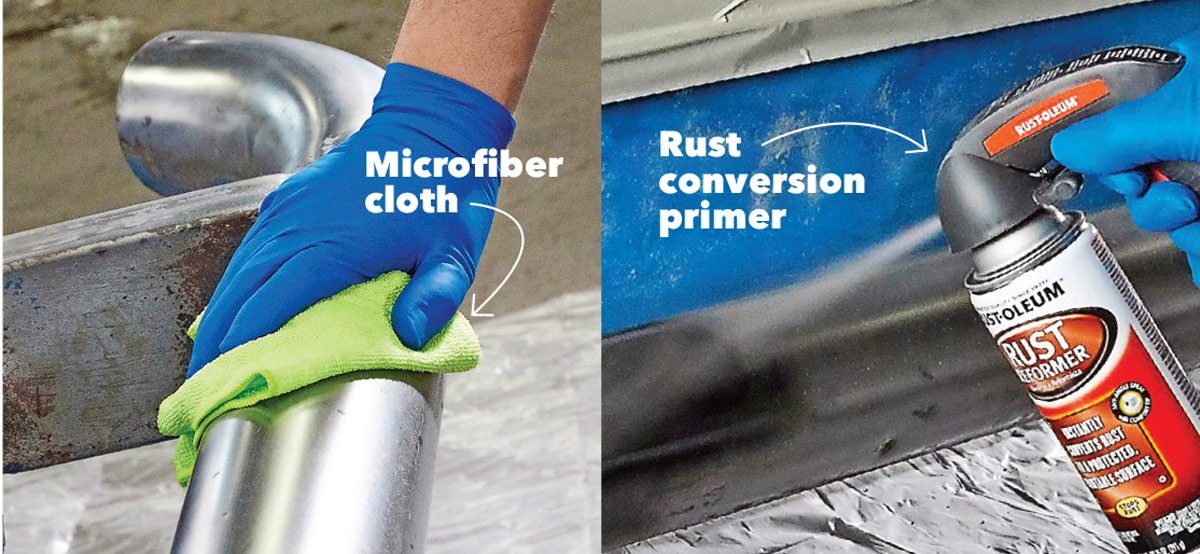
Prepping steel for paint is a lot of work, so here’s something you need to know: Moisture in the air will quickly cause “flash rust” on bare steel, and it might not even be visible. This will come back to haunt you after the paint has been applied. To prevent that, we immediately wiped everything down with denatured alcohol and then sprayed it all with a black rust conversion primer.
Prep aluminum for paint
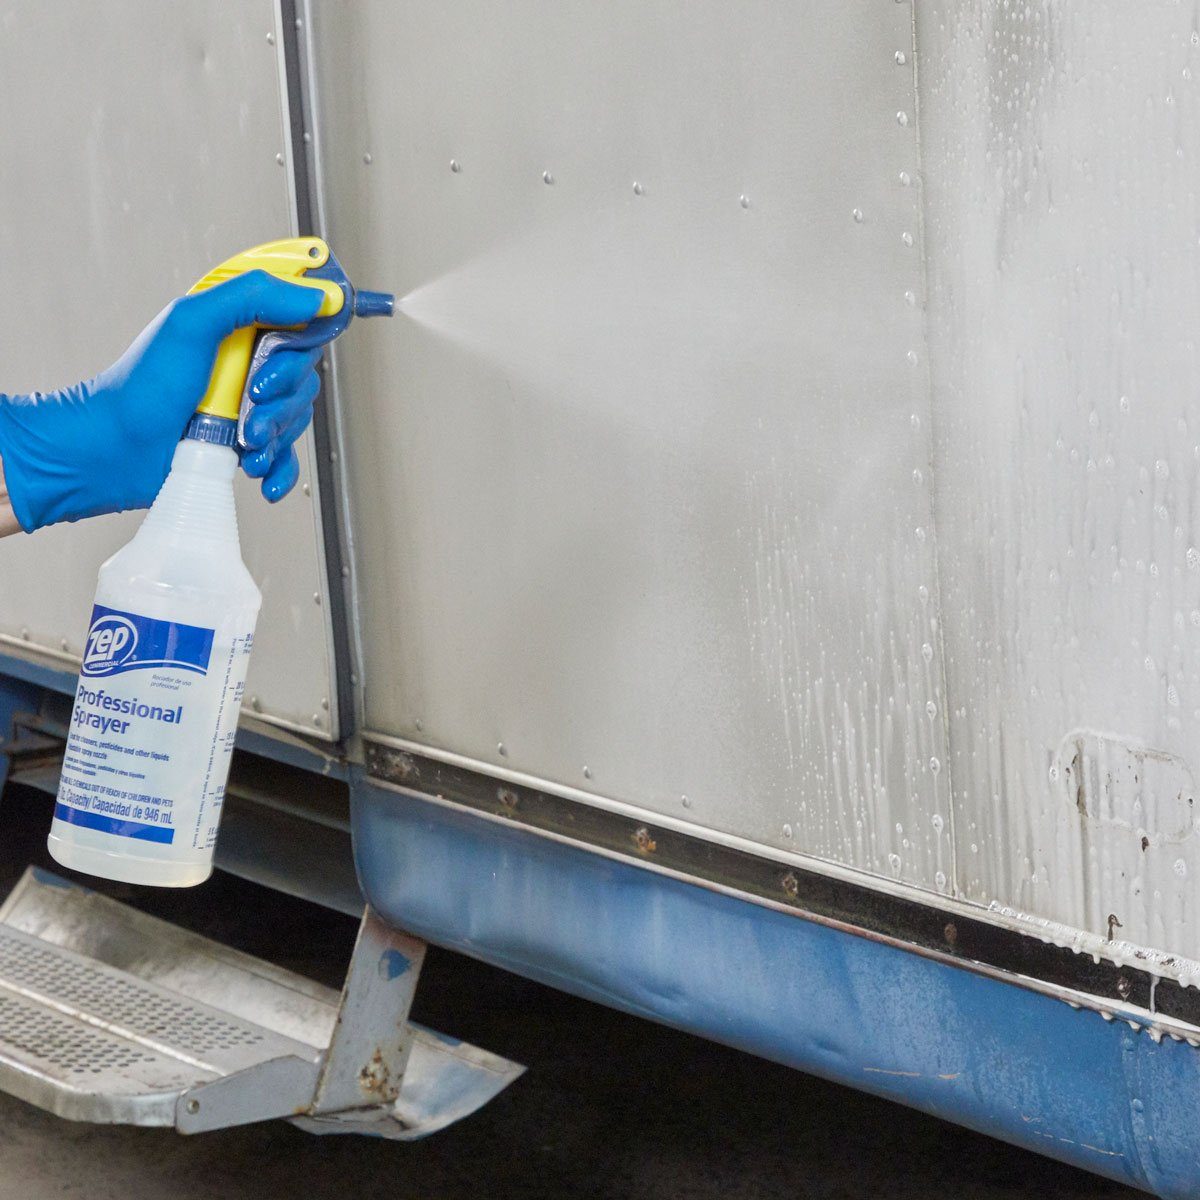
This camper was filthy! If we wanted our paint job to last, we needed to thoroughly clean the surface. We tried soap and water, TSP and even muriatic acid, but all proved ineffective against the camper’s decades of exposure.
Sold as a cleaner for aluminum watercraft, JJV’s Best Aluminum Cleaner did an excellent job of preparing this old, anodized aluminum for paint.
It really helps having two people for this process. We used a spray bottle to apply the full-strength cleaner, and let it sit for 10 minutes. Then, with an industrial scrub brush, we worked the cleaner around as evenly as possible, spraying more where needed. Finally, using the fine spray setting on the nozzle, we rinsed it off with water.
Here are 13 car cleaning tricks pro car washers don’t want you to know.

Add a catalyst
We used oil-based alkyd paint because it levels out well and forms a tougher finish than most water-based paints. We chose Krylon Farm and Implement paint. To make the paint even more durable and to speed curing, we added Krylon’s catalyst hardener.
Keep an eye out for Canada’s quirkiest roadside attractions.

Brush, then roll
We brushed paint onto spots that the roller would miss, then immediately ran over them with the roller for a consistent texture. This paint is thick, so we chose an extra-stiff brush with natural bristles.
Looking to explore the great outdoors in luxury? Don’t miss our guide to glamping in Canada.
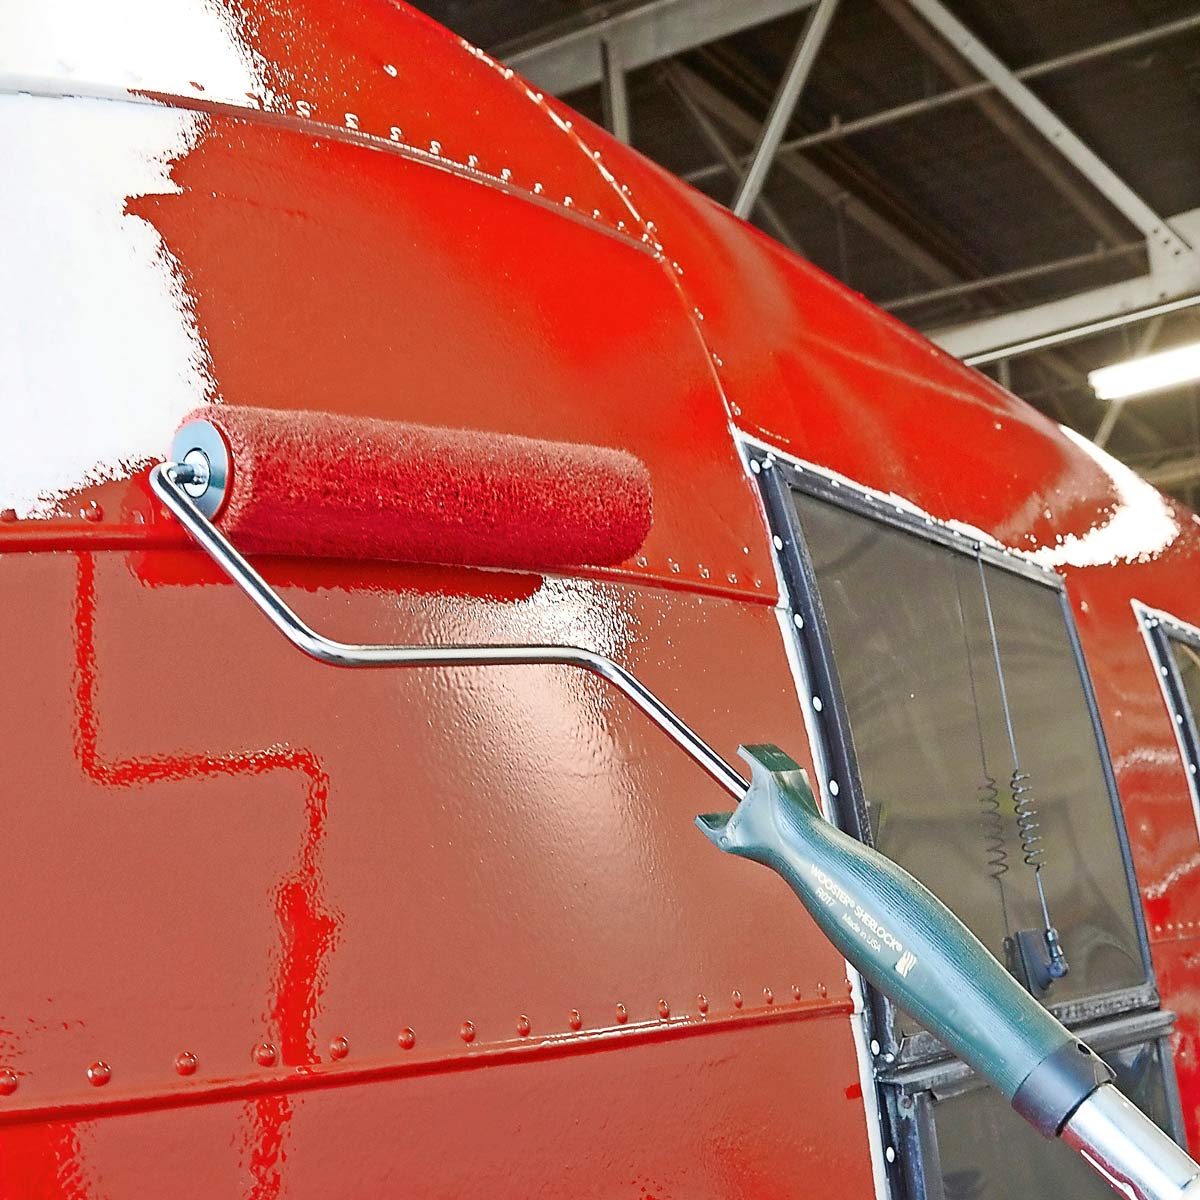
Quality rollers are the key
Don’t buy cheap roller sleeves! High-quality sleeves are worth the extra cost because they give you much smoother results. We used a 3/16-in. Soft Woven Roller Cover from Sherwin-Williams.
On the road this summer? Stop by the best drive-in theatres across Canada.
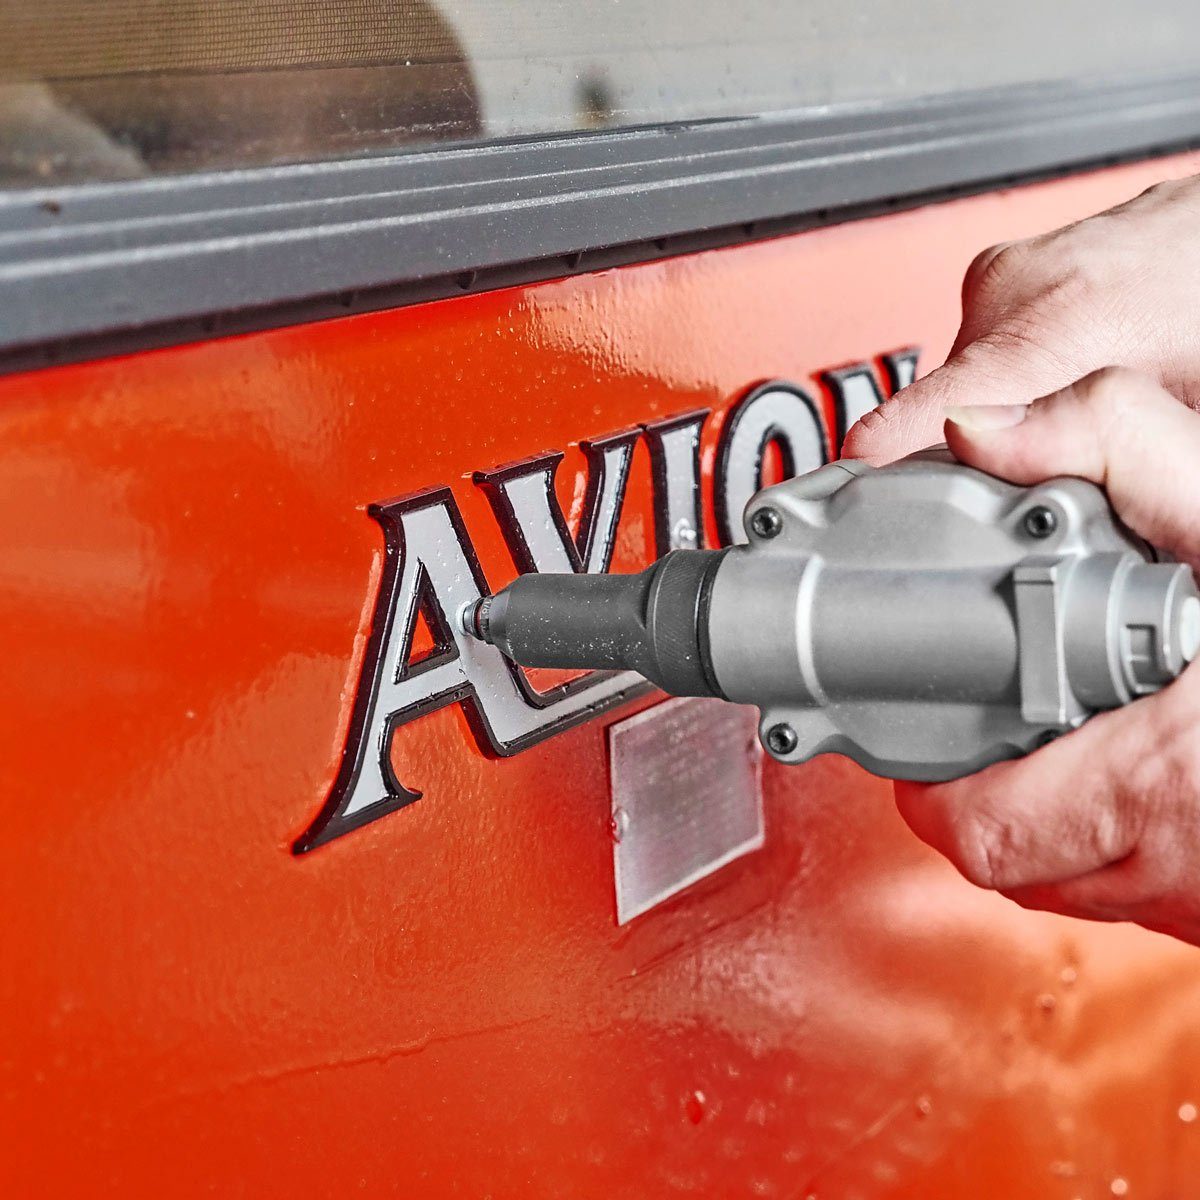
Painless riveting
When the paint had cured and it was time to reinstall the name plates and decorative pieces, we used POP rivets (a.k.a. blind rivets). POP rivets are really simple; they’re made of two pieces, the “hat” and the “mandrel.”
Rivets are inserted into predrilled holes and set using a rivet gun. The gun pulls the mandrel through the hat, mushrooming the end of the mandrel. The mandrel is then sheared off, leaving just the rivet head showing.
The length of the rivet is important. It needs to be twice its width plus the thickness of the material. So, if you’re using 1/8-in. rivets to join 1/4-in. material, the rivet needs to be 1/2 in. long.
Handheld rivet guns are common, but we always feel like we need a third hand when using them. We were dreading riveting by hand, but then we found the Milwaukee M12 battery-powered rivet gun.
It handled all the rivet sizes we needed to use, and we could even use it single-handedly. The bare tool isn’t cheap, but it makes this job much easier on your hands.
Check out 20 essential tools no home mechanic should be without.
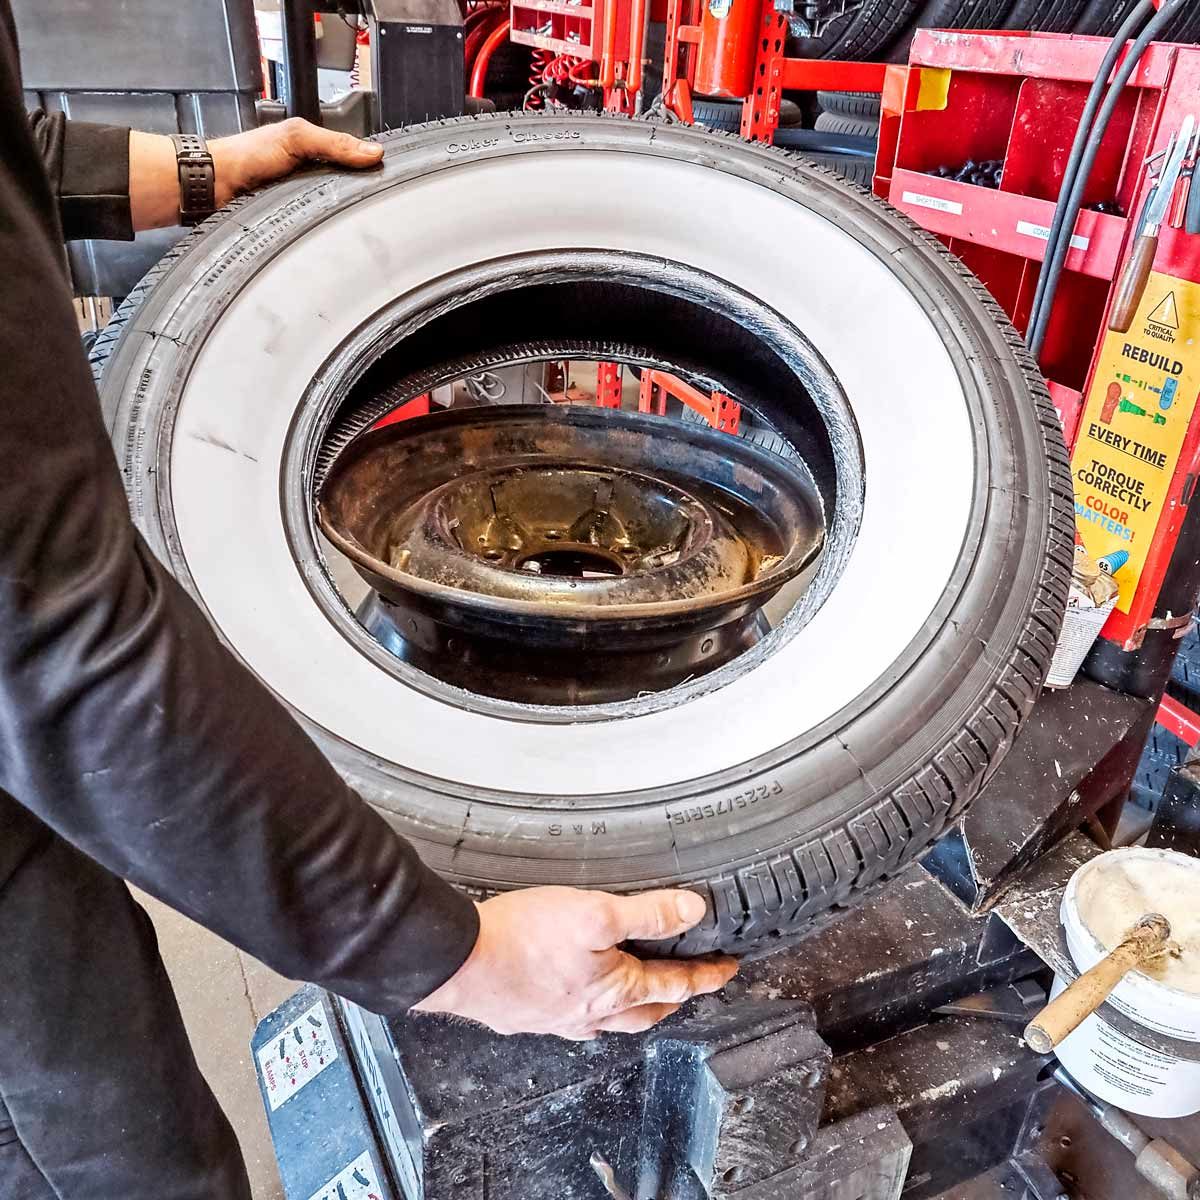
Endless exterior details
We upgraded all the exterior lights to new LEDs, refurbished the name plates, installed a toolbox in the trailer’s tongue. But the whitewall tires are our favourite detail. They cost four times as much as blackwall trailer tires, but the classic look was worth every penny.
Find out how to make your tires last longer.
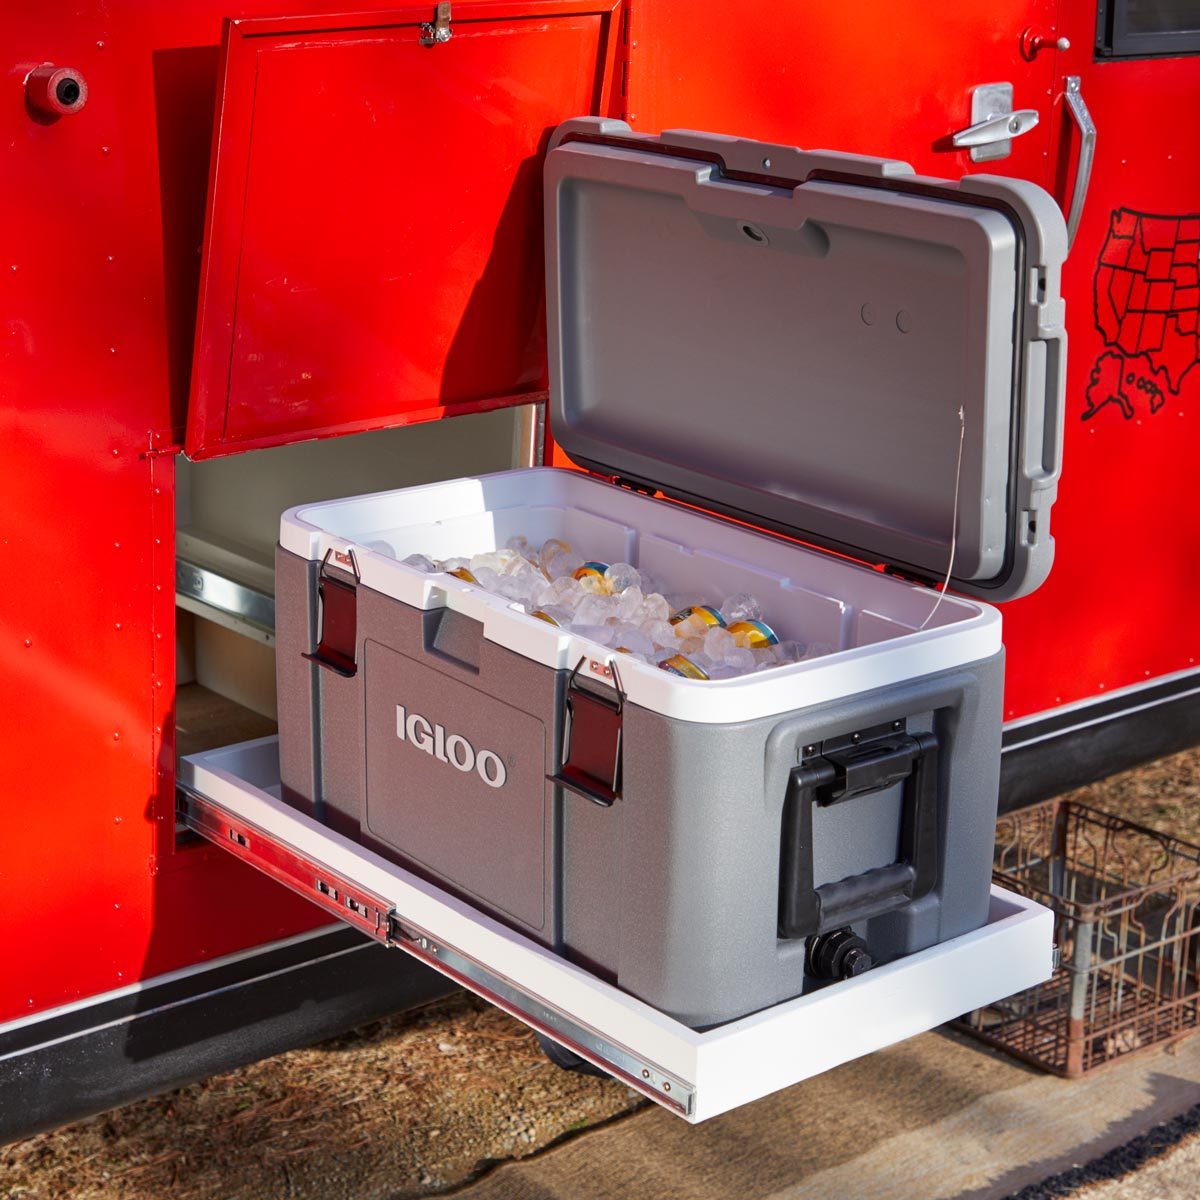
Clever cooler slide-out
With the camper’s old refrigerator gone, its access and venting door no longer served a purpose. So we decided to give it a new purpose. We built a lidded box/table just inside the door to house a cooler. The cooler sits on a platform that’s mounted on heavy-duty 32-in. drawer slides. No need to heft a cooler full of ice or step inside to crack a fresh beverage. Just open the door and pull the cooler outside!
Jumping on the RV bandwagon this summer? With expert advice on everything from packing to driving, our RV road trip planner has you covered.
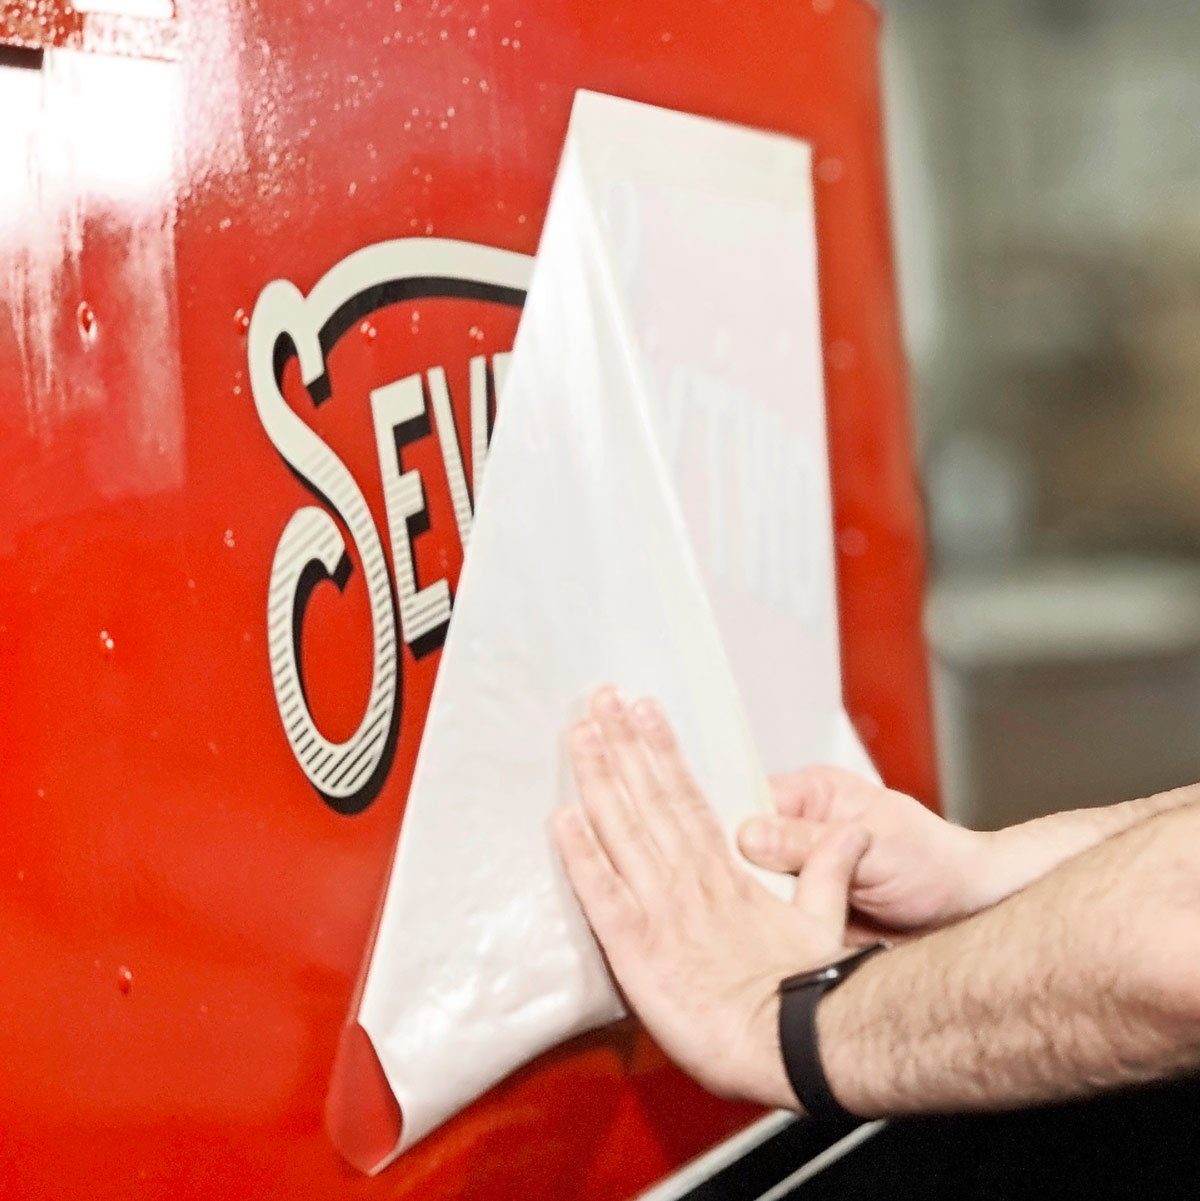
Custom decal
As much as we favour DIY, we chose to hire out the work on our camper’s name badge. The front and back decals cost about $200.
Here’s what it’s like exploring western Canada in an RV.
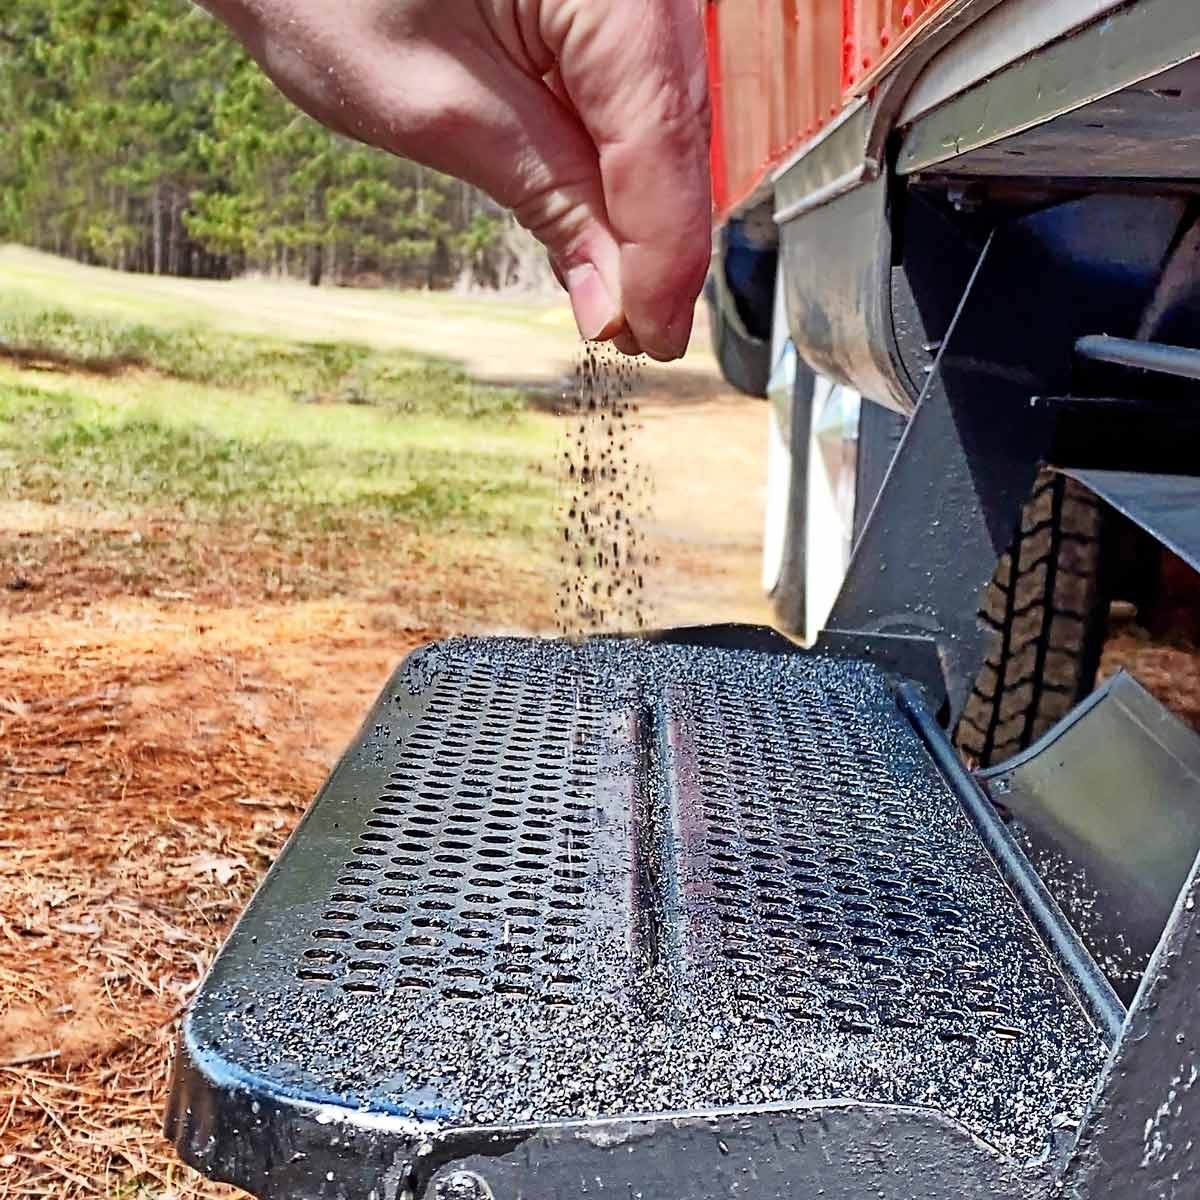
Nonslip Stair Tread
This simple trick can add a nonslip surface to just about anything. We learned this technique making skateboards, using epoxy and clear grit. For the camper step, we used POR-15 OEM Bed Liner coating and coal slag left over from vapour blasting. We rolled the bed liner on the stair tread and then sprinkled the coal slag on top of it.
Inspired by this camper trailer makeover? Start dreaming of your own getaway with this roundup of the best road trips across Canada.