5 DIY Car Repair and Maintenance Tasks To Keep Your Car Running Well

No one likes paying for car repairs and maintenance. Save money by doing these simple maintenance tasks and repairs yourself.
Our editors and experts handpick every product we feature. We may earn a commission from your purchases.
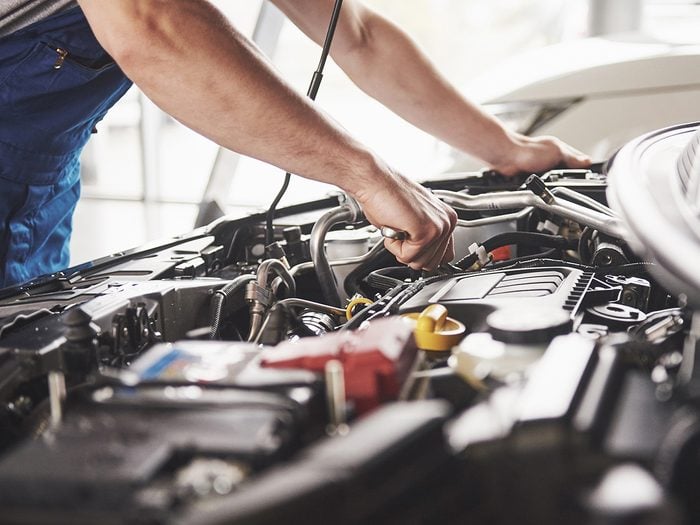
Spending an hour or two every three to four months performing basic DIY auto maintenance can save you hundreds or even thousands of dollars a year. In addition, proper maintenance reduces repair costs, improves fuel economy, minimizes breakdowns, extends your vehicle’s life and increases passenger safety. Although you can’t make every repair, or perform all maintenance on your vehicle yourself, here are a few things you can DIY.
Check/Replace Fuel Cap
Once its only purpose was to keep gasoline from sloshing out of the tank. No more. The fuel cap is an integral part of the emission control system. The fuel cap helps your fuel system maintain proper pressure by sealing the gas tank. A loose or cracked fuel cap can cause the CEL (Check Engine Light) to illuminate, drivability problems and poor mileage. Replace the fuel cap every 80,000 kilometres, or sooner, if damaged.
Replace Oxygen (O2) Sensor
An oxygen sensor monitors the amount of oxygen in a vehicle’s exhaust system after combustion. A dirty, damaged, or malfunctioning O2 sensor (or sensors) affects the air/fuel mixture, resulting in poor engine performance and reduced fuel economy. O2 sensors on pre-1996 vehicles have a recommended replacement interval of 80,000 kilometres. ODBII (On-Board Diagnostics, 2nd Generation—cars built after 1996) have a service life of 160,000 kilometres.
O2 sensor(s) are located in the exhaust system. The owner’s manual (or service manual, which is different from the owner’s manual) can help you pinpoint the sensor’s location and the specifics of the new sensor you need. Be sure to purchase the sensor specific to your engine.
Once the engine is completely cooled, spray the base of the sensor with penetrating oil. Disconnect the wire connector. Use either a 7/8-inch wrench or a special O2 socket and ratchet to remove the old sensor. Remember: lefty loose-y, righty tight-y. Use a soft-bristle brass brush or an old toothbrush to clean the threads in the exhaust system. Spread a little anti-seize compound onto the threads of the new sensor and install.
Replace EVAP Canister/Filter
The EVAP (Evaporative Emission Control) system prevents fuel vapours from escaping into the atmosphere. If an EVAP system canister becomes saturated with moisture, the filter cannot collect fuel vapours, causing excess fuel pressure. This can cause the CEL to light up, a loss of power and poor fuel economy. The EVAP canister/filter should last the life of your vehicle, but depending on the make and model, the filter should be replaced every 80,000 to 120,000 kilometres. On some cars you’ll need to replace the entire assembly if the canister becomes saturated.
After you locate the canister, disconnect the battery. Spray any attaching bolts with penetrating oil and disconnect the wire connector. Use masking tape to mark hoses attached to the canister before disconnecting them. Remove the mounting hardware and detach the canister. If the filter is replaceable, remove the retaining clips and install a new filter. Reverse these steps to reinstall the canister.
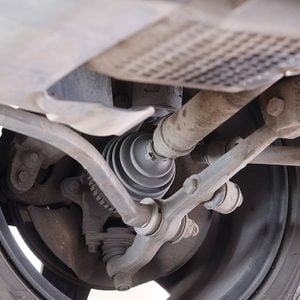
Check Under-Car Spare Tire Assembly
Nothing is worse than a flat tire. But it gets worse when the spare tire holder under your truck or SUV won’t budge due to corrosion caused by mud and road salt. First, read your owner’s manual to figure out how your spare-tire hoist system operates and to be sure you have all of the factory-supplied tools you need to lower the spare. To service the hoist, you’ll need a floor jack and jack stands to safely work under your vehicle. Spray the cable and hoist assembly with penetrating oil. Give it some time to soak into the assembly, then tap on the wheel with a hammer to help vibrate the penetrating oil into the assembly. Lower the vehicle onto the ground and try to lower the spare. If the assembly and cable are badly rusted or seized, they’ll need to be replaced by a pro.
Clean EGR Valve
The EGR (Exhaust Gas Recirculation) valve is another critical emission-control device. The EGR helps lower NOX (nitrogen oxides) tailpipe emissions by lowering combustion temperatures. This helps engines run cleaner and last longer. Although an EGR valve should last the life of your vehicle, a good cleaning every 80,000 kilometres is recommended. A dirty EGR valve, clogged with carbon, can cause rough idling, stalling, hesitation on acceleration, a failed smog/emission test and of course the dreaded CEL coming on. Use your owner’s or service manual to locate the EGR valve.
Purchase an EGR valve gasket(s) before starting. Disconnect the battery, disconnect the wire connector and spray the mounting bolts with penetrating oil. Use masking tape to mark hoses attached to the EGR before disconnecting them, then remove the mounting bolts and valve. Thoroughly clean all gasket mounting surfaces. Use a soft-bristle brush to remove excess carbon build-up. Spray or soak the EGR valve in carburetor cleaner or cleaner solvent specially designed to clean EGR valves. Scrub the EGR again and flush with clean solvent. Check the pintel valve—usually located on the underside of the valve, in the centre—it should easily move up and down after cleaning. Install a new gasket and reverse these steps to reinstall the valve.
Performing regularly scheduled maintenance and making timely repairs will save you money, ensure your driving pleasure and safety and help prevent other future costly repairs.
Next, check out the most common car problems—and how to fix them yourself.