

40 Home Repairs Anyone Can Do
Updated: Sep. 01, 2023
You can quickly master these yourself, even if you’re not very handy. They're all smallish jobs that can fend off big problems later.

Test your thermostat
Risk: If the temperature in your house isn’t what shows on the thermostat, your air conditioner or furnace could be working too hard.
How to DIY it: Every spring and fall, tape a household thermometer on the wall next to the thermostat. After about 15 minutes, compare readings. If the difference between the two numbers is more than a few degrees, try recalibrating your thermostat (follow the manufacturer’s instructions).
While you’re at it: If you don’t have a programmable thermostat, consider getting one. According to the U.S. Department of Energy, an Energy Star–rated model can save you about $180 in heating and cooling costs each year. You can buy one for about $40 and install it yourself. It’s a relatively easy job; no rewiring required. On the other hand, these are home improvement projects you should never, ever DIY.
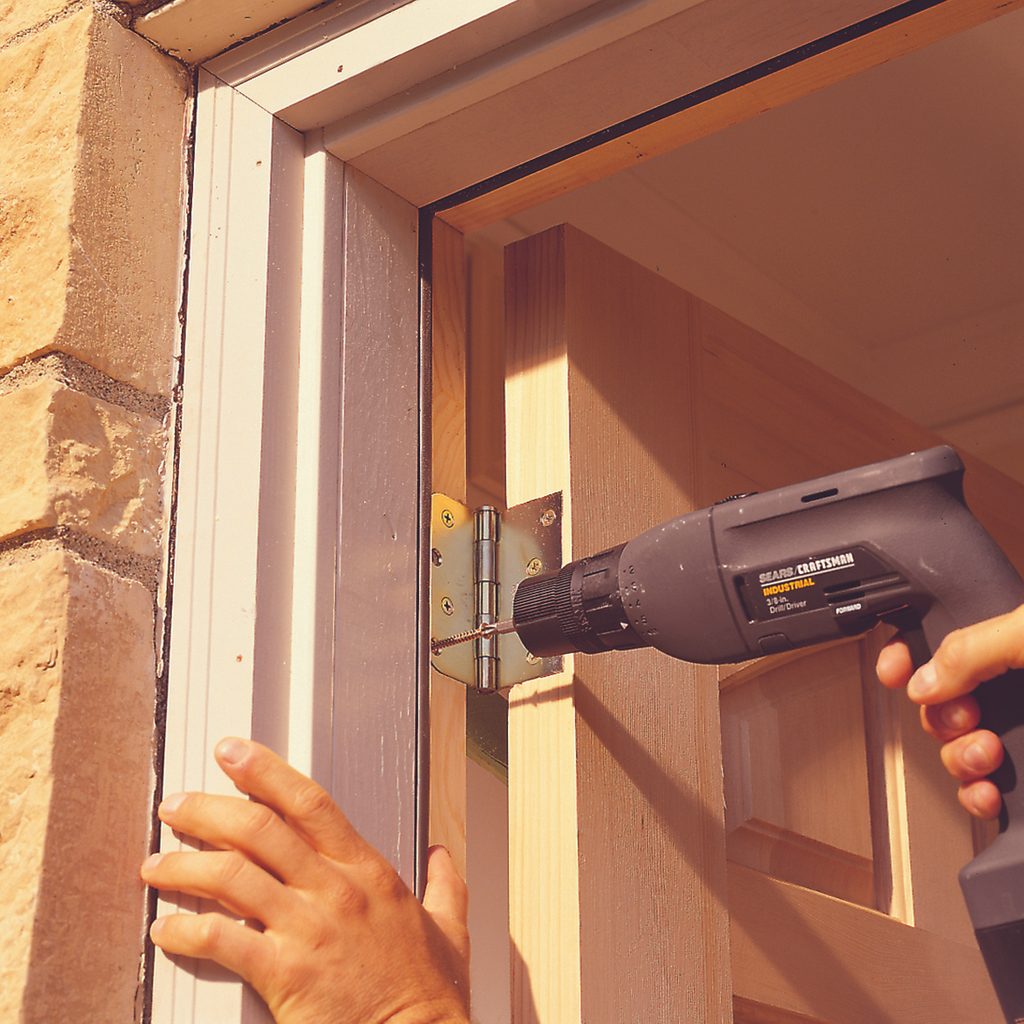
Stop air leaks under doors
Risk: Cooling or heating the world outside your home is obviously wasteful—and expensive.
How to DIY it: Most door thresholds (also called a saddle; below) adjust up and down with screws. Turn all the screws equally until the door opens and closes without much drag and the draft is eliminated.
While you’re at it: You can seal drafty windows with removable caulk, which will keep cold air outside in winter and easily peel off come spring.
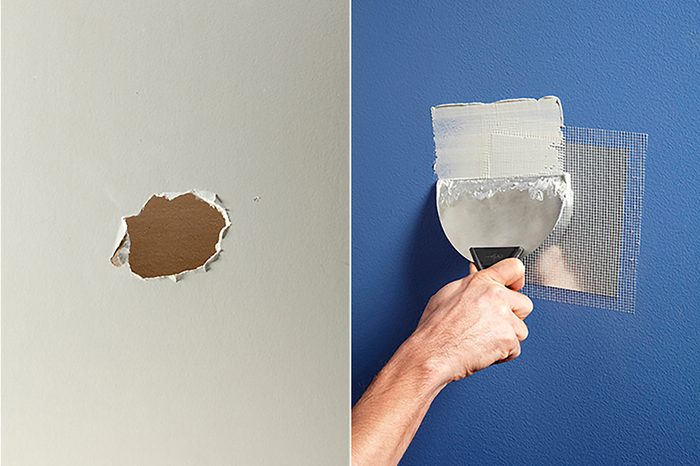
Patch a hole in drywall
Risk: Holes happen, but you don’t have to pay a pro $100 or more to patch them. The easiest way to do it yourself is with an adhesive aluminum patch, some joint compound (similar to spackle), and a taping knife, all sold at paint and hardware stores for just a few dollars.
How to DIY it: Clean up any rough edges around the hole, then stick the patch onto the wall over the hole (left). Using the taping knife, spread a layer of joint compound over it and let it dry overnight. Then spread a wider second coat, feathering out the compound on all sides to make the patch blend in. Let it dry, then apply one more coat extending 8 to 12 inches beyond the patch in all directions. After the final coat dries, sand the area with a sanding sponge (a foam block wrapped in sandpaper) until it feels smooth and even. Prime, and then paint.
While you’re at it: You can use joint compound to fill nail holes too. After filling the holes, apply a second coat and scrape the excess so the area is flush with the wall. Then prime and paint.
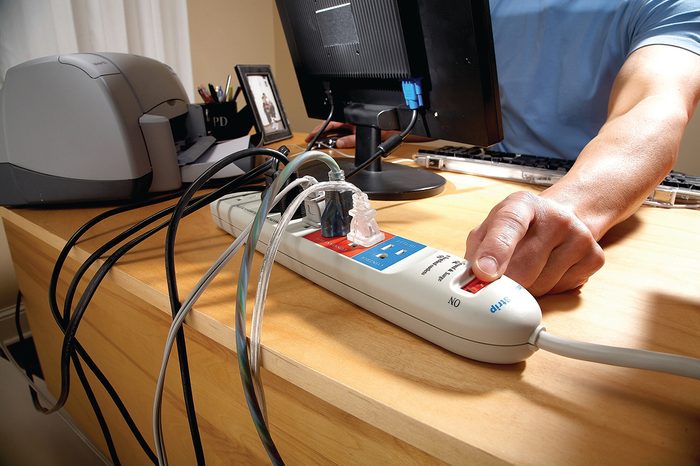
Protect your electronics
Risk: Power surges—caused by lightning, an unstable power grid, or heavy power use from energy-hog appliances such as your refrigerator or furnace—can fry your electronics. That includes anything with a digital display: your computer, TV, microwave, smart fridge, etc.
How to DIY it: Buy surge suppressors at a home-improvement store for $20 or so apiece, then plug each of your gadgets into one.
While you’re at it: Consider a whole-house surge suppressor, which protects all your devices from external surges. You’ll need an electrician to install it; expect to pay $400 to $600 for the job.

Repair carpet snags
Risk: If you have carpet with woven loops, loose fibers can easily unravel into even bigger snags. This quick fix is far cheaper than replacing carpeting, which will run you about $40 per square yard, on average.
How to DIY it: Gently tug the loose part of the carpet to find the point where it’s still attached. Snip it off as close to the backing as possible and save it. Use painter’s tape to surround the repair area. Squeeze a heavy bead of carpet seam sealer (about $6 at home centers) into the run. Then fill in the hole with the saved fiber, using a screwdriver to press it into the sealer bit by bit until the area looks like the surrounding carpet (below).
While you’re at it: Vacuum high-traffic areas at least once a week. This may sound like a no-brainer, but fabric experts stress that because dirt is abrasive, walking on dirty carpet—even if it looks clean—damages the fibers, making it stain more easily and wear out faster. Don’t miss these easy home repairs you can do yourself.
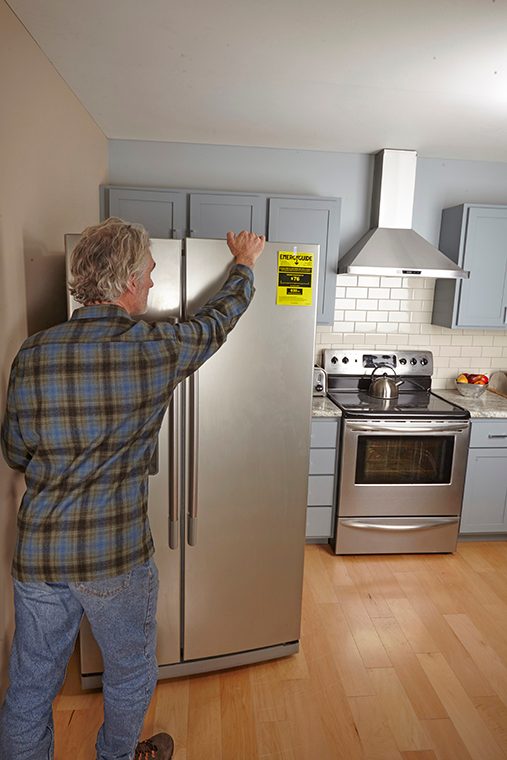
Unclog refrigerator coils
Risk: When coils are clogged with dust, pet hair, and cobwebs, they can’t efficiently release heat. That makes your refrigerator’s compressor work harder and longer than necessary, using more energy and shortening its life.
How to DIY it: Coils are located on the back of the refrigerator or across the bottom. Pull the fridge away from the wall. (Hint: Grab the sides and pull from the bottom. You may want to lay cardboard on the floor first to prevent scratching.) Clean coils with a coil-cleaning brush (about $10 at home centers), then vacuum. Do this every six months or so.
While you’re at it: Wipe down the rubber gaskets that line the inside edges of the refrigerator and freezer doors, as a poor seal can also make your appliance less efficient. Use warm water and a sponge (no detergents, which can do damage).
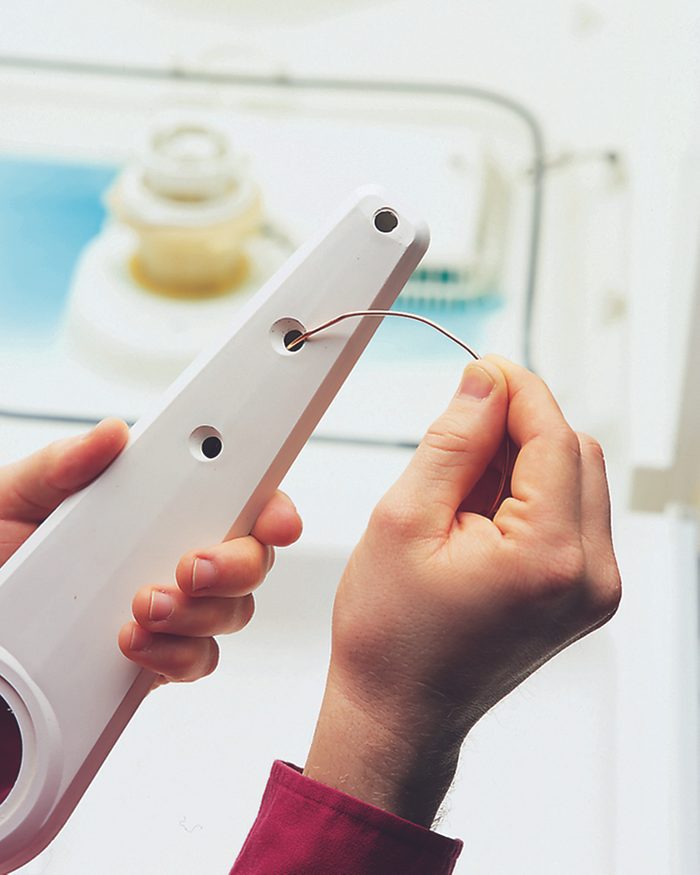
Freshen up the dishwasher
Risk: If yours isn’t doing its job, you’ll waste water by having to wash dishes again by hand or in another run through the machine.
How to DIY it: A simple cleaning often solves the problem. Start by pulling out the lower dish rack. Remove the spray arm and use a thin piece of wire to clean out the holes where water sprays through. Scoop or vacuum out any leftover food particles from the filter area, then remove the filter screen (above), if possible, and give it a good rinse.
While you’re at it: If your dishwasher smells, cleaning the filter should help. Also, wipe the door with a spray cleaner. Then throw in a bottle of dishwasher cleaner (about $5) and run the machine empty.

Degrease range-hood filters
Risk: The range hood sucks cooking fumes up and out of the kitchen. As grease splatters, it builds up and clogs the filter in the underside of the hood, keeping the fan from working as it should. This could cause your smoke alarm to go off, attract fruit flies, and leave potentially harmful pollutants from your gas or electric range lingering in the air. And if you have to replace the motor, it will cost around $200.
How to DIY it: Once a month or so, pop out the filter and run it through the dishwasher. (You can also place it in a sink full of hot water, dishwashing liquid, and baking soda and let it soak for ten to 15 minutes.) Scrub any remaining grease off with a brush, then rinse and dry the filter before putting it back.
While you’re at it: Wipe down the fan blades and the rest of the hood with an all-purpose cleaner.
Clean garbage disposal blades
Risk: Gunked-up, greasy blades won’t chop up scraps the way they’re supposed to, potentially causing backups and bad smells.
How to DIY it: Once a month, toss a bunch of ice cubes into the disposal. They’ll make a racket, but ice does a good job of cleaning the blades. Follow with a few lemon or orange peels, then run cold water down the disposal.
While you’re at it: Scrub the rubber splash guard—top and bottom—using an old toothbrush dipped in an antibacterial grease-cutting kitchen cleaner.
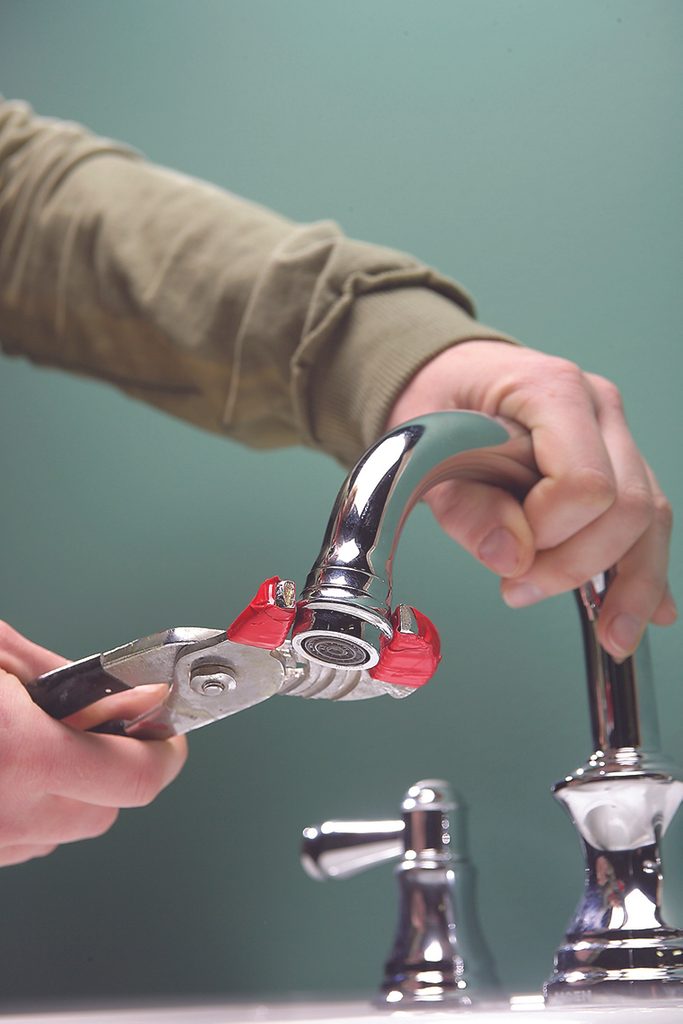
Unclog a faucet
Risk: If the flow from your faucet isn’t what it used to be, the holes in the aerator are probably plugged with mineral buildup.
How to DIY it: Close the drain stopper so small parts can’t fall in. Wrap duct or electrical tape around pliers to avoid scratching the aerator, then unscrew it (above). Scrub it with a toothbrush and rinse. If there’s still residue, soak the aerator parts in vinegar.
While you’re at it: Clean your showerhead the same way. Or try this: Fill a freezer bag with a half-and-half mixture of vinegar and water. Secure the bag over the showerhead with a rubber band or duct tape. Remove it every 15 minutes and check the flow. Don’t leave it on longer than necessary, as vinegar can damage finishes.
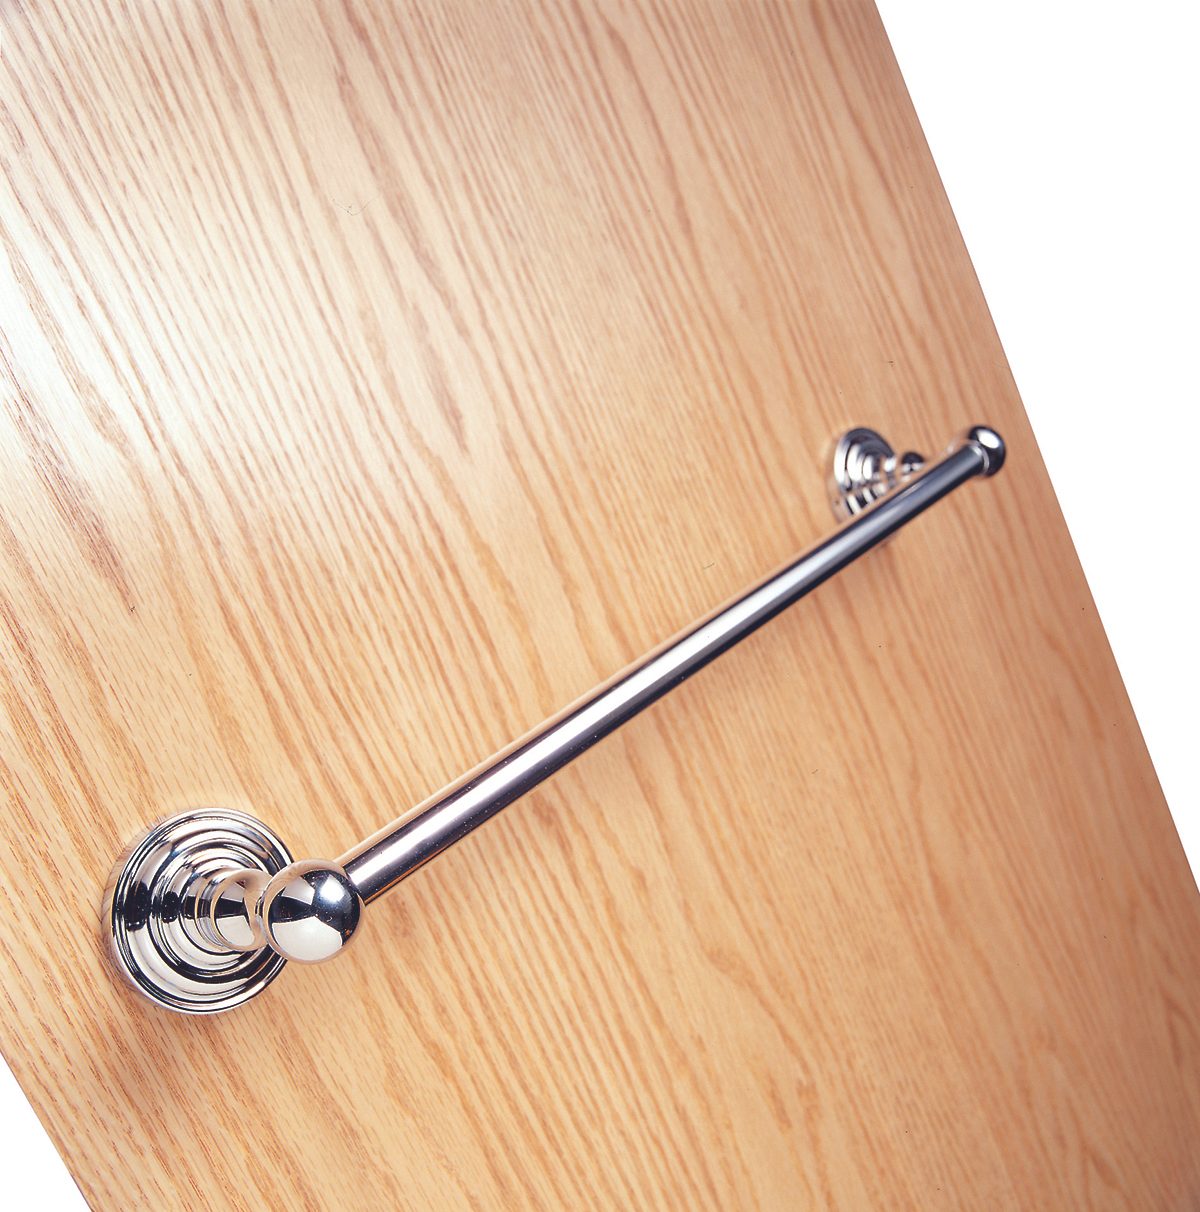
Fix a loose towel bar
Risk: Pulling the bar out of the wall can make a mess and perhaps bring you down with it.
How to DIY it: Take off the loose bar by removing the screws on each of the posts that mount the bar to the wall. (If one side is solidly attached, leave it alone.) With the mounting plate now exposed, try tightening the screws in it. If that doesn’t work, remove it. Chances are you’ll find two plastic anchors underneath. Poke them with a screwdriver and let them fall inside the wall. Replace with bigger, stronger metal toggle anchors (above), sold at hardware stores. Just drive them into the existing holes with a drill or a screwdriver, and then reattach everything.
While you’re at it: Follow the same steps to fix loose hooks and toilet paper holders. These small jobs would each cost $100 or more if you hired a handyman to do them. These ridiculous home improvement fails will make you cringe.
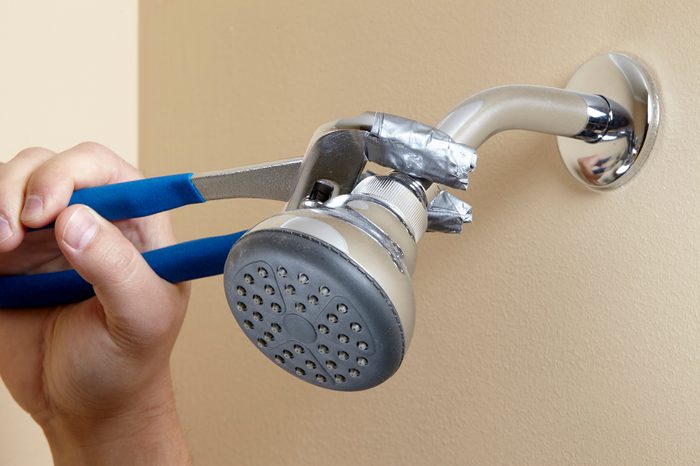
Install a low-flow showerhead
Risk: If your house was built before 1994 and still has the original plumbing fixtures, you’re using 30 to 40 percent more water than a comparable new home. Because about 70 percent of the water flowing through the showerhead is hot, that means higher heating bills too. A basic showerhead can cost just $15 and could pay for itself in reduced water and heating costs after just one month. Calculate your savings at epa.gov/watersense/watersense-calculator.
How to DIY it: Simply unscrew the old showerhead and screw on the new one. Read the directions to see whether it requires a layer of plumber’s tape to prevent leaks.
While you’re at it: Look for the WaterSense logo, which means the showerhead uses at least 20 percent less water and still performs as well as or better than other products in that category.
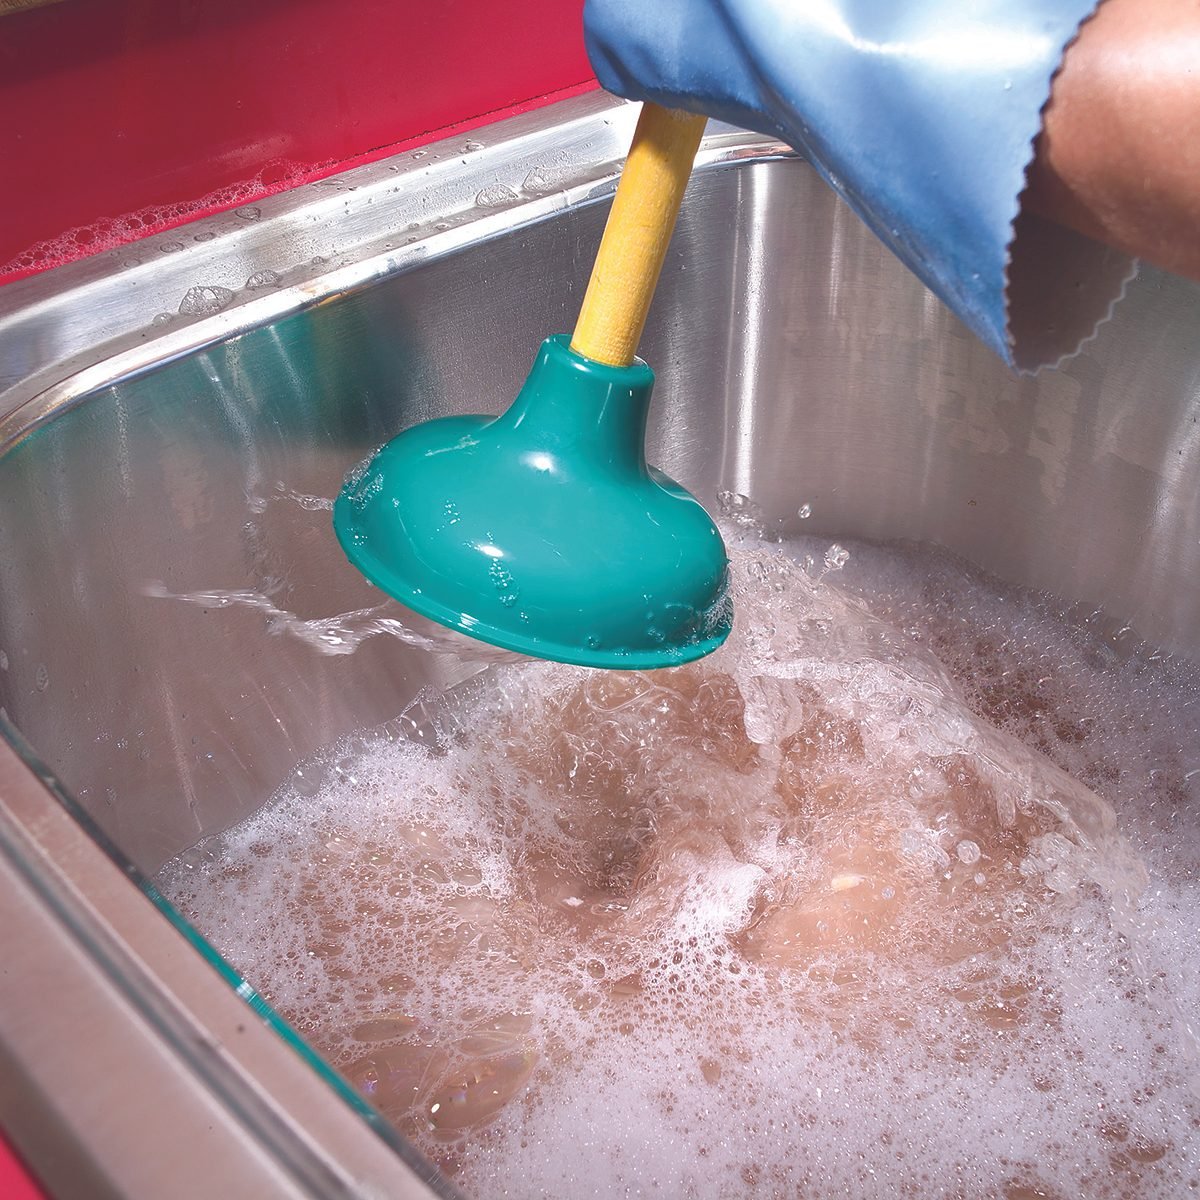
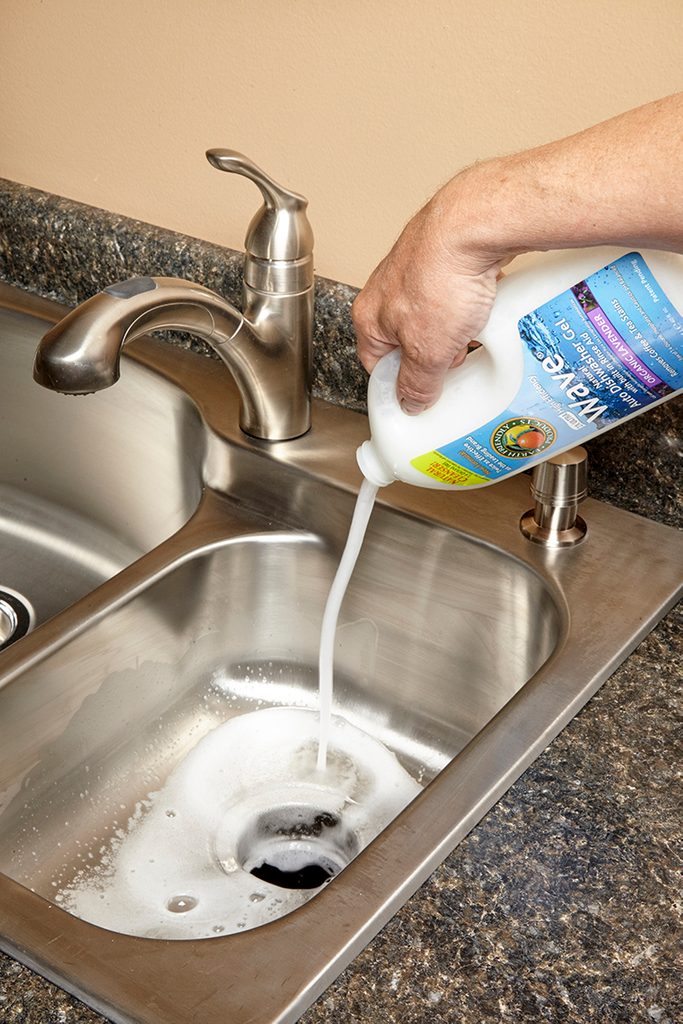
Speed up a slow drain
Risk: Clogs only get worse over time, and a slow drain can turn into a stopped-up sink or tub—and a $100-plus visit from a plumber.
How to DIY it: There are lots of ways to clear a drain, so start with the easiest one. If your sink has a pop-up stopper, remove that and clean it. If that doesn’t do the trick, fill the sink with 3 or 4 inches of water and use a plunger to plunge the sink (plug the overflow hole with a wet rag first). Still slow? Try snaking the drain pipe with a metal hanger or a pipe-cleaning tool (sold at hardware stores for about $2).
While you’re at it: Mix together 1 cup baking soda, 1 cup salt, and ¼ cup cream of tartar, and store it in an airtight, childproof container. To keep your drains clog-free, pour ½ cup of this mixture down each drain every few weeks, followed by a quart of boiling water.
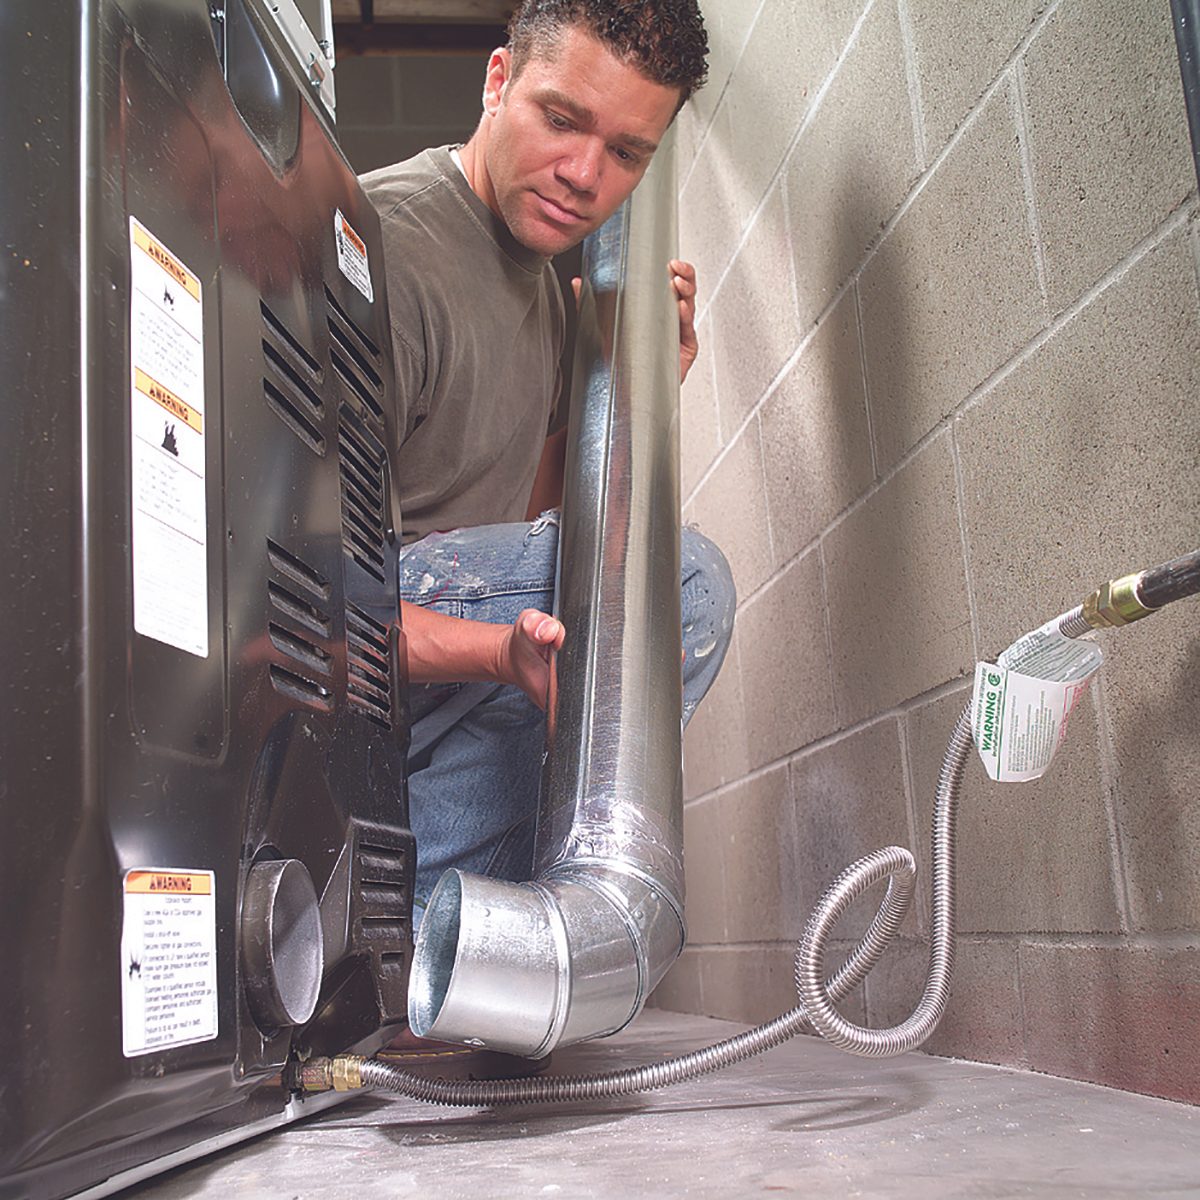
Clean your dryer vent
Risk: Lint buildup near your clothes dryer’s motor and heat source (gas burner or electric heating element) can ignite, causing a fire that could spread to the rest of your house. Besides, a clogged dryer takes longer to dry clothes.
How to DIY it: You should already be emptying the lint trap before every load of laundry. To do a thorough cleaning of the dryer and its vent duct system, unplug the machine (and turn off the gas valve if it has one). Pry off the access panel on the front (try a putty knife covered with duct tape to prevent scratching) and vacuum around the motor and heating element (above). Then carefully disconnect the vent duct tubing from the back of the dryer and use a dryer vent brush (about $10 at home centers; look for one that also cleans refrigerator coils) to pull out any accumulated lint. Aim to do this at least once a year.
While you’re at it: Vacuum behind the dryer regularly, and take the lint filter out every so often and run it under the faucet. If water doesn’t run through, use a stiff brush to scrub the filter with hot water and a little laundry detergent.
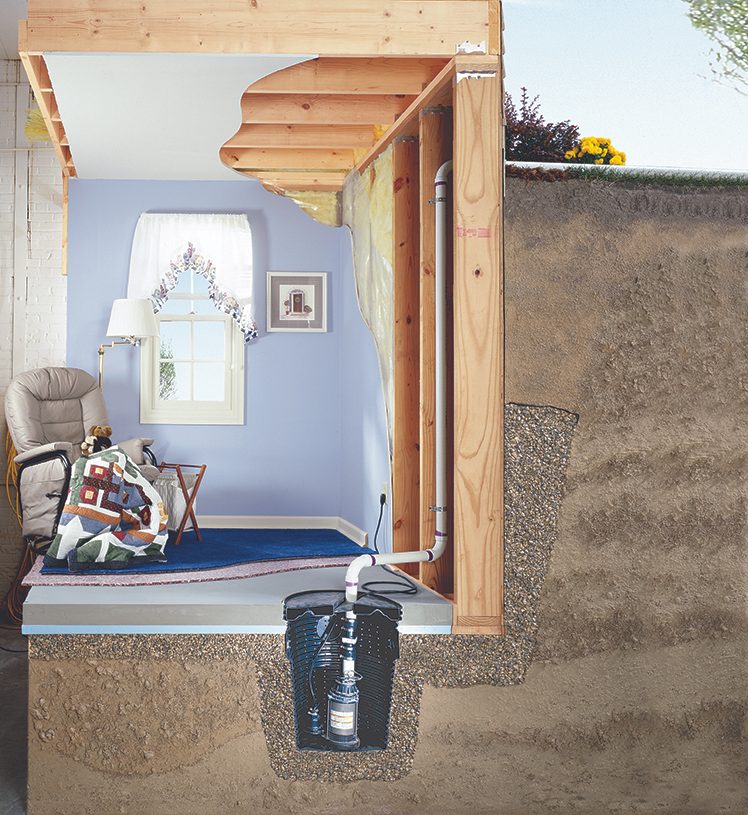
Test your sump pump
Risk: Your basement could flood. Most homeowners don’t discover that their pump is broken until they need it and it fails.
How to DIY it: Remove the basin cover and dump in a few buckets of water. If the pump doesn’t run or eject the water, you’ve got trouble that will require professional help.
While you’re at it: For less than $20, you can get a battery-powered alarm that goes off if water reaches the top of the basin. But that helps only if you’re home, so consider spending more (about $100) for a system that contacts you if the pump fails.
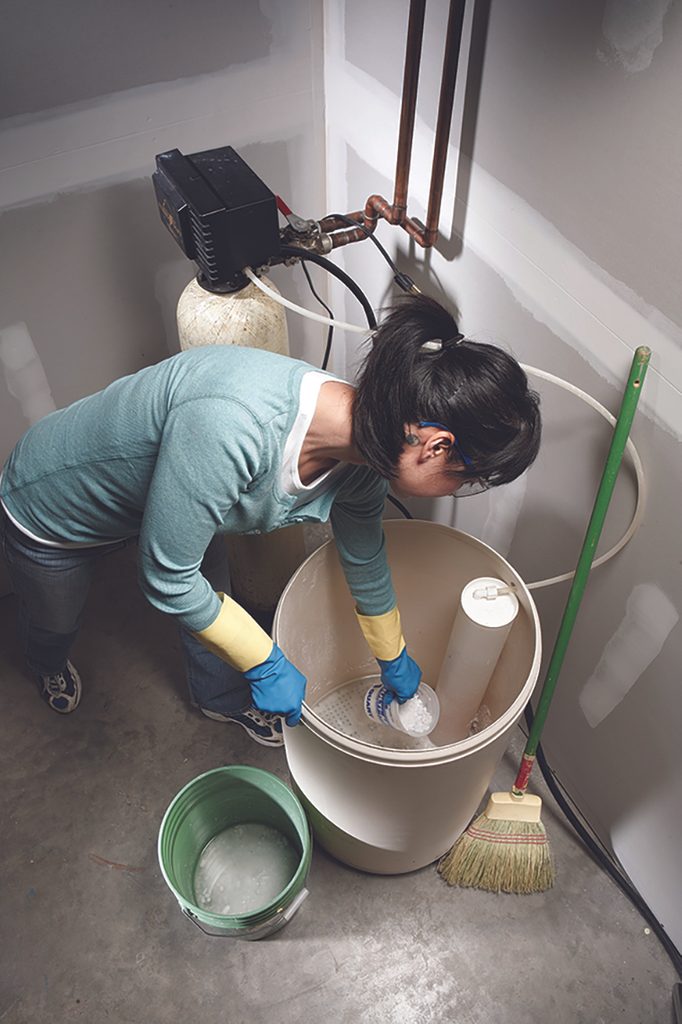
Scoop out your water-softener tank
Risk: Water-softener salt contains some impurities that can accumulate in the bottom of the brine tank, clogging it and shortening the life of your system.
How to DIY it: Wait until the salt level is low and scoop out any gunk with an old plastic container. Once a year is often enough.
While you’re at it: Don’t cheap out and use rock salt instead of water-softener salt, even though rock salt costs half as much. It contains far more impurities that will clog up the works, and you could wind up needing to spend $600 or more for a new water softener.

Shut off the water before you go on vacation
Risk: Every insurer has stories like this one: The homeowners left town Friday and returned Sunday evening to find a burst pipe, an overflowing toilet, or another plumbing fiasco.
How to DIY it: Simply turn off the main water valve (usually located in the basement).
While you’re at it: Any appliance that uses water has a shutoff valve. But when valves go untouched for years, mineral deposits can make them impossible to close. Before that happens, locate the valves for your washer, ice maker, water heater, etc., and turn the handle (clockwise, about a quarter turn) every year or so (more often if your water is very hard), and then turn it back. Here are some more things all smart homeowners do before going on vacation.
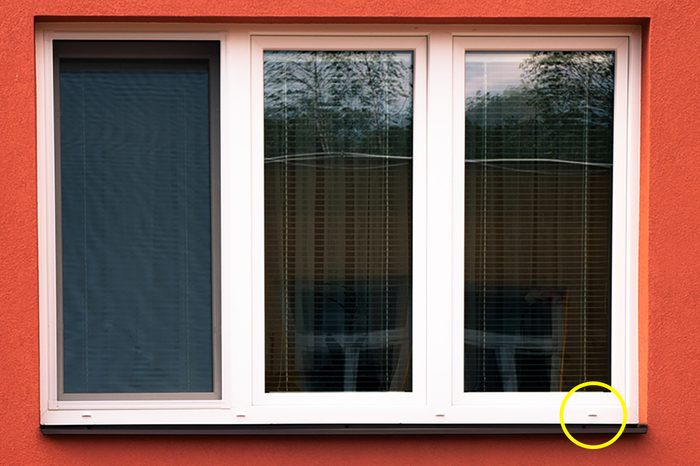
Clear window weep holes
Risk: If these holes, found in the bottom of the exterior frame of many sliding windows and vinyl replacement windows (below), get plugged with bugs or debris, they can’t do their job of draining away collected rainwater.
How to DIY it: Pour water into the track or spray the outside of the windows with a hose. If you don’t see a steady stream of clean water exiting the weep hole, poke a wire hanger into the hole or spray it with compressed air. Keep testing and cleaning out the hole until water runs through.
While you’re at it: Check basement window wells for any collected water, leaves, or other debris, and clean them out. Or protect them with window covers (around $10 at home centers).
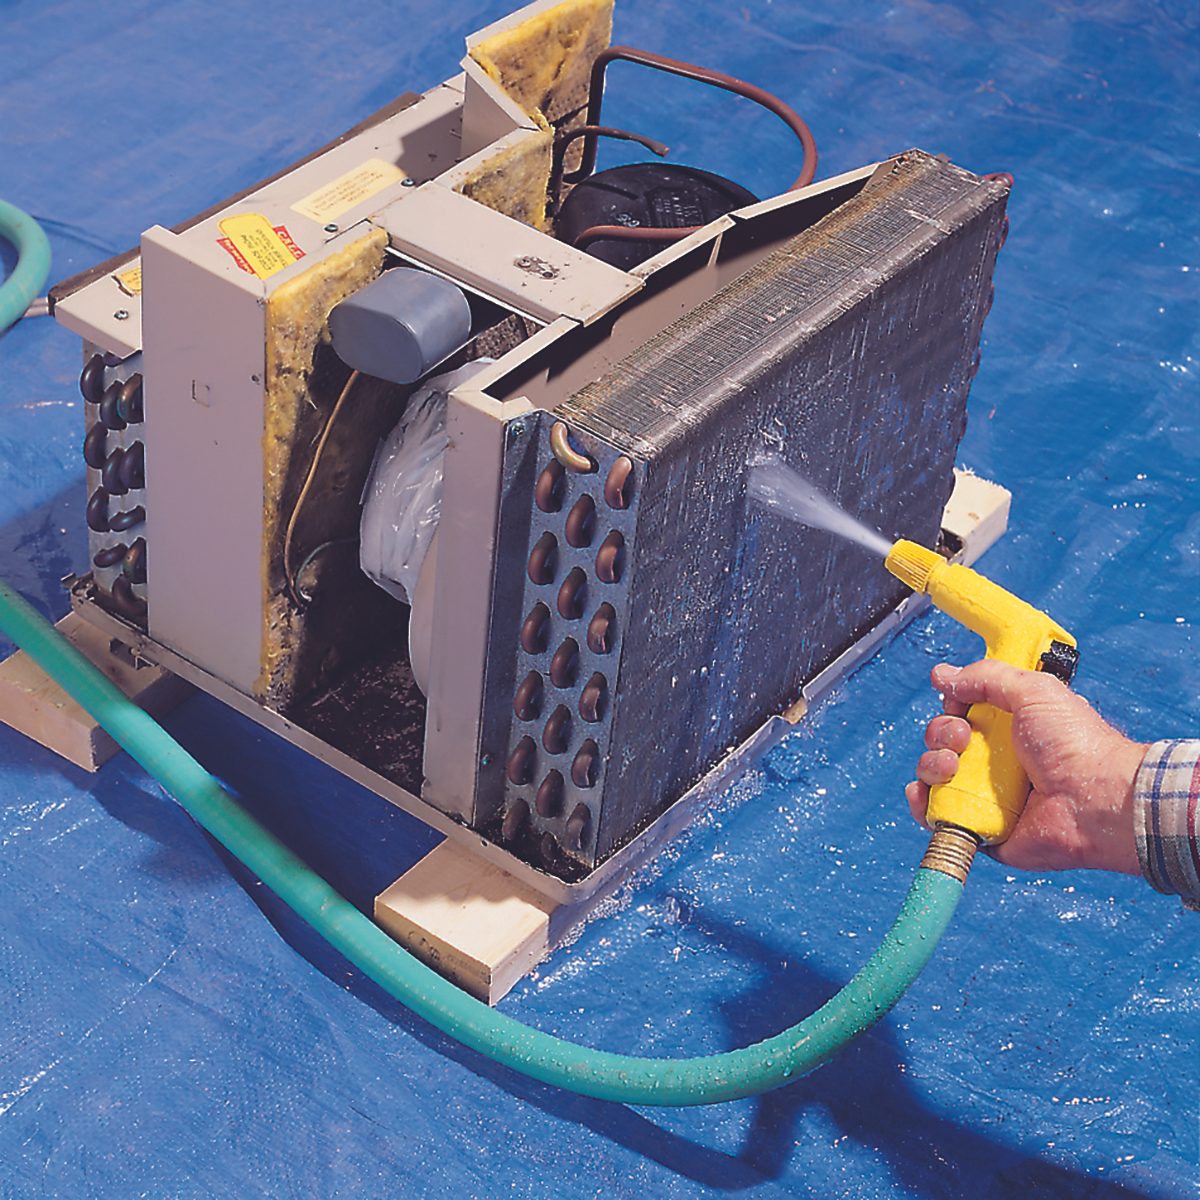
Hose down your central AC unit
Risk: The outside unit for your central air-conditioning is basically a fan surrounded by a wall of tubing and tiny fins. If those fins are plugged with dirt and debris, air can’t flow through properly. A neglected air conditioner uses 10 to 30 percent more energy.
How to DIY it: Turn it off by opening the disconnect box (typically located on the outside wall near the unit) and pulling out the disconnect block inside (above). Now take a good look at the unit. If the vents are caked with fuzz from dandelions or cottonwood trees, vacuum the vents. Then rinse the unit with a hose using moderate pressure (the flimsy fins might bend under strong pressure). As you spray, peer down into the unit. You should see water streaming through. If not, the fins are still clogged, so keep rinsing.
While you’re at it: Change AC filters monthly during warm weather. Ditto for furnace filters during colder months, depending on what type you have (check recommendations in your owner’s manual).
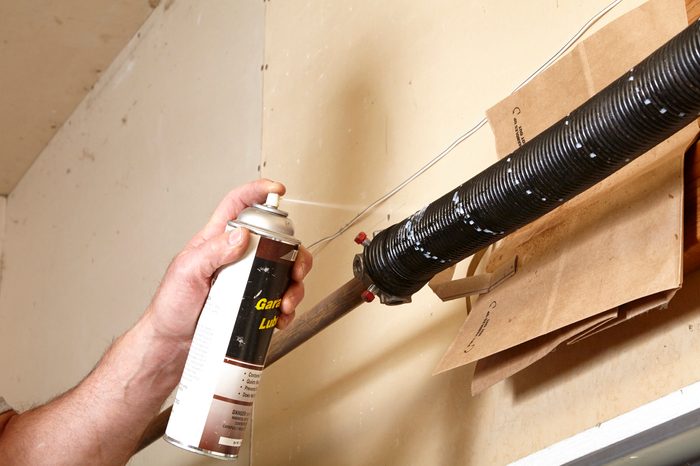
Lube garage door springs
Risk: All springs will eventually break because of metal fatigue and/or corrosion, but lubricating them at least twice a year will make them last longer. A new spring costs $125 or so.
How to DIY it: This job can be messy, so protect nearby surfaces by covering them with plastic or cardboard. Spray the springs with garage door lubricant (about $7 at home centers). Don’t use oil, grease, or other lubricants. They may be cheaper, or you may have them on hand already, but they won’t work as well and tend to pick up dust and grit—just what you don’t want on moving parts.
While you’re at it: Spray the rollers, hinges, and track too. Next, try these easy projects you can do in a weekend to increase the value of your home.