

How to Change Your Car’s Serpentine Belt
 Updated: Aug. 06, 2019
Automatic belt tensioners, standard in most cars now, make changing a serpentine belt a simple DIY repair. Follow the clear photos and step-by-step instructions and you’ll be done in 15 minutes!
Changing Your Car’s Serpentine Belt
If you’re old enough to remember the good old days when you changed your own fan belts, then you can also remember the bruised knuckles and cursing that went along with it. And to make matters worse, there were often two or three belts to change.
Now, instead of separate belts for each component, most cars today use a single wider, multi-grooved “serpentine” belt, named for the way it snakes around multiple pulleys.
Serpentine belts are easy to change because today’s automatic belt tensioners eliminate the need to loosen bolts or pry components into position for retensioning. Just rotate the tensioner, remove the old belt and install a new one. When the belt ribs are seated into the pulley grooves, release the tensioner and you’re done.
1. Check the tensioner for excessive movement
If your tensioner is bad and it’s one of the more difficult styles to replace, you won’t want to waste your time changing the belt. The shop would just have to remove the belt again to replace the tensioner. So check the tensioner first with these three tests.
The first test is a visual inspection with the engine running to assess the dampening feature of the tensioner. Pop the hood, start the engine and turn on the AC. Then shine a light on the belt tensioner and observe the tensioner arm roller for excessive movement.
A “good” tensioner arm should exhibit just a slight vibration with about 1/32 in. or less of arm movement. And the belt should run smoothly with no visible vibration. If the tensioner arm exhibits a jerky vibrating motion, the belt vibrates, or the tensioning arm moves 1/4 in., the tensioner is bad.
2. Check the tensioner for smooth rotation
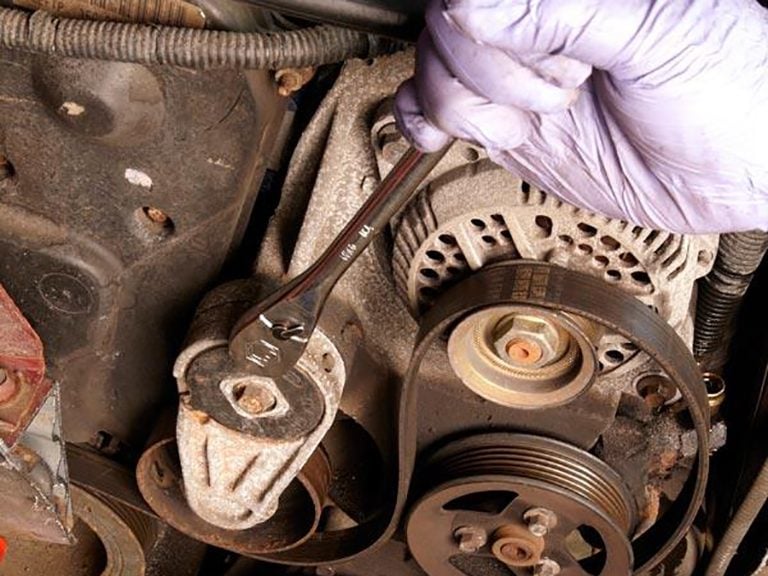
If it passes the visual test, move on to the “crank” test. The tensioner arm should rotate smoothly during crank and release with no binding. If the travel isn’t smooth, replace the entire tensioner. Snap a long-handled ratchet or a serpentine belt tool into the square 1/2 in.-drive or 3/8 in.-drive opening. Or use a socket on the hex-shaped protruding nut. Slowly rotate the tensioner arm as far as it will turn. Then release the tension. Feel for binding and creaking in both directions.

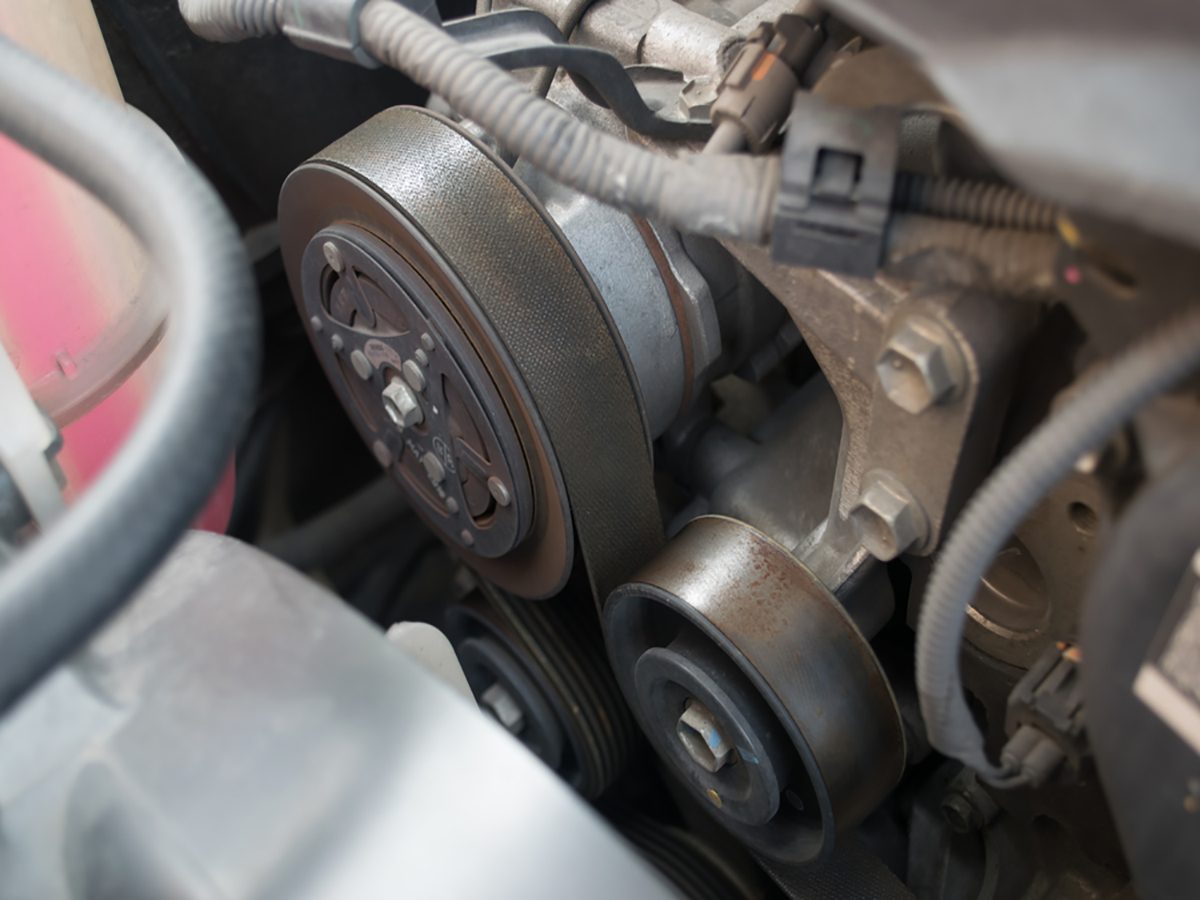
3. Check the pulley/roller
Next, check the condition of the tensioner arm pulley/roller. If the pulley or roller exhibits any roughness, binding or noise, that is also cause to replace the entire tensioner. Rotate the tensioner and slide the belt off the pulley/roller. Then turn the pulley/roller and feel for resistance, binding and roughness. Then spin it and listen for rumbling. If it doesn’t spin spin smoothly or has a rough surface, replace it.
4. Measure wear with a gauge
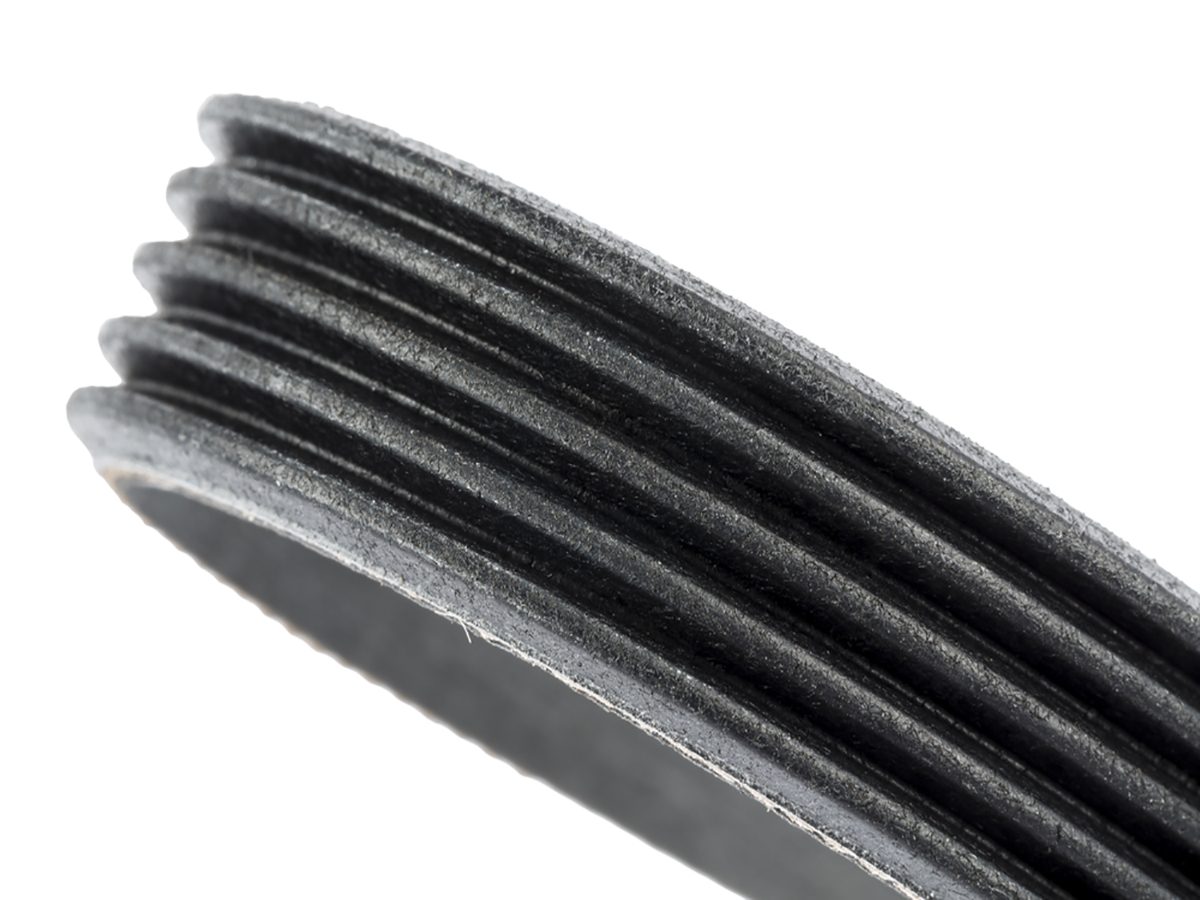
First-generation serpentine belts were made from a nitrile compound that cracked with use. If your belt has cracks in three or more adjacent ribs within a 1-in. span, or has four or more cracks per inch on a single rib, it’s time to replace it. You also need a new belt if you notice any of these conditions: chunks missing from the rib area, torn or frayed fabric, glazing on the belt’s back side or debris trapped in the ribs. Or, press a gauge into a belt groove. As long as the gauge sits above the ribs, the belt is good. If it slides down so it’s even with the rib, the belt is worn and must be replaced.

5. Measure wear with an app
Starting with the 2000 models, carmakers switched from nitrile to ethylene propylene diene monomer (EPDM) belts. EPDM belts last much longer and don’t crack or lose chunks the way nitrile belts do. But they do wear, and that wear is much harder to detect. You can measure EPDM belt wear with a gauge or a smartphone app. Both products are available for free from Gates Corp. (go to gatesprograms.com/beltwear and click on either tool).
In most cases, you’ll want to use the plastic gauge to measure your belt. However, if you have a smartphone and enough maneuvering room to shoot a close-up photo (engine off), let technology do the work for you. The app works by analyzing the width of the ribs compared with the width of the grooves. Draw a line on the belt ribs with a silver permanent marker. Then shoot a photo with your smartphone. The belt wear app will tell you if the belt is good or bad.
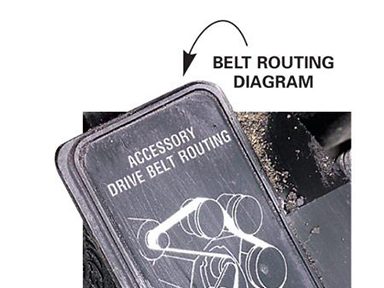
6. Follow the belt routing diagram
Examine the decal that shows the belt routing. If yours doesn’t have one, draw one before you start the job.
Note: If your car requires the removal of an engine mount in order to remove the serpentine belt, or the belt’s just nearly impossible to get at, we recommend you leave the job to a professional.
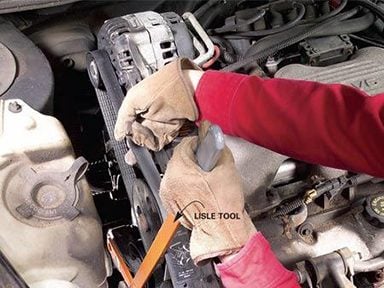
7. Remove the belt
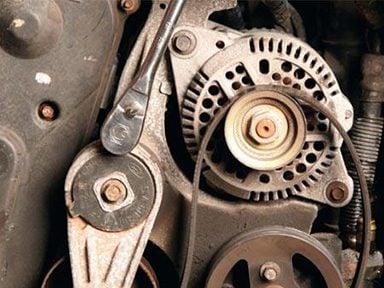
You can replace a serpentine belt with ordinary hand tools. But we don’t recommend it. The spaces are often tight and the belt-driven devices difficult to reach. Using a serpentine belt tool to loosen the tensioner and a belt placement tool to position the belt, we completed the entire job in less than 15 minutes, without breaking a sweat (or a knuckle). The serpentine belt tool comes with an assortment of sockets, making it the perfect choice for all the cars in your family. The two extension bars can be configured to reach the tensioner at the proper angle, and the extra-long handle provides maximum leverage so you can release the pressure easily. The belt placement tool allowed us to remove and properly place the new belt without reaching down into the pulley area.
Using the serpentine belt tool, rotate the tensioner to remove belt tension. Remove the old belt. Slowly release the tensioner. Rotate the tensioner and slide the belt off any smooth pulley. Then release the tensioner and finish removing the old belt.
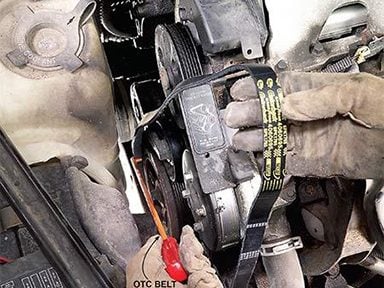
8. Place the new belt
Many tensioners are readily accessible and attach to the engine with a single bolt. To replace that style, simply remove the belt and then the retaining bolt. Pull off the old tensioner, noting the location of the locking pin on the back. Then slide the new unit into place, lining up the locking pin with the hole in the engine. Hand-tighten the bolt and then tighten it with a torque wrench to the factory specifications shown in your shop manual.
Or, using the belt placement tool, route the new belt around the belt path. Rotate the tensioner again while you load the belt around it. Wrap the new belt around the crankshaft pulley, then around the grooved pulleys. Finish the job by sliding the belt onto a rounded, non-grooved roller. Double-check to make sure the belt is aligned with all the pulleys and that it follows the correct path. Slowly release the tensioner.
Check out more do-it-yourself car maintenance tips!
Explore Reader’s Digest Cars.