

How to Change Front Brake Pads: Step By Step Instructions
 Updated: Sep. 16, 2019
Changing front brake pads is simpler than replacing rear disc brakes, and if you have experience doing basic repairs the job will only take about four hours.
Learn How to Change Front Brake Pads Yourself
If you’ve done some basic wrenching like replacing starter motors, alternators or even mufflers, you’re completely capable of doing your own brake job. We’ll show you how to change front brake pads on a late-model vehicle and get you up to speed on the newest techniques. The job takes about four hours and will save you about $350 in shop labour.
(Rear disc brakes are far more complex, so that’s a job you should leave to the pros.)
A car that’s used mostly for city driving will need new front brakes and rotors about every 65,000 km. But cars that are driven mostly on highways can go almost 130,000 km before the front brakes wear out.
Get the Parts and Gather the Tools
A shop can determine whether a rotor can be reused as-is or resurfaced with an on-car brake lathe. Since you don’t have access to an on-car lathe and probably don’t own a brake micrometer, just plan on buying new rotors and brake pads. Choose the premium offerings from a name brand manufacturer to get the longest life and best service out of your new brakes. (Bendix, Raybestos, EBC, Wagner, Brembo and Akebono are examples of well respected brands.) Buy the same type of brake pad that was installed at the factory—the auto parts store has that information. (Here’s why you should never use cheap auto parts.)
You’ll also need a small packet of synthetic high-temperature brake grease, aerosol brake cleaner, polishing pads, a tube of nickel anti-seize and a packet of blue and red thread locker (Loctite is one brand).
Next, gather your socket set, torque wrench and screwdrivers, along with a drill and wire wheel, an 8-inch C-clamp, a small spool of mechanic’s wire, two feet of 1/4-inch vinyl tubing and a jar to hold the brake fluid that bleeds out as you compress the caliper piston.
Work On Brakes On One Side At a Time
Brakes on late-model vehicles include clips and springs that must go back in exactly the same position. If you remove both brakes at the same time and forget how to reinstall the small parts, you won’t have the other side to use as a reference (a common DIY mistake). So replace the brakes one side at a time.
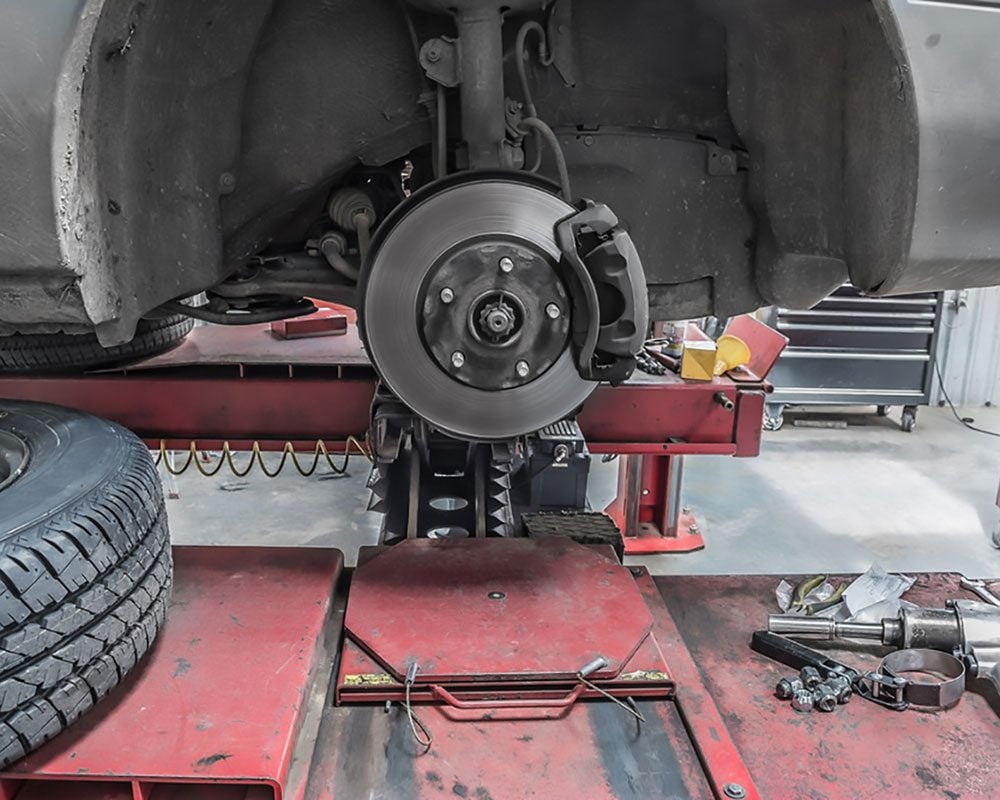
Start by loosening (not removing!) the lug nuts while the tire is on the ground. Raise one side of the vehicle with a floor jack or spare-tire jack. (Here are tips on how to use a car jack safely.) Then place a jack stand under the engine cradle for added safety. (Check out this advice on how to buy a car jack and jack stands.) Then remove the tire and proceed with the brake job.
Remove the Caliper
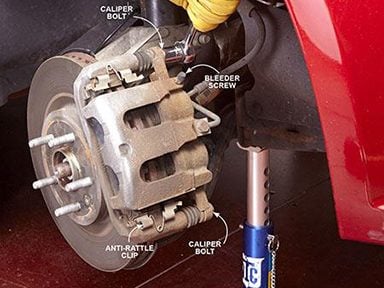
Remove the wheel. Then loosen the caliper retaining bolts with a socket and ratchet. Next, loosen the caliper bleeder screw and lightly reseat it. You’ll loosen it again when you retract the caliper piston. Then lift the caliper off the rotor and set it on top of the caliper bracket.
You Might Need Hex- or Star-Shaped Sockets
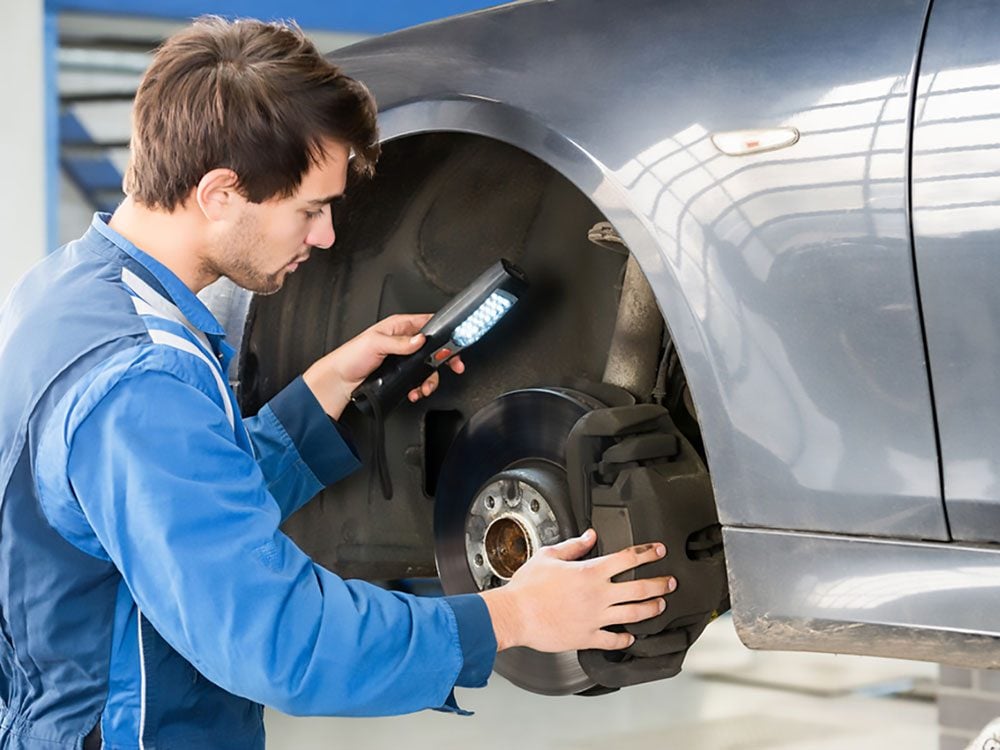
The brake caliper bolts on older vehicles usually have an internal hex or internal star-shaped head. You won’t have enough leverage to remove an internal hex-head caliper bolt with an ordinary L-shaped Allen wrench. So before you begin the job, turn the front wheels all the way to one side and crawl under the vehicle with a light. Check the caliper bolts to see if they’re internal hex or internal star. Then buy a complete set of the correct sockets to have on hand when you start the job.
Here are 20 essential tools no DIY mechanic should be without.
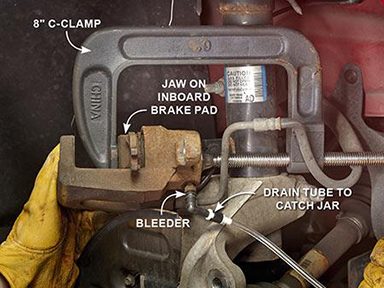
Retract the Caliper Piston
Connect one end of the drain tube to the bleeder screw and place the other end in a catch jar. Then open the bleeder and force the caliper piston back into the bore with the C-clamp. When you’re done, tighten the bleeder and disconnect the drain tube. Secure the caliper to the coil spring or strut with mechanic’s wire while you complete the brake job. Never let the caliper dangle by its hose.
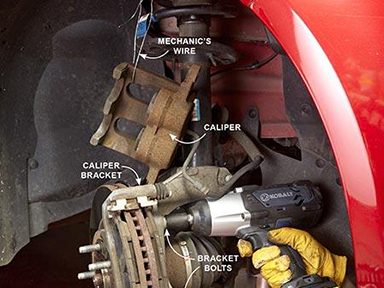
Unbolt the Caliber Bracket
Next, remove the caliper bracket so you can replace the rotor. The caliper bracket bolts are quite large and are usually coated with thread locker. So you’ll need a large ratchet or breaker bar or an impact wrench to remove them.
As you remove the bolts, note whether they’ve been coated with red or blue thread locker. Recoat the threads with the same type when you reinstall them.
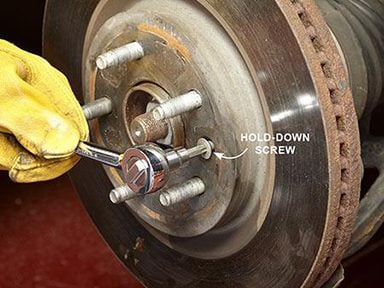
Remove the Rotor Hold-Down Screw
Many car-makers secure the rotor to the hub with a screw, and it rarely comes out without a fight. So assume it’s rusted in place and soak it with spray rust penetrant before you try to remove it. Otherwise you can strip the head, and you’ll be forced to drill it out. Let the penetrant work for about 15 minutes.
Smack the rotor hold-down screw with a hammer to shock it. Then insert a Phillips or star socket. If the screw doesn’t loosen, try tightening. Rock the socket back and forth until it comes out. Then remove the screw and pull the rotor off the hub.
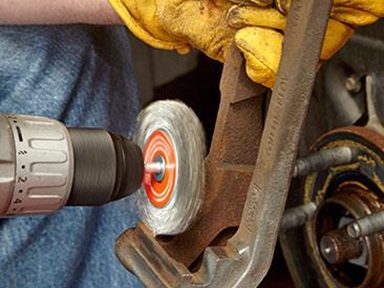
Clean Off the Rust
Brake noise, vibration, harsh braking and brake pedal pulsation are the most common brake complaints, and they’re all caused by improper cleaning and installation procedures. So trust us on this point and follow all of our cleaning and greasing instructions.
Remove the old anti-rattle clips and toss them (they can’t be reused). Toss the old anti-rattle clips. Remove all traces of surface rust in the pad slide areas using a wire brush or a drill with a wire wheel. Coat the areas with a light film of brake grease. Install new anti-rattle clips. Then clean all the rust off the caliper bracket.
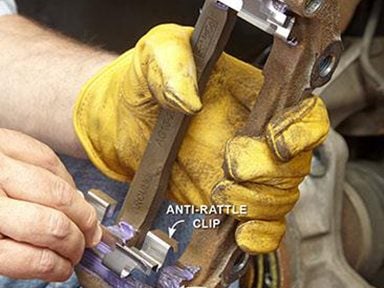
Add the Hardware
Next, clean the caliper bolts with aerosol brake cleaner and check for corrosion. Replace the bolts if they’re corroded. Install new anti-rattle clips. Apply a very light coat of high-temperature synthetic brake grease to the caliper bracket. Then snap in the new anti-rattle clips.
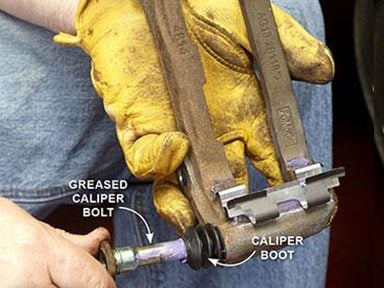
Lube and Install New Boots
Apply a coat of high-temperature synthetic brake grease to the bolt and the bores in the caliper bracket. Seat new boots into the caliper bracket and slide in the greased caliper bolts until the boots seat on the bolt recess. Then grease the bolts and install new rubber boots.
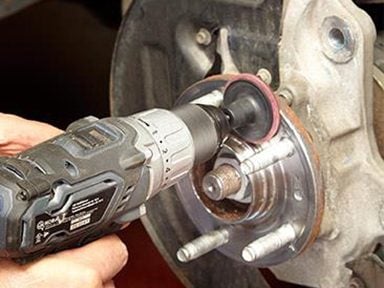
Polish the Hub
Then clean all the rust and debris from the wheel hub. All it takes is .003-inches of rust or crud on the hub to cause brake pedal pulsation and ruin a perfectly good brake job. So take this part seriously. Chuck a mildly abrasive polishing pad into your drill and clean the wheel hub well. Spin the polishing pad around the face of the wheel hub. Then clean the rust off the centre of the hub. Wipe off the debris and apply a light coat of nickel anti-seize to the face to minimize future rust buildup. (Don’t get anti-seize on the wheel studs.)
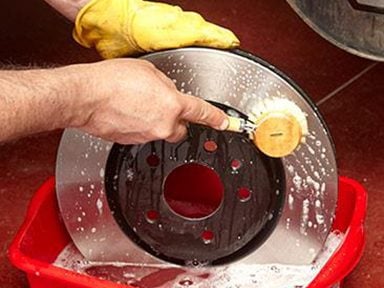
Wash the Rotor
Next, clean the new rotors. Use aerosol brake cleaner to remove the rust preventive coating. Then dunk the rotor into a tub of hot soapy water and scrub the entire surface with a stiff brush. Rinse with clear water and dry with paper towels. It’s a pain, but skipping this step can also ruin your brake job.
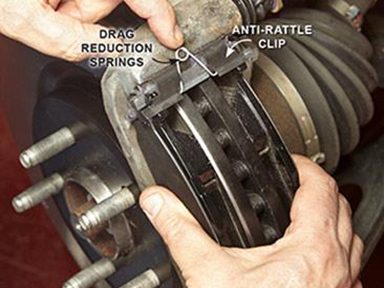
Add the Springs
Slide the rotor onto the hub, aligning the rotor retention screw hole with the threaded hole in the hub. Tighten the screw to specs. Next, apply the correct thread locker to the caliper bracket bolts and reinstall the caliper bracket. Apply a thin film of brake grease to the back side of the noise reduction shims, slide them into the caliper bracket.
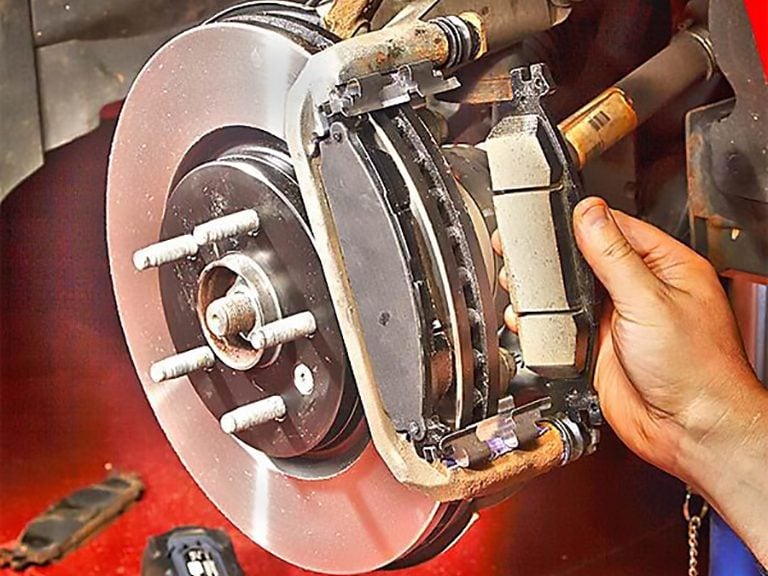
Slide the pads into the anti-rattle clips. Squeeze the pads together as you install the drag reduction springs. Make sure they go back in the same way they came out. Continue squeezing the pads and slide the caliper over the pads. Reinstall the caliper.
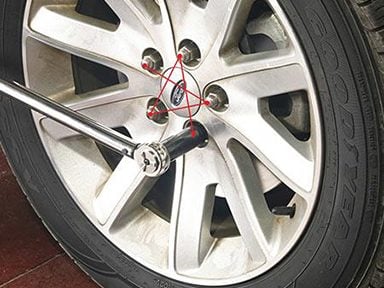
Torque the Lugnuts
Now that you’ve followed all the cleaning and greasing tips, don’t wreck your work by using an impact wrench or ratchet to tighten the lug nuts. They must be tightened to the same torque to maintain the critical rotor-to-hub fit. If they’re torqued unevenly, the rotor will cock slightly and you’ll get pedal pulsation.
Remove the jack stand and lower the vehicle until the tire just touches the ground. Set the torque wrench to one-half the specified torque and tighten the lug nuts in a star pattern. Then set the wrench to the full torque and tighten again in the same star pattern. Lower the vehicle the rest of the way and remove the floor jack.

Caution! You Won’t Have Immediate Braking!
You won’t have immediate braking at this point, so don’t start the engine or put the car in gear until you perform this next step.
Depress the brake pedal several times with the engine off until you get a firm pedal. Then go for a test drive at slow speed to be sure the brake pads work. Finally, perform the “bedding” procedure recommended by the brake pad manufacturer (see “How to Break-in Brake Pads” in next card).
Find out the six things every car owner should look out for when checking brakes.

How to Break in Brake Pads
Brake pads must be correctly “burnished,” or “bedded,” for proper operation. This step transfers a thin film of friction material onto the rotor and polishes the face of the brake pad. Consult the brake pad package insert for the recommended procedure. Most manufacturers recommend this 50-30-30 method: You accelerate to 50km/h and gently brake to a complete stop. Wait 30 seconds for the brakes to cool. Then repeat the procedure 30 times. (Perform the break-in procedure in a quiet parking lot or on a traffic-free road!) If you skip this critical break-in step, you might experience shorter brake pad life, along with noise and vibration.
Check out 100 more car repair tasks you can do on your own.