

Oil Change: How to Do-It-Yourself
 Updated: Mar. 20, 2019
A regular oil change can prolong the life of your car. Save time and money by doing this 20-minute oil change yourself.
How to Change Oil Yourself
Getting a regular oil change is the single best thing you can do to prolong the life of your car’s engine. And if you do this simple 20-minute job yourself, you can save money and know that it was done right.
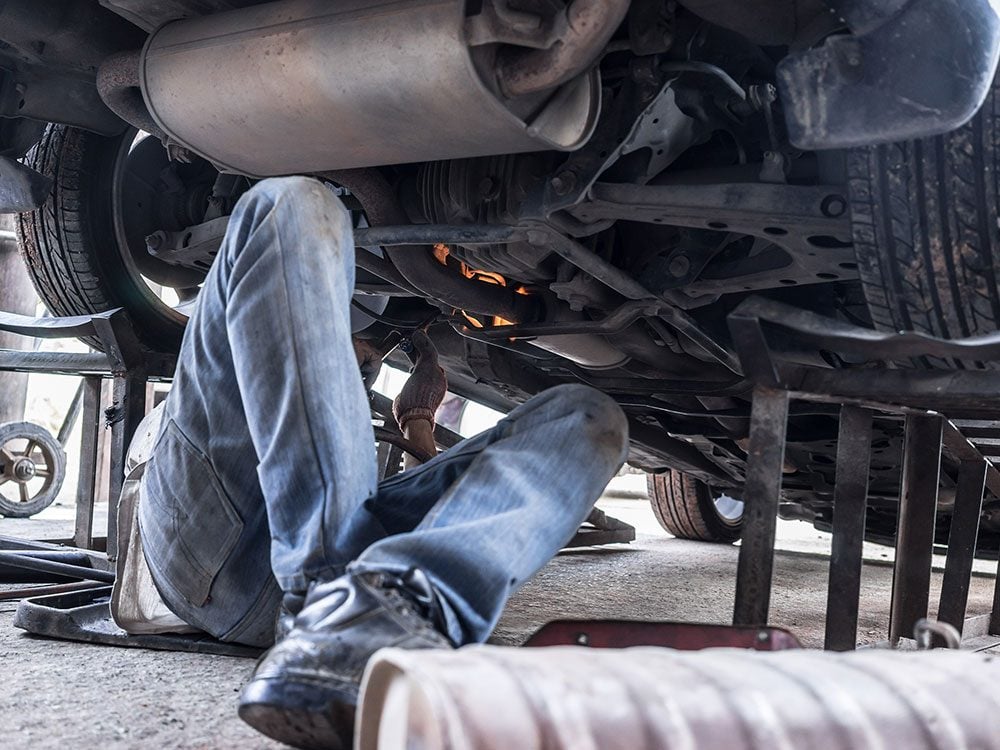
However, it’s not a task for everybody. Most of the job is easy, but you’ll probably have to raise your car to get at the drain plug. You’ll need a sturdy set of ramps for your car or a floor jack and safety stands designed for your car’s weight. Some people have a phobia about getting under their car. If you’re one of them, stop here and make an appointment at a lube shop. (Here’s advice on how to buy a floor jack and jack stands.)
Also, before you start, look under the car and make sure you’ll be able to get at the filter to remove it. Some makes of cars have awkward setups that make it nearly impossible to get at and remove the filter with ordinary tools. If that’s the case, call for an appointment and pay the $30 fee. Check your owner’s manual for the vehicle’s oil capacity and drain plug location. For most jobs, you’ll need 3.5 to 4.5 litres of oil, an oil filter wrench, a box-end wrench the size of your filler plug, a funnel, rags and, of course, a new oil filter appropriate for your car or truck.
Tip: If your car’s engine is cold, let the engine run for a few minutes to warm up the oil. This helps loosen the contaminants in the oil so they’ll flow out into the drain pan. However, don’t try to drain the oil if the engine is hot. Let it cool to avoid burning your hand.
1. Use a Ramp When Changing Your Oil
Drive your car onto your ramps, or use an inexpensive floor jack along with a set of jack (safety) stands (not shown). Be sure to set your parking brake. Check the directions that come with the drive-on ramps or jack stands for details, then give the car a good shake from side to side to make sure it’s solidly supported. If you use ramps, be sure they won’t slide as you drive onto them. We used a rubber mat under the front of the stand and a 2 x12 plank to keep the ramps from sliding forward. Have a helper guide you so you don’t drive off the ramp.
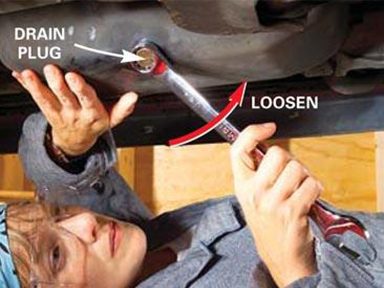
2. Drain the Old Oil
Using a box-end wrench, loosen the drain plug about a half turn. Avoid using an adjustable wrench because it’s more likely to slip and eventually ruin the plug head. And remember this memory aid—lefty loosy, righty tighty. Slide the drain pan under the drain plug. Unscrew the plug. When the plug is ready to come out, quickly pull it out of the way. Hold on to the plug so it doesn’t drop into the drain pan. Let the oil drain for at least five minutes, then reinstall the plug.
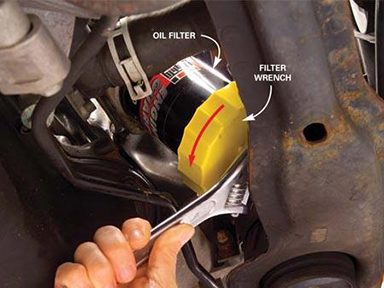
3. Unscrew the Oil Filter
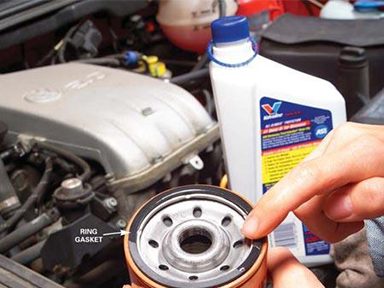
Unscrew the oil filter, using an inexpensive oil filter wrench. If you use the type pictured, make sure it’s the right size and configuration. Some wrenches cinch around the filter and turn from the side. Others, like the one shown, fit the bottom of the filter and accept a 3/8-in. drive socket or a wrench. Room to move the tool is the key. Loosen the oil filter by turning counterclockwise. When the filter is loose, use a rag to unscrew it by hand. Be careful! The filter may be full of oil, so place the drain pan under it. Remove the filter and pour any oil into the drain pan. Wipe any old oil or dirt from the filter-mounting surface so the new filter will seal properly, and make sure the old oil filter ring gasket hasn’t stuck to the engine.
Here are four things you probably didn’t know about oil changes.
4. Install the New Oil Filter
Smear a few drops of clean oil on the new filter’s ring gasket. Carefully spin the new filter on by hand. Be sure you don’t pick up any dirt from the frame or other parts on the ring gasket as you position the new filter. Spin the filter on clockwise until the gasket seats against the engine. Then turn the filter—by hand—approximately a half turn to fully seat the ring gasket. If you can’t get your hand around it firmly because space is tight, use your wrench. Don’t over-tighten the filter—you may tear the gasket.
Check out these tips on how to choose the right engine oil and oil filter!
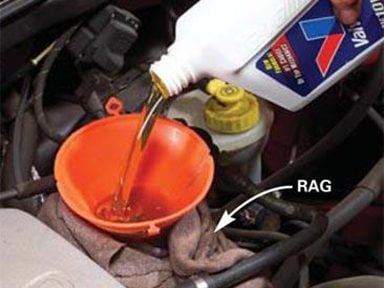
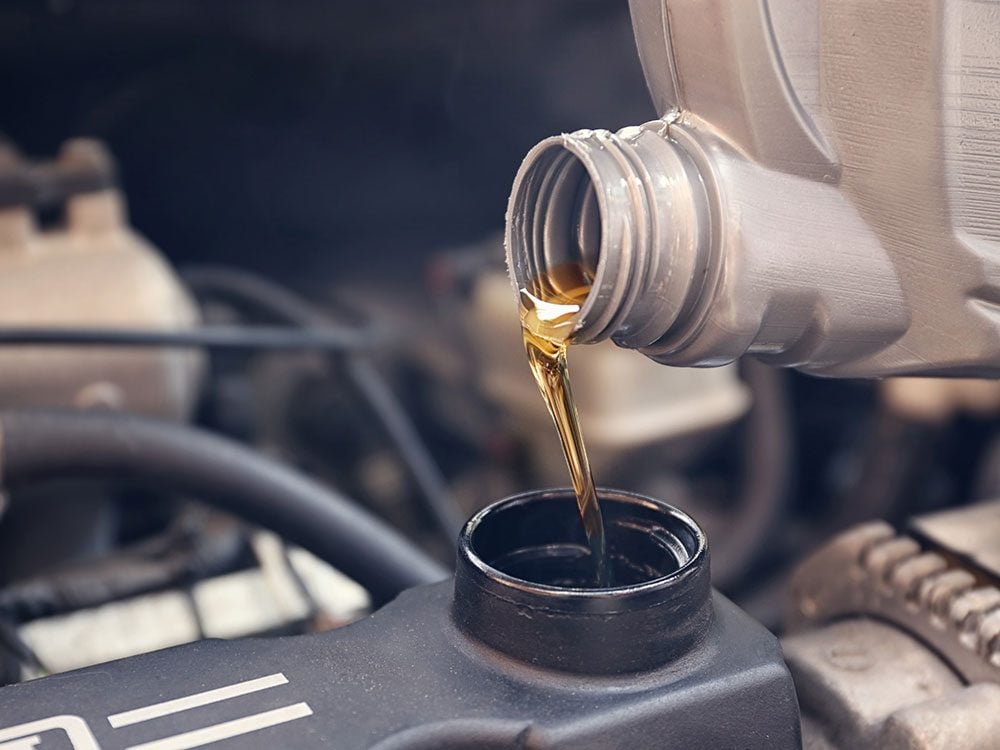
5. Add the New Oil
Locate the engine oil fill hole and clean the area around the fill cap. Using a clean, dry funnel, add the new oil. Don’t spill any on the engine. If you do, wipe it up immediately. Note: Refer to your owner’s manual for the correct weight, API rating and amount of oil you’ll need to add. Replace the oil fill cap, check the oil level on the dipstick (it may be slightly over the mark until you run the engine) and start the engine. Be sure the garage door is open so exhaust fumes can escape. Check the oil pressure gauge for the proper pressure reading or be certain the oil light on the instrument cluster is off. Look under the car for leaks. Lower the car and recheck the dipstick level to make sure the oil is up to the full mark.
Is there a funny noise coming from under the hood? Here are nine strange car sounds—and what they probably mean!
6. Dispose of Old Oil
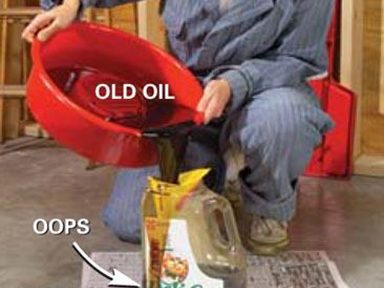
Pour the used oil back into oil bottles (a rather messy job) or into an old container. Don’t put the container out with the regular trash. Used motor oil is hazardous waste and must be disposed of properly. In many regions, retail outlets that sell motor oil must accept used oil for recycling. If your store doesn’t take back used oil, check with a repair shop, because many shops will dispose of used oil. Otherwise, contact your local waste removal company for instructions. Drain all the oil from your old filter and dispose of the filter in the trash.
Check out the 20 essential tools no car mechanic should be without!