

These Cleaning Tricks Will Leave Your Car Looking Like New

Automotive experts share 13 tips for a car so clean, it'll look like you just drove it off the lot.
How to Clean a Car, Step By Step
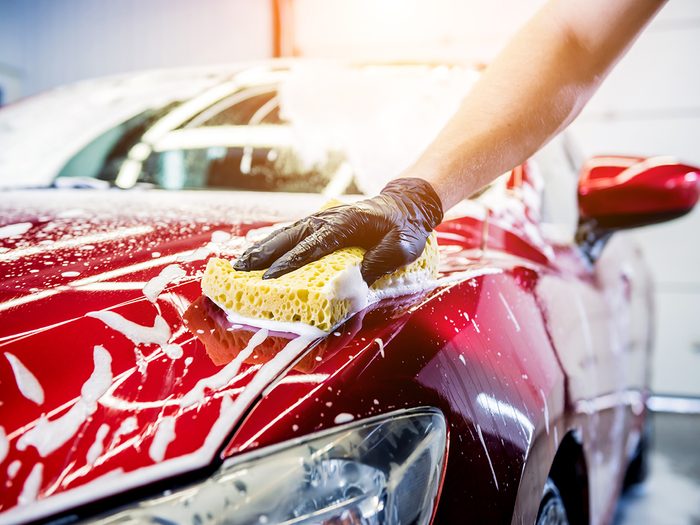
Wash your car with the right suds
Even though liquid dish soap is a great degreaser, it’s not the thing to use on your vehicle’s finish. Yes, it removes dirt, grease and old wax. But it also sucks important oils right out of the paint’s finish. Use it repeatedly and you shorten the life of your paint job.
Instead of dish soap, use a cleaner formulated for vehicles (available at any auto parts store). Once you’ve mixed the suds, go one step further—fill a second bucket with clean rinse water. Use it to rinse the wash mitt often. That’ll remove most of the road grit from the mitt to prevent scratches. When you’re finished, throw the mitt in the washing machine to get it completely clean.
Read on for more expert advice on how to clean a car.
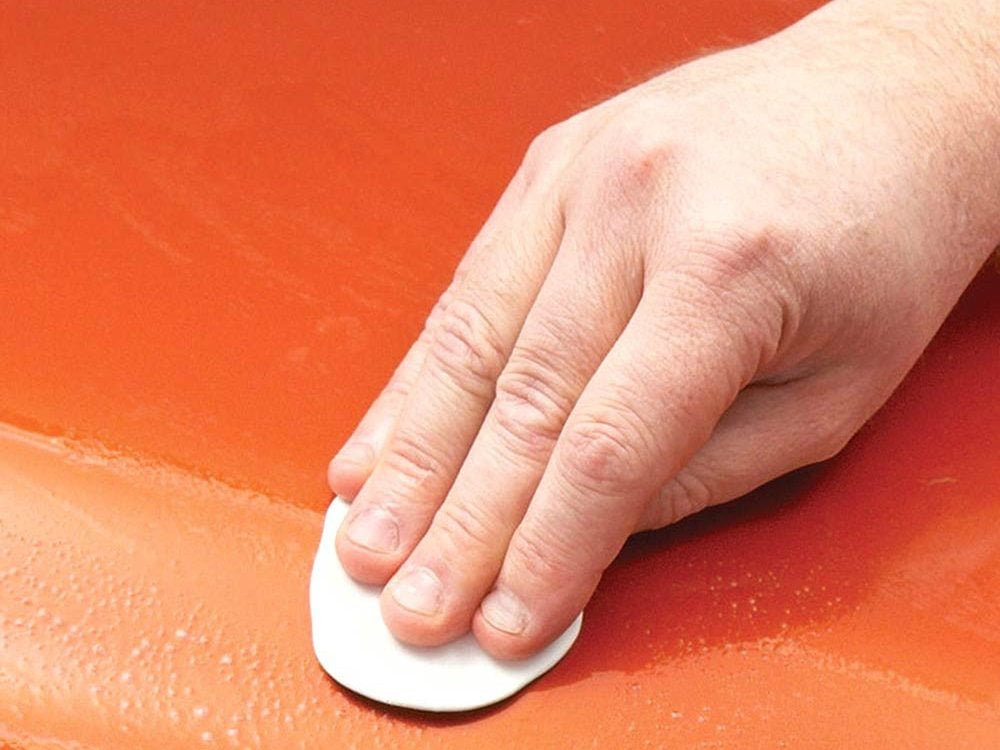
Pluck the finish
A car hurtling down the road at 100 km/h becomes a dartboard for any crud in the air. Your vehicle’s clear coat deflects some of it but can hold the sharper grit. Washing removes the surface dirt, but clay-barring is the only way to pluck out the embedded stuff.
Buy a clay bar kit, which includes a lubricating spray and several pieces of synthetic clay. Prepare the clay by tearing a piece into four sections. Flatten one section into a small pancake in the palm of your hand and rub it over the paint with a back-and-forth motion. Fold the clay against itself, knead it and reflatten until the clay turns gray. Then toss it and use a fresh piece until you remove the “darts” and get a glass-like finish.
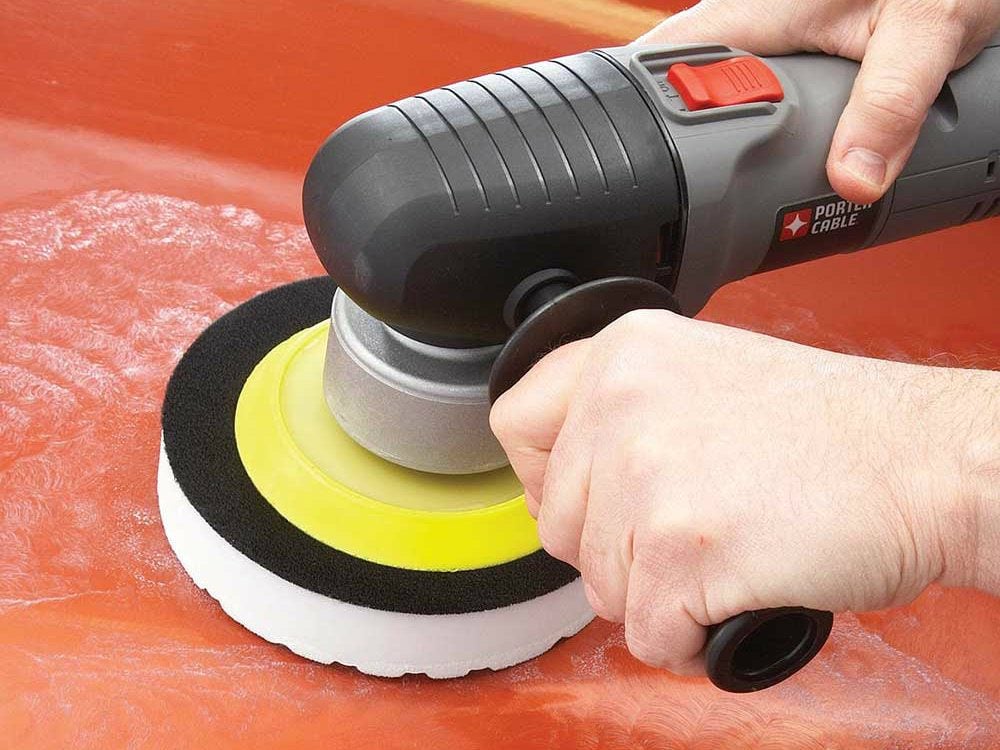
Polish the finish
Many car owners confuse polishing with waxing. But they’re separate steps. Polishing removes small surface imperfections and scratches and buffs the finish to a shine. Waxing adds more gloss and protects the finish from the elements. Most DIY-ers skip polishing because they don’t want to invest the money for a polisher or the elbow grease for a hand polish. But polishing your vehicle’s finish is the key to getting the best gloss (pros would never skip it).
Apply a dollop of polish to the pad and wipe the pad across a 2 x 2-ft. area. Run the polisher at a slow speed to spread the compound over the entire area. Then boost the speed and let the polisher do the work for you.
Find out which rust proofing options are best for you.
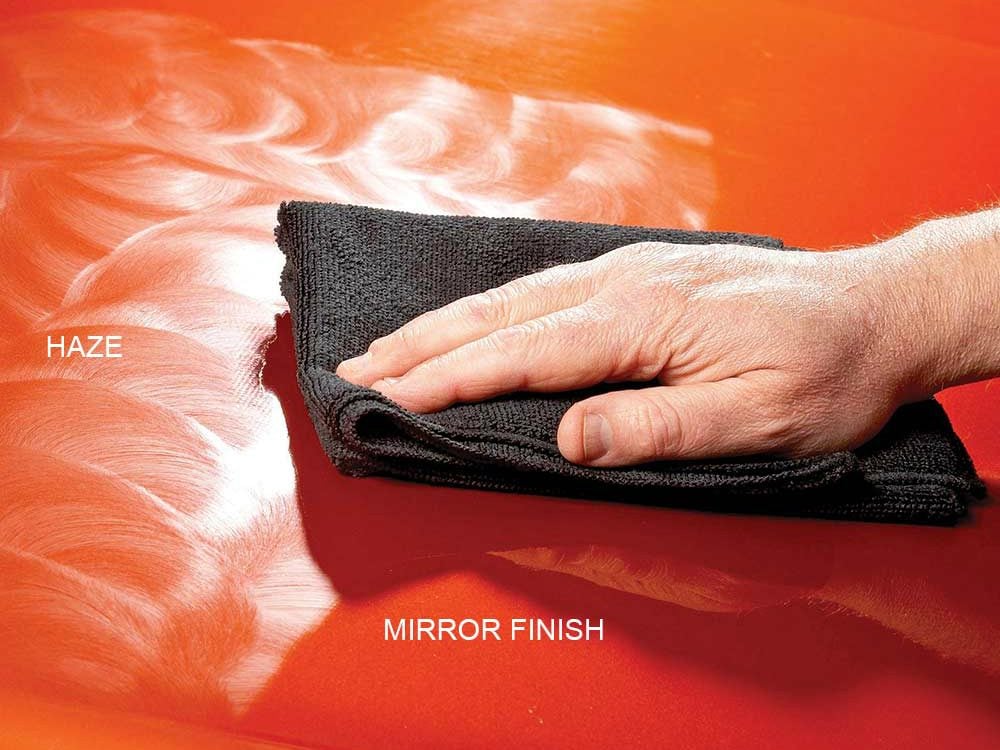
Get a mirror finish with synthetic wax
Some people swear by carnauba wax. It produces a deep, warm shine. But we prefer the wet-gloss look of the newer synthetic polymer waxes (also known as paint sealant) such as Meguiar’s Ultimate Liquid Wax. It’s pricier than other synthetics, but it doesn’t leave a white film on plastic or trim—which is a real advantage. Plus, it’s really easy to apply.
Apply the wax to the foam applicator and rub it into the finish with a swirling motion. Then wipe off the haze with a microfibre towel. Swap in a clean towel as soon as the first one loads up.
Suck up the dust as you go
Most DIY-ers start cleaning their car interior by shampooing the carpet. That’s a mistake—you’ll just get it dirty again as you clean the upper surfaces. Instead, start at the top and work your way down. Vacuum the headliner, dash, console and door panels. Then clean all the glass, and dust the nooks and crannies. Sweep the dust out of the cracks with a detailing brush. Catch all that crud right away with your vacuum.
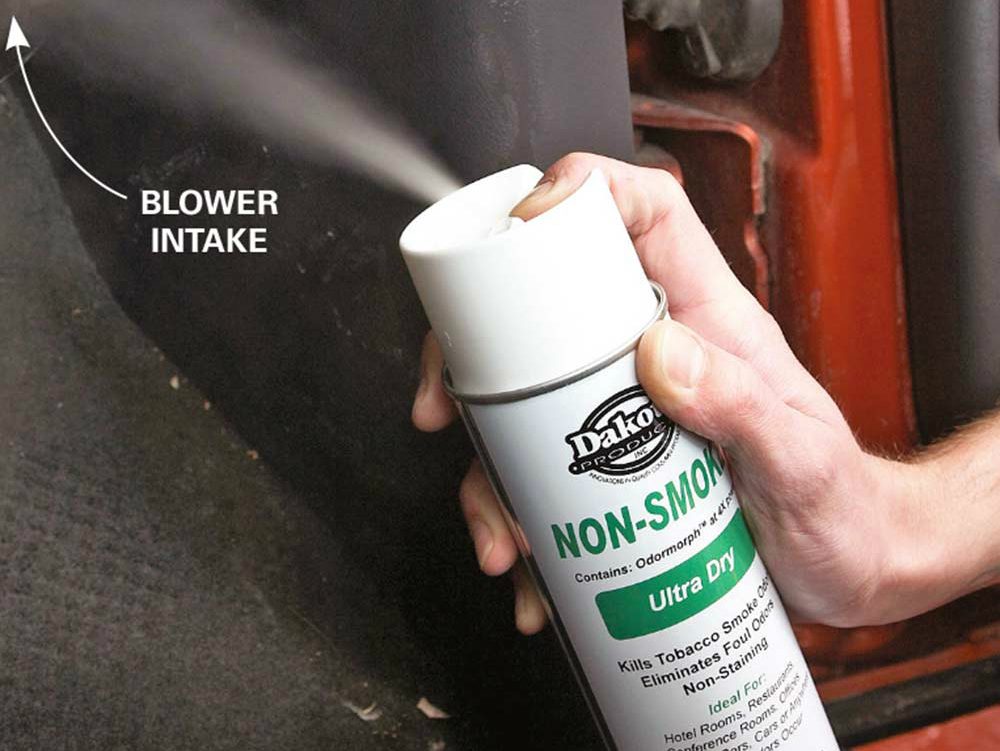
De-stink the interior
To neutralize tobacco smoke, buy an aerosol can of Dakota Non-Smoke. Holding the can 12 to 14 in. away from fabrics, lightly spray the headliner (don’t soak it), seats, door panels and carpet. Then turn the fan to high and switch the system to recirculate mode (“Max A/C” if you don’t have that option).
Find the intake opening by holding a tissue near the blower motor. Then spray the mist into the opening. Leave the windows closed for at least one hour. Your vehicle will smell like baby powder for a while, but that’ll go away.
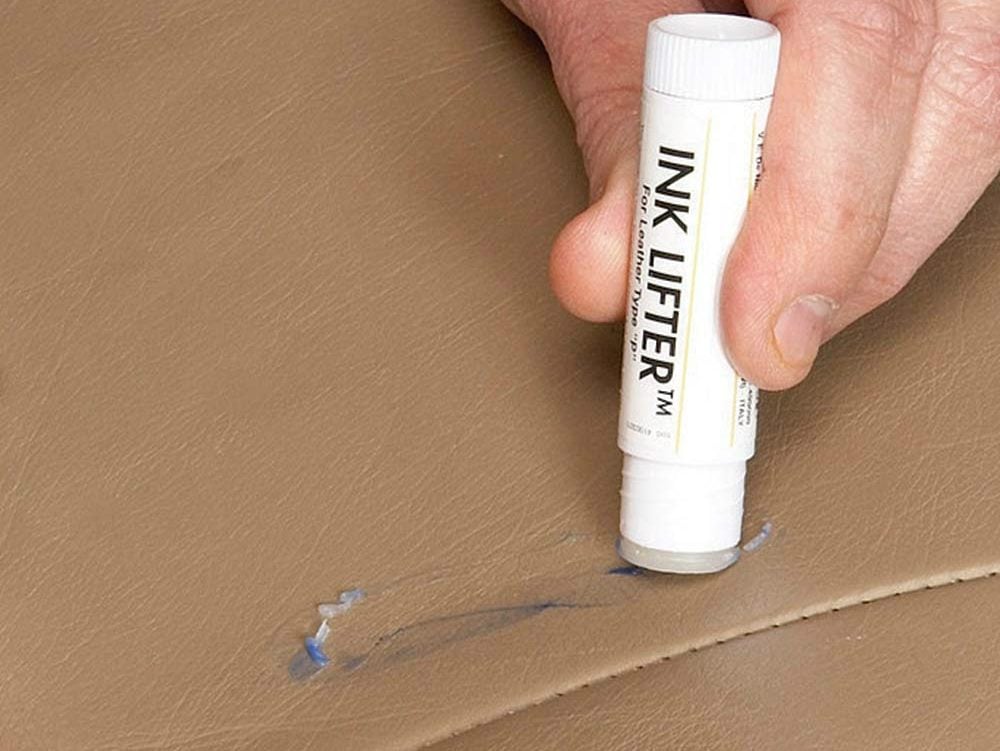
Clean the leather
This may sound extreme, but if you’ve got leather upholstery, buy a leather-cleaning kit and keep it in the vehicle. Why bother? Well, if you clean the “oops” right away, you really increase your chances of a complete cleanup. If you wait, lipstick, ink and dye transfers from clothing (and plastic shopping bags) can set permanently in as little as 24 hours.
Pretreat the leather with a conditioner before you start the stain removal process. Wipe the ink lifter directly on the pretreated leather and rub it in. Let it sit for 30 seconds, and wipe it with a clean cloth. Then apply leather cleaner and the leather protection cream.
Find out how to fix a burn hole in car upholstery.
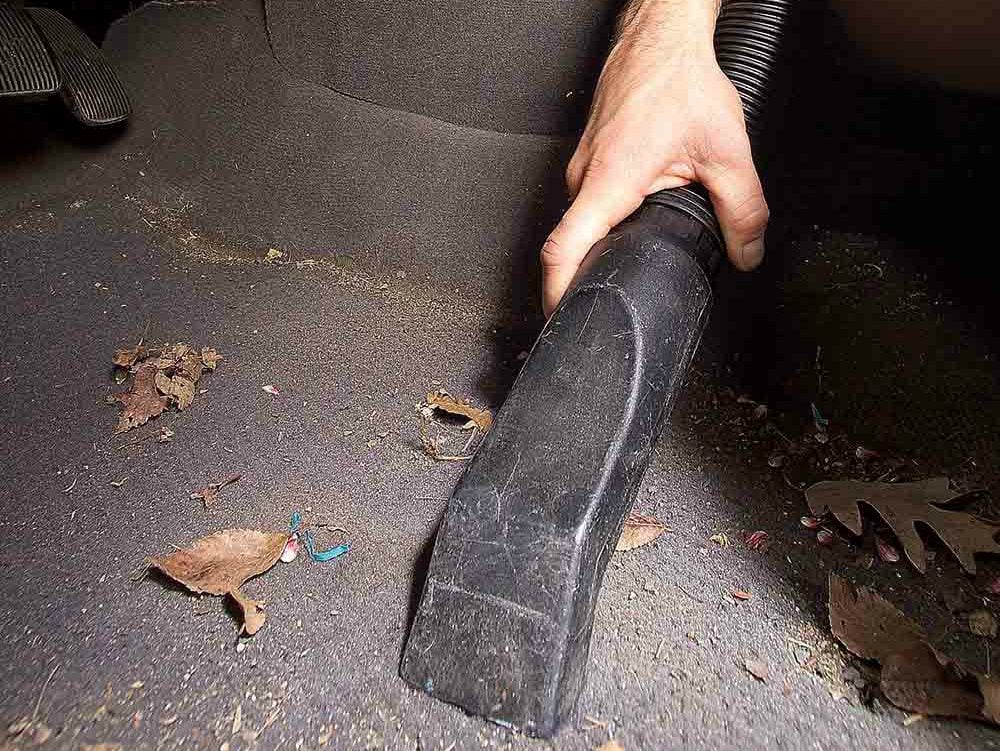
Slide seats forward and clean out the junk
You’ll be surprised by what you find behind car seats. We found enough pens and pencils to equip a small office, and enough change for several vending machine lunches. Vacuum the seats, remove the mats and vacuum the carpet. Use a brush attachment for the dash and door panels. Don’t forget to clean out and vacuum those handy door pockets (another source of buried treasure).
Here’s expert advice on how to clean rubber car mats.
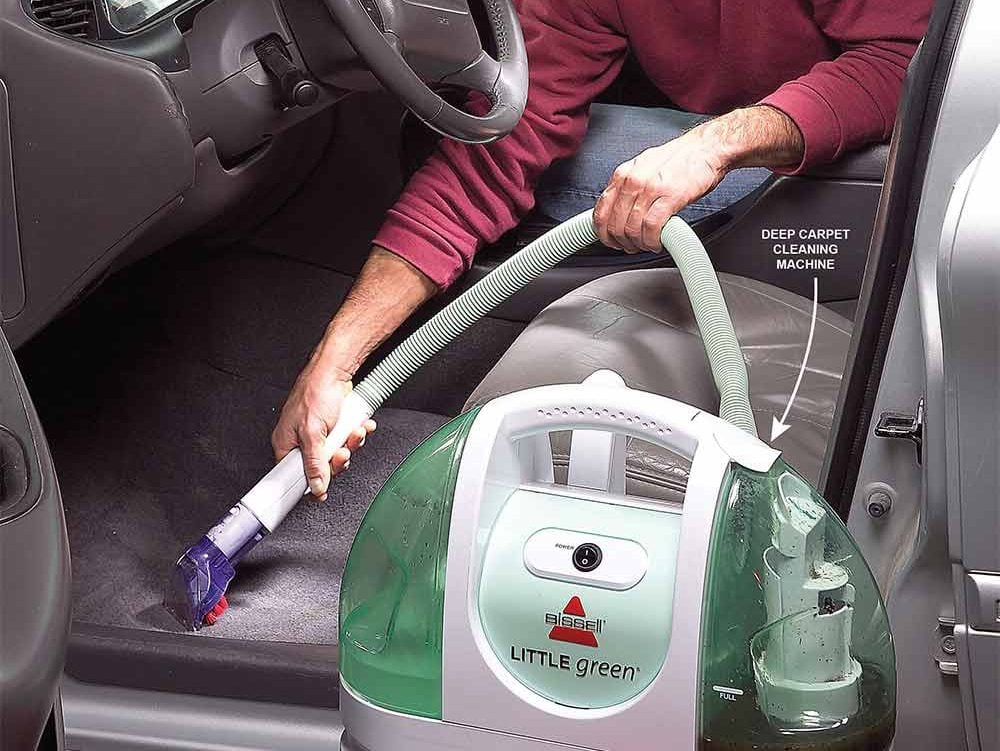
Deep-clean carpet and upholstery
Use a carpet cleaning machine to get the deep dirt that settles into the fibres of the carpet. (Clean cloth seats this way as well.) It sprays the carpet with a solution of water and cleaner and then sucks the dirt and grime into a reservoir. A machine like this pays for itself after just a few uses. You can also rent one from a rental centre or use a spray-on cleaner and a scrub brush instead.
Keep the clutter under control with these clever car organizing tips.
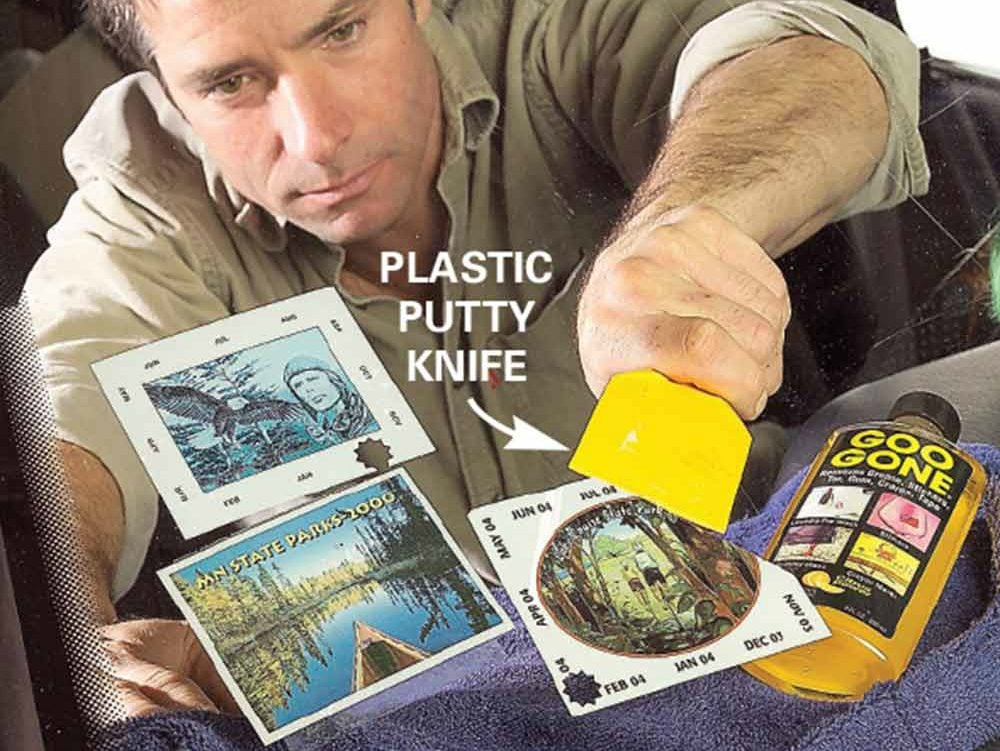
Scrape off those annoying stickers
All of your souvenir stickers may call to mind great memories, but they can be a visual hazard as they accumulate. The high-quality stickers will pull off if you can get under a corner and carefully pull them free at a 90-degree angle. Others will leave a gummy residue and require a bit more attention. Cover your dash with an old towel and dab on a degreaser like Goo Gone. Then scrape and wipe it off.
Discover the car cleaning tricks pro washers don’t want you to know.
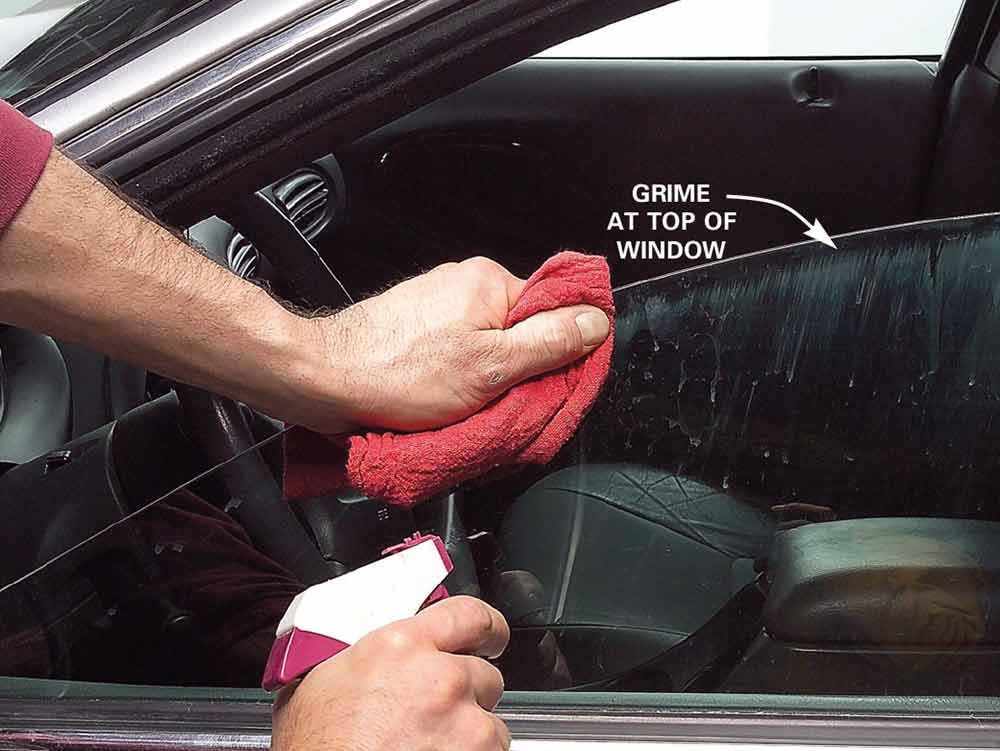
Wash windows, including top edges
Ever notice that line of grime on the tops of windows when they’re partially rolled down? Most people overlook this detail when giving their vehicle a quick wash. A few minutes with Windex and a clean rag is all it takes.
Here’s more advice on how to clean car windows like the pros.

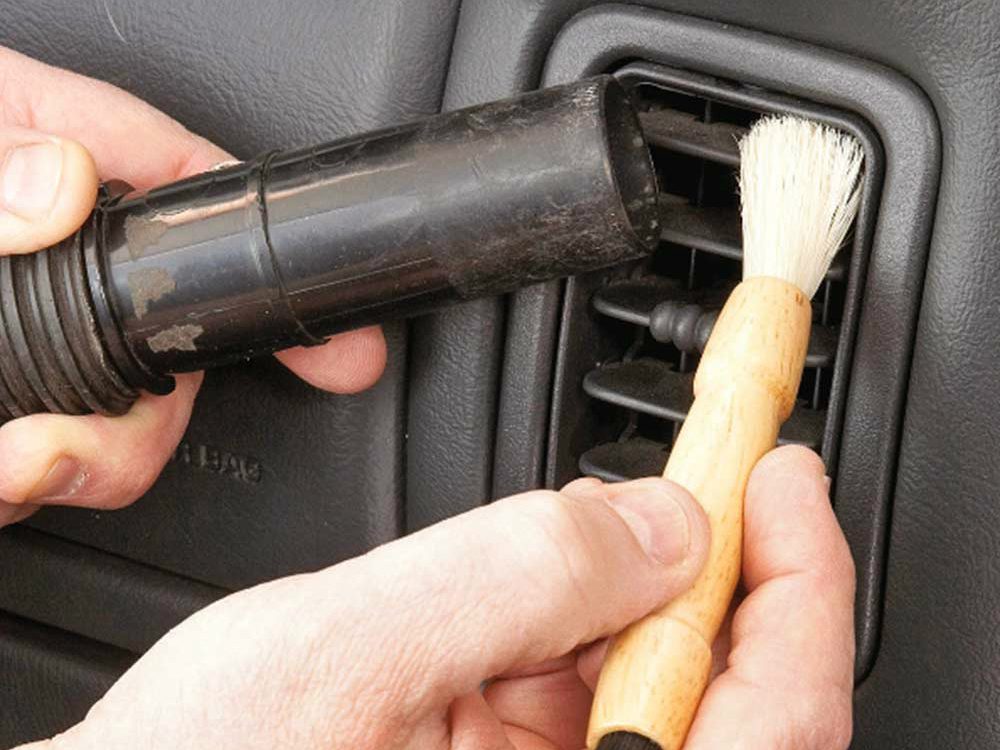
Brush out air vents
These louvres are a real magnet for dust, and a vacuum with a brush attachment just won’t get it all. Take an inexpensive artist’s paintbrush and give it a light shot of furniture polish. Work the brush into the crevices to collect the dust. Wipe the brush off with a rag and move on to the next one.
Check out more cleaning tips for the inside of your car.
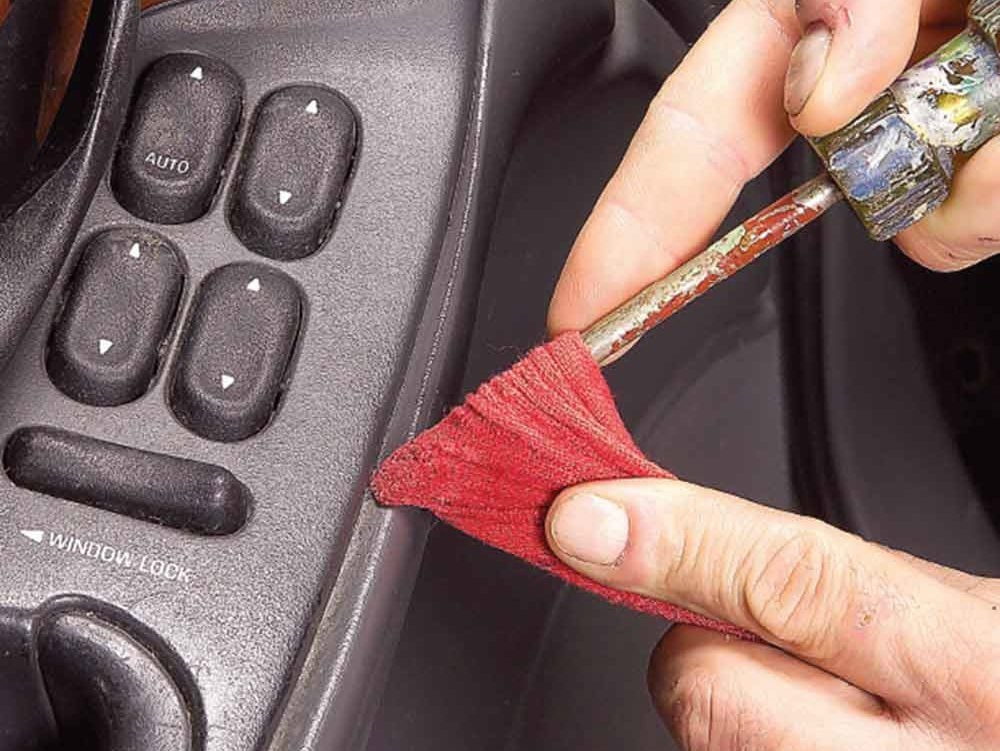
Clean nooks and crannies
Detailing means just that—finding and dealing with all the trim lines and recesses that a quick once-over cleaning job misses. Wrap a cloth around an old, worn screwdriver (without sharp edges) and spray all-purpose cleaner on the cloth.
Move it gently along the trim lines to pick up the gunk. Keep refreshing the surface of the cloth. Go around all the buttons and controls as well. Follow up with a rejuvenator like Armor All.
Now that you know how to clean a car thoroughly, check out 13 cleaning hacks that take the hassle out of housekeeping.